If you hike in bear-prone wilderness and especially if you stay overnight, you will need a useful equipment for storing food like a bear canister. A bear canister can be defined as a bear-proof container for storing food or other different things that may attract bears.
Must read: How to Keep Bears Away from Campsite: Creating a Bear-Free Zone To Sleep In
Due to the cylindrical shape of the canister, its lid seal mechanism and hardness, it is almost impossible for bears to open it and access the contents. Bear canisters became especially popular in the last decade due to the increasing number of encounters between bears and people.
In this article, we will tell you about pros and cons of bear canisters, the tips on proper usage and packing, and also provide you with a guide on how to make your own DIY bear canister that will serve you well while in the backcountry.
Why bear canisters are beneficial?
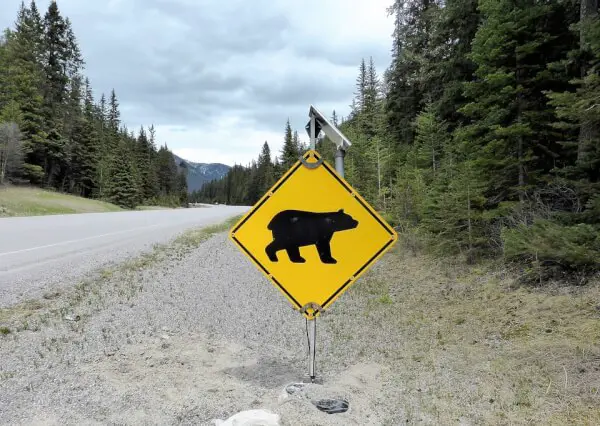
If you doubt in necessity to make or buy a bear canister, you should know the following: bears have a capacity to sniff out people’s food over huge distances because they have around 230 million scent receptors. Bears are quite relentless and intelligent animals, especially when it comes to food: they are able to find any way to get it.
Thus, old methods that people had used before, such as hanging bags with food high over tree limbs for example, are not effective and protective anymore. Moreover, in most protected areas it is even strictly forbidden to hang food on trees.
See also: How to Hang a Bear Bag: Best Practices for Protecting Your Food Against Bears
Therefore, using bear canisters is the most efficient, the safest and the easiest way nowadays to protect your food and yourself while camping.
Some parks that require usage of bear canisters
If you are camping is some of the most popular national parks in the United States, you will be required to bring a canister to ward off bears:
- Yosemite National Park – pretty much the entire area except a few locations where there are food lockers available.
- Sequoia / Kings Canyon National Parks – in some areas as there are ones that offer food boxes.
- Grand Teton National Park – the entire camping / hiking area except for places where there are food lockers.
- Rocky Mountain National Park – pretty much all the camping sites except below treelines.
- North Cascades National Park – selected camping areas.
- Olympic National Park – selected camping locations.
As a general rule of thumb, you should see to it that you contact park and wilderness area administrators to verify updated information. There are parks that will allow you to loan canisters from their offices.
At the end of the day, it’s always best to research and find out the rules and regulations for each park or campsite to avoid getting in trouble, and this is not just for canisters.
Advantages and disadvantages of bear canisters
Before you decide whether to use a bear canister or not, it is worth mentioning that this tool has its fair share of benefits and disadvantages. Knowing these pros and cons will help you determine if using a bear canister is the right option for you or not.
Specially designed to protect food from hungry bears in the backcountry, bear canisters have several essential advantages over other protective measures:
- They are simple to use;
- They are multi-functional: you can also use them as a convenient camp stool or a water bucket;
- They protect your food and items from getting wet in case of rain;
- They save your time: it takes just a couple of minutes to pack food into a container;
- Using canisters prevents tree damage from overuse, which is a common result of bear bags use;
- They give your freedom to camp anywhere without thinking of how and where to store your food.
However, despite all the above mentioned benefits, there are also several disadvantages of bear canisters that you should also be aware of:
- Many of them are quite heavy (around 2-3 lbs.) which is not exactly ideal for light backpacking;
- They are bulky and huge which takes up a lot of space in your backpack;
- Due to their cylindrical shape, they are often difficult to fit especially with frameless backpacks.
For more information on the best bear canister to keep your food safe while camping, check out our earlier article.
How to make your own homemade bear canister
You can either buy a canister that will cost in average from $50 to $275 depending on the volume and quality of the canister. Renting a canister is also possible, especially in many national parks known for their bear-prone areas, and it will cost approximately $5 per week.
However, the cheapest way will to make your very own unique canister. To find out how to do it, we provide with a step-by-step guide below.
Step 1: Collecting materials and tools
Before you start, make sure that you have all the materials and tools from the list below:
- A tight leak bucket with a leak twist on lid;
- 2 key chain rings;
- 2 bike straps or inner tubes;
- One tube of silicone bathroom calk;
- One knife;
- Hammer or mallet;
- A calk gun.
Most of these items are available at any hardware store, except inner tubes or straps – it is possible to get them at a bike shop. You do not have to buy new ones because there are often a lot of damaged and used straps and tubes that you can get absolutely for free.
Step 2: Placing a ring on the rim of the bucket
After collecting all the necessary tools and materials, you can begin with making a canister. First of all, you need to apply silicon bathroom calk to the top rim of your bucket. The purpose of it is not only to secure to the leak twist top, but also to keep the canister air tight enough in order to lock in odors.
Once you have laid some silicone bathroom calk on the rim of the bucket, the next step is to place the lead ring on the rim of the bucket. While doing it, it is important not to smudge the silicone calk off the rim. When the ring is placed properly, you should press it down by snapping it on the rim.
It is recommended to begin in a single spot of the ring and then press it down around in both directions. In case if it does not work, you can use a hammer.
Step 3: Attaching straps to the canister
Once you have finished with the ring, it is time to attach straps to your canister, with the help of which you can fasten the container to your backpack while hiking. The straps can be made of any material, but we recommend to use bike inner tubes. First of all you need to prepare material for the straps by cutting the valve of the tubes.
After this, you need to place key rings to the holes on both sides of the bucket that are used for mounting the handle. With the help of these key rings you will have a spot in order to tie the ends of the inner tube by creating a strap that you will use for attaching the container to the backpack.
The last thing that you should do is to make to slits in each side of the tube to thread through the other cross strap. After you have done it, do not forget to connect the ends of the cross strap.
Tips on using a bear canister in wilderness
Whether you decide to purchase, rent or make a handmade bear canister by yourself, it is necessary to know how to use it properly in the backcountry. Thus, we have provided below several tips and rules when it comes to proper bear canister usage.
- Carry your canister while hiking by ensuring balance. In order to do this, it is important to carry the canister in the center of your backpack near your shoulders and close enough to the back.
- When leaving the canister for the night, it is recommended to flip it upside-down. First of all, it prevents the contents from getting wet in case of rain. And second, it decreases the likelihood that bears will gnaw on the lid of the canister.
- Place the canister at a sufficient distance from the campsite (not less than 50 ft.) for your own safety. In order to boost the canister’s nighttime visibility, it is recommended to attach special reflective stickers on it.
- Never leave your canister open, even if you are cooking or somewhere nearby. Remember that a bear canister works only when it is completely locked.
- It is more effective to store a canister behind rocks or hidden in brush. By doing so, you make it more complicated for bears to find it.
- Do not keep a canister near water in order prevent it from floating it downstream accidentally.
- Do not attach anything to your canister. Additional elements, including rope, make easier for a bear to take and carry it away.
- In many areas, such as National Parks, there are specific requirements and regulations regarding bear canisters. Therefore, make sure to check your destination and its hiking regulations prior to your departure.
Tips on packing a bear canister
To know how to use a bear canister is not enough: you should also be aware of how to pack it and what kind of food out inside, especially if you are going to hike multiple days in row. The statistics shows that most hikers, even the most experienced ones, do not pack their canisters properly. Below there are tips on how to pack it:
- Make sure that everything that must be stored in the canister fits properly inside. It means that you should plan your meals in advance and test your canister at home by packing it and ensuring that you get all you need inside.
- Not only food must be stored in the canister, but any other items that smell. Thus, according to the rule of the American National Park Service, everything that you put both in your mouth or skin must be properly stored in a bear canister. It relates to such items as lip balsam, deodorant, mosquito repellent, medications, feminine products, sun cream or soap. Make sure that all these toiletries do not occupy too much space in your container.
- Choose the right food such as high-calorie and dense products, such as tortillas, dried fruit, chocolate and energy bars, peanut butter, nuts, instant soups, tuna packets, and etc.
- Repack your canister regularly by getting rid of inflated packaging or bulky boxes, which will help you to save space and reduce the amount of garbage.
- The first two meals, such as lunch and dinner, can be carried outside of the canister.
Final words
Summarizing all the written above about bear canister, it is possible to say that it is one of the most important equipment tools that is responsible for your safety during a hiking trip.
We hope that the guide on making your own bear canister, as well as tips on using and packing it, have appeared to be useful for you and will help to reduce to zero your chances to meet a bear face to face while hiking. Check out our must-read bear canister review to give you more options.
Share with us, what kind of a bear canister would you prefer – the one that you can buy from a store or something that you’ve made yourself? Feel free to sound off in the comments section.


