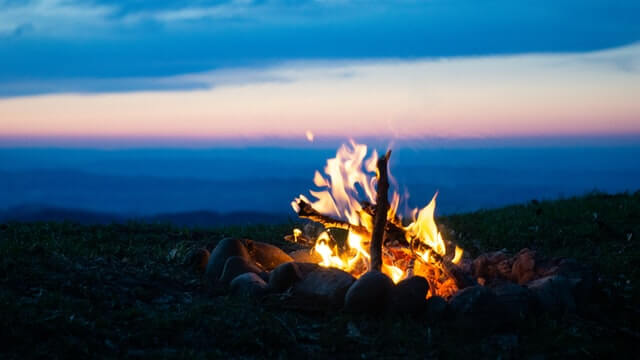
Lighting a campfire can be as simple as dropping a lit match onto a pile of small twigs. There are also many methods of lighting a fire. Some of the more familiar methods on how to start a campfire are suitable under ideal conditions, but others work better in wet or windy situations.
There are even further styles of fire starting that can be somewhat more labor-intensive, but may be the only method available in an emergency situation.
Methods of lighting a fire
There are dozens of ways to light a fire during your camping. Here are main methods and guide how to use them. Check out our reviews of the best fire starter sticks to easily ignite and start a campfire.
Lighters or matches
Perhaps the easiest and most widely used method involves the simple process of holding a lit match or lighter to the fuel until it ignites. This is the fastest way to get a fire started, but it only works for as long as your supply of matches or lighter fluid will last. Once these two tools are no longer an option it is essential to know additional ways to get that fire going.
Fire Plough
If you don’t tire easy and are up for a challenge then the fire plough could be a useful tool in your quest for fire. You’ll need a piece of flat, dry wood, a dry, straight stick and some tinder. Simply carve a groove down the center of your board, place the tinder at one end and begin sliding the stick back and forth in the groove. If you are able to persist long enough an ember will form and will ignite the tinder.
Hand Drill
Due to the primitive nature of this labor intensive method, the hand drill is not popular. It is certainly a useful skill to know if you find yourself in a situation where this is your only option. Be prepared to exercise your patience and your hands.
Before getting started you will need to collect the following:
- Very fine, flammable tinder worked together to form a bundle that resembles a nest
- Some small and flammable fuel such as fine bark or leaves
- Dry and straight stick, about two feet long, which will be used as a spindle
The process:
- Cut a v-shaped notch into the edge of the board
- Carve a small cup at the small end of the notch
- Put the tinder nest directly underneath the notch
- Place the tip of your spindle stick into the carved cup
- Hold the spindle between both flattened palms of your hands
- Begin spinning the spindle with downward pressure
- Depending upon the fuel and efficiency of your spinning, a glowing ember will form at the tip of the spindle. Once you see this ember, tap the board gently to make it fall down into the tinder nest underneath
- Gently blow on the ember until the tinder ignites
Bow Drill
The bow drill starts a fire in very much the same way as the hand drill, but is somewhat more efficient and less taxing on your hands. In addition to the materials needed above, you will need to fashion a bow out of a long stick about two feet long and some form of string material. Attach the string to both ends of the bow stick and then loop the string tightly around your spindle.
With a handsaw-like motion on the bow spin the spindle in the cup. The rest of the process is the same as the hand drill, but hopefully your ember will develop in much less time and with less stress to your hands.
Flint and Steel
The flint and steel method supports a pretty competitive following that has seen considerable growth and innovation over the past few years. At its very basic theory, this method utilizes the striking of a steel object against a piece of flint rock. As long as you have a piece of steel and can find a good flint rock you can definitely start a fire.
The innovations that have occurred recently improve upon this practice are the replacement of flint with more efficient materials such as magnesium. To apply this method simply strike the sparking material with the steel in the direction of your tinder until an ember is burning.
Electricity and Metal
As can be seen from the previous examples, what is needed to start a fire is as simple as a small spark. What better way to make sparks than with electricity? If you have a battery on hand as well as a thin piece of tin foil or steel wool you can get a fire going in no time at all. Provided your battery is powerful enough and still retains enough energy, simply place the metal material across the negative and positive terminals and it will spark.
When using fine steel wool you essentially already have your tinder because rather than spark, steel wool will begin to glow red and then burn and ignite.
Sun and Lens
What small child hasn’t had some measure of fun with focusing sunlight through a magnifying glass? This simple method is an absolutely wonderful way to start a fire provided you have both a lens and sufficient sunlight to produce a powerful beam. The pinpoint of light focused on flammable material will get so hot that it will start your fire with little more effort than simply holding the lens.
If you don’t have a magnifying glass, the lenses of eyeglasses will work just as well. Some people have even successfully started a fire during the winter by freezing water into a clear lens. Others have found that polishing the bottom of a soda can with fine sand will make a mirror powerful enough to start a fire.
Fire Piston
The fire piston is a very interesting and actually quite simple way to start a fire. The simple process uses the rapid compression of a piston inside a tube to create enough heat that it can ignite a small piece of flammable tinder at the bottom of the chamber. Once there is an ember inside, pour it onto more tinder, blow on it and the flame will grow.
Chemical Reactions
Simple chemistry can produce some very spectacular results in the realm of fire starting. Due to the often volatile nature of this method it is highly recommended you have a good understanding of the potential danger of mixing particular chemicals together. From a safety perspective this is a fire starting method of last resort under most conditions and situations.
Fueling the Fire
Except for when using matches, lighters or chemical fire starting methods it is essential to provide quality tinder in order to achieve success. There are many qualities that make up effective tinder, but the two factors are size and dryness. When it comes to tinder, the smaller and dryer the better, but materials that contain flammable sap are also desirable as the sap enhances flammability and can cause the bundle to burn hotter and longer.
Unfortunately there are conditions, such as rain and snow, which make obtaining dry tinder difficult. On the brighter side, it is possible to prepare ahead of time in order to be sure that you will have effective fire starters when you need them. Naturally, in unique emergency situations you may not have these items on hand, but when planning for outdoor adventures plan on adding one or more of the following items to your equipment checklist.
Egg Carton
Whenever you buy eggs at the store, be sure to include eggs packaged in paper cardboard containers. Once you have these items you can fill the individual cups with flammable tinder such as small twigs, saw dust, dryer lint or other such small material. With the cups filled, pour melted paraffin wax over the cups so that the paper and tinder is soaked with the liquid wax.
When the wax cools and dries you will have several individual and waterproof fire starters. They can be carried as the whole carton or as individuals that will burn hot for up to five minutes. These are a very cost effective and sure way to provide starting fuel for your fire
Fuzz Stick
Fuzz sticks are nothing more than a small finger-sized stick that is “feathered” with a knife thus creating the image of a fuzzy stick. Just about any type of hardwood can be used, but the most effective fuzz sticks are created from sapwood (also known as fatwood).
The other great thing about fuzz sticks is that they can be made both ahead of time and on the spot when they are needed.
Cotton Balls
The idea behind creating a good fire starter is to have tiny, interwoven fibers that catch fire easily. Nothing says tiny, interwoven fibers better than cotton balls. When you work a small amount of petroleum jelly into the fibers of a cotton ball you will have a ready-made and very portable fire starter.
Snack Chips
Believe it or not, those tasty, greasy goodies in your foil bag can actually help you get a fire going. Unless you are more inclined to enjoy healthy, natural snacks, most chips contain a lot of oil that can be rather flammable. You may want to experiment with the different types of chips to determine which ones burn better, but the general consensus is that Fritos Corn Chips are the best burning.
Char Cloth
Char cloth requires slightly more work to create and the resulting product must be stored properly due to its fragility, but few homemade fire starters will accept a spark better than char cloth. For the best char cloth, start with natural plant-based fabric such as that old cotton t-shirt in the back of your drawer that you haven’t worn in years. Cut the fabric into 1 inch squares and pack them loosely in a small metal container.
Take the metal lid and poke a small hole in the center of it to allow air flow within the container. Start a small fire and once coals have developed, place the metal container on the fire and watch for a small stream of smoke exiting the hole in the container’s lid.
Once the smoke begins to escape the container gently shake it a few times and leave it on the fire for another ten minutes. The smoke will stop coming from the container and your cloth will be ready for use.
Commercial Options
If the do-it-yourself fire starter isn’t interesting to you, there are also a wide variety of pre-made starters available at most stores that sell outdoor supplies. These products typically work well enough for most situations and can save you time if you don’t have it to commit to making your own.
Not Just Any Fire Will Do
Whichever method is used, many people may fail to realize that just any old fire will not necessarily meet the needs of certain circumstances. You may now be able to start a fire with ease, but are you lighting the fire that you need?
See also: Campfire Dessert Recipes: Quick and Easy Goodies for the Sweet-Toothed Camper
If you think that a pile of burning sticks and logs will solve all of your needs, you will be mistaken.
Some fires are better for cooking than others while different styles are better for heating or signaling. Here are some of the most basic types of fires:
The Teepee
The easiest style of fire which, when built right, can provide the quickest source of heat in the shortest time. With the tinder placed on the ground, stand three or four small pieces of kindling wood against each other above the tinder. Continue building upon the teepee with ever increasing sizes of wood until you have enough to provide ample heat.
The heat from the teepee typically rises straight up from the hot center and is very useful for cooking items in pots that hang over the fire.
The Log Cabin
Many campfire cooking methods require hot coals rather than searing flames. The log cabin fire lay is perhaps the best type of fire to build if you need long-burning coals. Begin constructing this fire by placing the tinder on the ground and then placing two small sticks on either side of it. Two more sticks are then stacked across these two, being careful to maintain access to the tinder.
As each layer is added the thickness of the wood can increase, but always make sure to start from smallest to biggest. As the fire burns through the logs, they will begin to collapse down upon one another causing a decrease in air flow and allowing the coals to slowly burn.
The Lean-To
A very easy to build fire that can be beneficial in windy conditions, this fire is built by first placing a large log on the ground. Kindling is placed upon the tinder which is placed directly next to the large log. Larger sticks are then placed over the kindling by leaning them against the large log.
Lumberman’s Fire
The Lumberman’s Fire, also known as the Long Fire is essentially a small fire that is lit between two larger logs. The two logs will eventually burn if placed close enough to the center fire, but until then they can be a stable place to cook.
Grates and grills can also be placed across the logs for cooking without pots or pans. The two logs also provide wind protection as well as channel air flow into the cooking fire.
Trench Fire
If there is ample fuel to make a cooking fire, but big logs are hard to find, a trench can be dug and the fire placed within it. The fire can extend from one end of the trench to the other allowing for multiple pots to be cooking at the same time.
Star Fire
When you want a small amount of heat, but want it to burn for hours, the star fire may be what you are looking for. The small ignition fire with the tinder and kindling is placed on the ground and then the ends of four or more logs are placed up against it.
As the fire burns, the ends of the logs will catch and burn. To extend the life of the fire simply push the ends inward towards the center.
Dakota Hole
When the wind is very high and gusty, it may be nearly impossible to start a fire above ground. The Dakota Fire hole involves digging a pit below ground and then digging a small channel to allow air to reach the fire.
The fire may struggle at first, but one the fire get going, the heat will draw in more air creating a hotter that is safe from the danger of high winds.
Proper Fire Placement
Now that you have chosen the type of fire you want or need, have gathered the appropriate fuel and tools needed to start the fire it is important to know where to place the fire. In established campsites this task is usually very simple due to the designated fire ring, but if you are out on your own placement of a fire is a matter of both safety and effectiveness.
If a cold night is coming on and you have a shelter prepared, it wouldn’t due much good to build a fire too far away. You need the fire to be close enough to benefit from its heat while being mindful not to get burnt while you sleep.
With this in mind, if the trees around you are covered in snow it is especially important not to build the fire underneath such a tree. Otherwise the snow will undoubtedly melt and put out the fire you’ve worked so hard to build.
You also want to consider how big you plan to make the fire and ensure that it is in an area where the vegetation is far enough away both along the ground and above the fire. Cooking and staying warm by a fire are great benefits, but starting a forest fire is a very real danger to be aware of.
Extinguishing the Fire
The mere fact that you are done with a fire doesn’t mean you are finished with it. Even though it may appear to you that a fire is out, is not producing flames or smoke, and may even feel cool on the surface does not mean that the fire is actually out. Coals burning deep below the surface can smolder for hours, even days, and with a sudden gust of wind can flare up in an instant.
If there is an abundant water source nearby the process is fairly simple. Pour more water on the fire than you think may be necessary and stir the coals around until there is no smoke or steam rising from the ashes. When there isn’t any water available, pouring sand or dirt that is free of combustible twigs and leaves can help in smothering the fire.
Simply covering the fire and then walking away isn’t the best advice. Instead, as with water, continue to stir and cover the fire until you are confident there is no more heat coming from it. Only then should you consider abandoning a fire.
Necessity is the Mother of Invention
Of all of these different methods and styles, there are unique situations in which none of them are perfectly suitable. Or perhaps you find yourself in a situation you simple are not prepared for. Such things have happened to the best of outdoor enthusiasts, but those who have practiced the different methods of building and starting campfires are better prepared for the unforeseen.
There is no officially written rule on how to build a fire, but if you take these ideas and build upon them with your own experience the better off you will be. Who knows, you may even come up with new ideas that others have never even considered before. For more fire safety tips, check our our earlier article on this topic to stay protected.
Featured Image Source: https://unsplash.com/photos/IpaDEVMct8I


