Hiking is an excellent form of exercise but like any other intense physical activity, it will make your body feel tired, depleted, and dehydrated. It’s important to drink close to four liters of water before, after, and during the hike. But how do you keep water cold while hiking?
In this article, we are going to take you through a few simple yet effective hacks that will ensure your water is chilled at all times while you trek that mountain on foot.
Freeze Your Bottle Well In Advance
When it comes to keeping water cold while hiking, this is a popular trick that never gets old. Freezing water bottles overnight is a great way to make sure you have cold water to drink on your trek the next day. It works especially well if your hike is going to be a long and strenuous one because freezing water the night before keeps the water cold for a long duration.
Every method comes with its dos and don’ts. When freezing water before your trek, try to avoid filling your water bottle to the brim. By filling just 80% of the bottle with water, you can prevent the bottle from expanding when it freezes.
It’s also important to note that if your water bottle is completely frozen, it may take a while to thaw and you might have to wait till you can finally drink from it. To avoid this unnecessary hold-up, fill up only a quarter of the bottle with water before freezing it.
In the morning, fill up the rest of the bottle with cold water, and voila, you’ll have chilled water for a minimum of eight hours while you trek that glorious mountain.
Recommended Reading: We’ve created a list of our top picks for water bottles for hiking that you might be interested in.
Freezing Your Water Bladder
Several hikers prefer using water bladders as reservoirs instead of bottles. A water bladder is a hydration pack built as a backpack and is usually made of soft flexible plastic.
Before your hike, fill up your water bladder with water up to its halfway mark. To pack the bladder, blow some air into it, don’t fully inflate it as the water will expand when freezing, and seal it tight. Place it horizontally in your freezer the night before. Once it’s frozen, fill the rest of the bladder with cool water.
Remember to make sure there isn’t any water in the tube when you’re freezing it. If there’s water in the tube, you may end up breaking or splitting the tube when it freezes. And without the tube, the bladder is completely useless to you on your hike. Make sure you fill only half the bladder with water before freezing it.
Use A Thermos
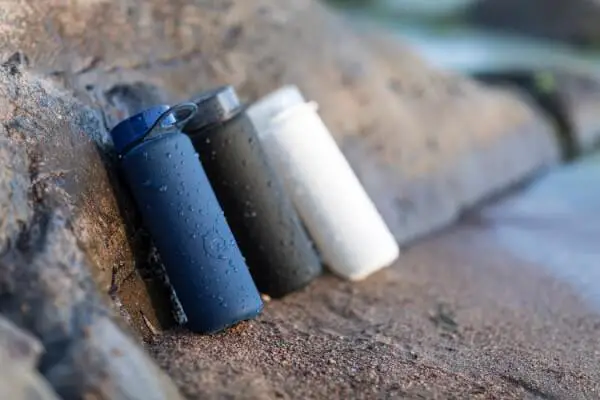
Whoever invented the thermos flask was most certainly a hiker who indulged in several, adventurous activities outdoors. A thermos is essentially a well-insulated stainless steel bottle that is capable of keeping water cold or hot, depending on your need.
If you want your water to stay cold during your hike, make sure you fill up your thermos with chilled water, and the temperature will remain the same all day.
Thanks to vacuum insulation and an inbuilt copper cooling system, thermos flasks can keep beverages cold for up to 36 hours at a stretch! Pretty amazing, isn’t it?
Add Ice Cubes To Your Bottle
While freezing your water bottles overnight proves to be an effective way to keep water cold during a hike, you may not get around to doing it. Worry not! Adding ice cubes to your bottle will save the day. This last-minute hack will make sure you have enough cold water to drink on a hot, summer hike.
If you keep your bottles well-insulated, the ice will remain intact for hours and you can keep refilling your bottles with fresh water every time you run out. Fortunately, each refill will be just as cold as the previous one.
Sometimes, hikers prefer keeping two or three frozen bottles of water close to one another. This prevents the ice from melting quickly as they stick together to remain cold and icy for a long time.
If you want to ensure your water stays as cool as possible then you may want to look into combining ice cubes with a thermos with a mouth wide enough for you to put the ice in. A very popular option for this is the Hydro Flask with wide mouth.
Keep Out Of Sunlight
Several fashionable backpacks come with bottle holders that are placed on the outer cover. While these allotments make great storage space for bottles with room-temperature water, they aren’t apt for cold water bottles.
If you want your ice-cold water to remain as it is while you’re hiking, keeping it away from sunlight, and in a cool and dry place in your backpack is the way to go.
Even on the coldest of days, the sun’s heat rays will melt the ice in no time. If left outside the backpack at a stretch, your water will definitely become warm before you know it.
This obviously does come at a cost. The great thing about those outside water bottle pockets is the convenience of being able to easily access the bottle. When packed inside of your backpack it is harder to get to.
Pro Tip: If you’re camping overnight, it’s ideal to leave your bottles on the ground while you’re asleep. The cool forest floor will keep the water cold. Once the sun rises in the morning, be sure to put the water bottle back in the backpack. You don’t want the strong morning sunlight to fall on your bottle at all so that the water stays cold for the rest of the day.
Insulate With Clothes
Your clothes keep you warm when it’s chilly but they can also keep your cold water bottles nicely chilled. This is especially true for hiking outfits like jackets, sleeping bags, and raincoats. These specific materials function as effective insulators and when used to wrap cold water bottles, they will ensure the water is unaffected by the temperatures outside.
Here’s another smart method of keeping water cold with clothes. Wrap your water bottle with a cloth first and add another layer of wrapping using aluminum foil. The foil will refract heat instead of absorbing it, keeping the water cool no matter what.
Seasoned hikers and climbers also use insulated thermal bags to keep their water bottles cold while hiking. While these thermal bags are easily available at hiking stores, you can even make one at home. All you need is a good-quality plastic bag and an ice pack. Place your bottle in the bag along with an ice pack that will keep the water cool while you’re busy admiring the glorious terrain around you.
If you have move than just your water that you’re looking to keep cool then you might be interested in a backpack cooler.
Featured Image Source: https://unsplash.com/photos/tF9iUErZXWA


