Rain’s hammering your tarp, everything’s soaked, and you’re shivering hard enough to rattle your teeth. I’ve been there — November in the Cascades, gear failure, and three hours until dark. That campfire wasn’t a luxury. It was the difference between a rough night and a genuinely dangerous one.
Starting a fire in wet conditions is one of those skills that separates people who’ve actually spent time in the backcountry from those who just read about it. And here’s the thing: it’s not nearly as hard as people make it out to be. You just need to understand a few principles and stop making the mistakes that kill most wet-weather fires before they ever get going.
In this guide, I’ll walk you through everything — finding dry fuel when the world looks like a swimming pool, building a fire lay that actually works, and the specific techniques that make wet-weather fires possible. By the end, you’ll know exactly how to start a campfire in the rain, even when conditions are genuinely miserable.
Why Wet Weather Fire-Starting Is a Critical Survival Skill
Let’s get real for a second. In dry conditions, fire-starting is almost trivially easy. Spark, tinder, done. But the times you desperately need a fire — when you’re hypothermic, when visibility’s gone, when you’re stuck somewhere unplanned — those are almost always wet conditions.
Hypothermia doesn’t require freezing temperatures. I’ve seen people go hypothermic in 50°F rain. Your body loses heat roughly 25 times faster in wet conditions than dry. A fire isn’t just about warmth either — it’s signaling, water purification, drying gear, and psychological comfort that keeps you making good decisions instead of panicking.
The kicker? Most people have never actually practiced this. They’ve lit plenty of campfires on clear summer evenings. But fire starting in wet conditions is a completely different animal, and the first time you try shouldn’t be when your life depends on it.
Finding Dry Fuel Sources When Everything Looks Soaked
Here’s the secret that changes everything: even in a multi-day downpour, dry wood exists. You just need to know where to look.
Rain falls down. (Revolutionary, I know.) That means the inside of things stays relatively dry, and anything protected by overhead cover retains much lower moisture content. Your job is finding those protected sources.
Standing Dead Wood vs Ground Wood
This is the single most important distinction in wet-weather fire craft. Standing dead wood — dead trees and branches that are still attached and upright — will have moisture content around 15-20%. Ground wood? You’re looking at 40-60%, sometimes higher.
Why the massive difference? Standing wood sheds water. It dries between rain events. The wood fibers aren’t sitting in soil moisture wicking upward. When I’m gathering fuel in the rain, I don’t even glance at ground wood. It’s not worth the effort.
Look for:
- Dead branches still attached to trees (snap them off — if they break clean with a crack, they’re dry inside)
- Standing dead snags with bark falling off
- The underside of leaning dead trees
- Dead lower branches on living conifers, protected by the canopy above
That snapping sound matters. Wet wood bends. Dry wood snaps. Get used to testing branches before you haul them back to your fire site.
Inner Bark and Fatwood Identification
When surface wood is soaked, sometimes you need to go deeper. Inner bark from certain trees — particularly cedar, birch, and cottonwood — can be scraped into fibrous tinder that ignites readily even after rain exposure.
But the real gold standard? Fatwood. This is the resin-saturated heartwood found in dead pine trees, especially around the stump and root system. The resins are essentially solidified turpentine — they’ll ignite when wet, burn incredibly hot, and are nearly windproof.
Finding fatwood:
- Locate old pine stumps (the more decayed the outer wood, the more concentrated the fatwood)
- Look for wood that’s noticeably heavier than it should be and has an amber/orange color
- Cut into it — you’ll smell the pine resin immediately
- Shave off curls or split into thin sticks
I carry a small bag of fatwood on any trip where rain’s in the forecast. You can buy it too, but finding it in the field is a useful skill.
Where to Find Dry Tinder in a Downpour
Tinder is your biggest wet-weather challenge. You need material that’s both dry AND fine enough to catch a spark. Here’s my hierarchy:
Best natural options:
- Birch bark (the oils make it water-resistant — peel thin layers from downed trees, never living ones)
- Dead grass and plant fibers from underneath rock overhangs
- The fuzzy inner bark of cedar, shredded fine
- Cattail fluff from inside the seed head
- Old man’s beard lichen from protected tree branches
What to carry:
- Cotton balls saturated with petroleum jelly (my go-to)
- Commercial fire-starting cubes
- Dryer lint in a waterproof container
- Wax-dipped cardboard
I’ve started fires in pouring rain using nothing but fatwood shavings and a ferro rod. It’s possible. But carrying some guaranteed dry tinder removes a huge variable from an already challenging situation.
Preparing Your Fire Lay for Rain
You’ve gathered your materials. Now comes the part where most people screw up: they build their fire directly on wet ground, exposed to rain, and wonder why it keeps going out.
Building a Platform to Keep Fire Off Wet Ground
Wet ground kills fires from below. The moisture wicks up into your fuel, chilling everything and creating steam instead of flame. You need a barrier.
The platform method:
- Lay down a base of wrist-thick green branches (yes, green — they won’t burn quickly and they insulate)
- Add a second layer perpendicular to the first
- Top with a layer of bark or flat rocks if available
- Build your fire on top of this platform
This lifts your fire 3-4 inches off the ground and creates a dry zone. The platform will eventually dry out and become fuel itself, but by then your fire should be established enough to handle it.
No time for a full platform? Even a single layer of thick bark or a flat rock makes a meaningful difference.
Using a Tarp Shelter Over Your Fire Area
This seems obvious, but I see people skip it constantly. If rain is actively falling, you need some kind of overhead cover during the initial fire-building phase.
A few approaches:
- Rig a tarp at an angle over your fire area (keep it HIGH — at least 6-8 feet above the flames)
- Use a space blanket or emergency poncho as a temporary shield
- Build against a rock overhang or under dense evergreen canopy
- Have a partner hold a pack lid or pot lid over the tinder pile while you work
Once your fire is established with a good coal bed, light to moderate rain won’t kill it. But during those critical first few minutes? You need protection.
Warning: Keep any synthetic material well away from flames and sparks. I’ve seen more than one tarp destroyed by someone who got complacent. And never build fires in enclosed spaces — carbon monoxide doesn’t care that you’re cold.
The Top-Down Fire Method for Wet Conditions
Forget the teepee. Seriously. I know it’s what every camping book teaches, but the teepee structure is genuinely terrible in wet conditions.
Why Top-Down Burns Better Than Traditional Teepee in Rain
The traditional teepee fire lights at the bottom and burns upward. The problem? In rain, your tinder and kindling are exposed to falling water, and any wet fuel you’ve added is directly in the path of rising heat and smoke. You end up with a smoky mess that snuffs itself out.
The top-down method (also called an upside-down fire or log cabin fire) flips this completely:
- Bottom layer: Your largest fuel — wrist to forearm-thick pieces laid parallel
- Second layer: Medium fuel perpendicular to the first
- Third layer: Small kindling perpendicular again
- Fourth layer: Your finest kindling and tinder on top
You light the top. The fire burns downward, and here’s why that matters:
- Heat rises through fuel that’s already been pre-dried by the flames above
- Rain falls onto ash and coals, not onto unlit fuel
- Larger fuel at the bottom is protected from rain until the fire is fully established
- No collapsing structure as fuel burns away
| Fire Method | Rain Resistance | Setup Time | Fuel Efficiency |
|---|---|---|---|
| Traditional Teepee | Poor | Fast | Moderate |
| Top-Down | Excellent | Moderate | High |
| Lean-To | Fair | Fast | Poor |
| Log Cabin (hollow) | Moderate | Slow | High |
I’ve lit top-down fires in steady rain with nothing but fatwood and a ferro rod. Try that with a teepee and you’ll be nursing smoke for an hour.
Best Fire Starters That Work When Wet
The ignition source matters more in wet conditions than any other time. A lot of fire-starting tools that work fine in ideal conditions fall apart when it’s wet.
Ferro Rods vs Waterproof Matches vs Lighters
Let me break down your main options:
Ferro rods (ferrocerium): These throw sparks at roughly 3,000°F — hot enough to ignite most tinder instantly, even when damp. They work wet, they work at altitude, they work in wind. You’ll get thousands of strikes from a single rod.
Downsides? You need proper technique and suitable tinder. You can’t just spark at a wet log.
Waterproof matches: Usually work as advertised, but “waterproof” often means “water-resistant for about 30 seconds.” And you get maybe 20-40 strikes before you’re out. I carry them as backup, not primary.
Standard lighters: Fine until they’re not. BIC lighters work wet if you shake them out, but they struggle in wind and fail completely at altitude. I’ve had them refuse to spark in driving rain.
Plasma/arc lighters: Windproof and work in rain, but battery-dependent. When that battery dies, you’ve got an expensive paperweight.
My recommendation? Carry a ferro rod as primary, a mini BIC as backup, and a few waterproof matches deep in your kit for emergencies. Redundancy matters here — this is one system where you don’t want a single point of failure.
DIY Waterproof Fire Starters You Can Make at Home
Commercial options work, but you can make fire starters that perform just as well for almost nothing.
Cotton balls + petroleum jelly:
Pull a cotton ball apart slightly, work in a generous amount of Vaseline, and store in a small waterproof container. These catch a spark instantly and burn for 3-5 minutes — plenty of time to establish kindling. I keep a dozen in an old film canister on every trip.
Dryer lint + wax:
Pack dryer lint into cardboard egg carton sections, pour melted candle wax over the top. Once hardened, cut into individual fire starters. The cardboard and lint catch flame easily; the wax provides sustained burn time.
Cardboard + sawdust + wax:
Same concept, different materials. Melted wax mixed with sawdust, poured over corrugated cardboard, cut into squares. Burns hot and long.
Char cloth:
Old-school but effective. Put 100% cotton fabric in a sealed metal tin (Altoids tin works), heat in a fire until smoking stops, let cool. The resulting char cloth catches a spark better than almost anything but needs to be kept dry.
Feeding and Maintaining Your Fire in Ongoing Rain
Got a fire going? Good. Now you need to keep it alive, and that means constantly feeding it fuel — ideally fuel that’s getting drier as you go.
Drying Wet Wood Using Your Existing Fire
This is the sustainable loop that lets you maintain a fire indefinitely in rain: use your fire to dry the next batch of fuel.
The drying rack approach:
Stack wet wood close to (but not in) your fire. A simple lean-to arrangement works — prop branches against a support stick positioned 1-2 feet from the flames. The radiant heat drives moisture out. Rotate pieces occasionally.
The ash bed method:
Once you have a good coal bed, pile wet wood around the perimeter. Push pieces gradually closer to the center as they dry. The coals throw serious heat and will steam-dry wood surprisingly fast.
Inside the fire ring:
Lay larger wet pieces next to your active fire, not on it. The goal is pre-drying, not extinguishing your flames. Once they’re no longer steaming when you hold them near heat, they’re ready to add.
Pro tip: That hissing, steaming sound when you add wood? That’s moisture escaping. Some steam is normal. But if it’s billowing white clouds, you’re adding fuel too wet, too fast. Slow down and let pieces dry longer.
Keep a rotation going: wet wood on the outer ring, drying wood in the middle ring, dry wood actively burning. You’ll never run out of fuel if you stay ahead of the cycle.
Three Backup Methods When Matches and Lighters Fail
Sometimes everything goes wrong. Your lighter’s dead, matches are soaked, ferro rod fell out of your pocket on the last scramble. What now?
1. Friction fire (bow drill or hand drill)
The hardest method but 100% feasible with no gear. You need:
- A fireboard (dry, soft wood like cedar, willow, or cottonwood)
- A spindle (dry, straight stick from the same type of wood)
- A bow (any bent stick with cordage — shoelace works)
- A handhold (rock or hardwood with a depression)
Friction fire in wet conditions is challenging but possible if you can find dry inner wood from standing dead timber. The coal you create gets transferred to a tinder bundle and blown into flame.
I won’t pretend this is easy. I’ve practiced bow drill in ideal conditions and it still took me dozens of attempts before I got consistent. But it works, and it requires nothing but knowledge and effort.
2. Battery and steel wool
If you’ve got any battery (phone, headlamp, AA cells) and steel wool, you can create fire. Touch the wool to both terminals — it ignites instantly due to the electrical resistance. Even a 9V battery makes this trivially easy.
I keep a small bag of steel wool wrapped in plastic in my kit. Weighs nothing, never fails.
3. Fire plow
Simpler than bow drill but more physically demanding. Rub a hardwood shaft back and forth in a groove cut into a softer fireboard. The friction creates dust that eventually ignites. It’s exhausting but requires less precision than bow drill.
Honestly? These are last resorts. Carry backups for your backups and you’ll rarely need them. But knowing they exist gives you options when everything else fails.
Common Mistakes That Kill Your Fire in Wet Weather
I’ve watched dozens of people fail at wet-weather fires. Here’s what kills most attempts:
Adding too much too fast. A new fire is fragile. Piling on fuel smothers flames and drops temperature. Build slowly, adding slightly larger fuel only after the previous additions are fully burning.
Using ground wood exclusively. I see this constantly. People gather armloads of wood from the forest floor and wonder why nothing lights. That wood is saturated. Go find standing dead.
No wind protection. Wind plus rain equals fires that never establish. Build a wind break. Use your body. Use your pack. Use a log wall. Whatever it takes.
Poor tinder bundle structure. Tinder needs airflow. A wadded-up ball of material smothers itself. Build a loose nest with finer materials in the center, leaving space for oxygen.
Giving up too early. Wet-weather fires often smolder and smoke before they ignite. Gentle blowing at the base can make the difference. Don’t abandon a smoking pile — work it.
No preparation before the rain. If you know rain’s coming, gather fire materials while it’s still dry. Stage your fuel under a tarp. Ten minutes of effort before the storm saves an hour of struggle during it.
Impatience with fuel drying. You can’t rush the process. Wet wood placed directly on flames produces steam and smoke, not heat. Let pieces dry near the fire before adding them. Yes, it takes longer. No, there’s no shortcut.
Frequently Asked Questions
Can you use wet wood to start a fire?
Not directly, no. Wet wood won’t ignite — the heat energy goes into vaporizing moisture instead of combustion. But here’s the nuance: the inside of wet wood is often much drier than the outside. Split wet logs open and you’ll find usable fuel. Combine that with proper tinder and kindling, and you can absolutely build a fire using wood that looked hopeless from the outside. The key is starting with dry tinder and very fine, dry kindling, then gradually adding split wood as your fire builds heat.
What household item starts the best fire in the rain?
Cotton balls with petroleum jelly — not even close. They catch a spark instantly, burn for several minutes, and the petroleum jelly makes them water-resistant. Cost is essentially nothing (a jar of Vaseline and a bag of cotton balls runs maybe $5 and makes dozens of fire starters). Stuff a handful in a waterproof container and you’ve got reliable ignition for any weather condition.
How do you start a fire with completely soaked matches?
You mostly don’t. “Waterproof” matches resist water for short exposure but won’t light if they’ve been submerged for hours. Your best bet: dry them against your body (armpit or groin area — body heat helps), strike them firmly and quickly on the striker, and have your tinder ready to catch the first flame. Some people try striking wet matches on rocks, but this rarely works. Better approach: keep matches in truly waterproof containers so this situation never happens.
What’s the fastest way to get a fire going in rain?
Top-down fire method with commercial fire starters. Build your largest fuel as a base, stack progressively smaller fuel on top, light a fire cube or cotton ball + petroleum jelly on top. The entire thing catches from above and burns downward, protected from rain by its own structure. I’ve had fires fully established in under five minutes using this approach, even in steady rain. It’s not romantic or primitive, but when you’re wet and cold and losing daylight, effective beats impressive every time.
Is starting a fire in the rain harder at high altitude?
Yes, for several reasons. Oxygen is thinner, so combustion is less efficient. Lighters struggle (butane doesn’t vaporize well in cold, thin air). And high-altitude weather tends to be more severe — colder, wetter, windier. Ferro rods become even more valuable at altitude since they don’t care about air pressure or temperature. Focus on excellent tinder preparation and build smaller fires with more attention to airflow. And give yourself more time — fires establish more slowly when oxygen is limited.
Fire in the rain isn’t magic. It’s just knowledge, practice, and refusing to give up. The techniques here — finding standing dead wood, building top-down, using proper ignition sources — work every time if you execute them properly.
But reading about it isn’t the same as doing it. Before your next trip, go outside on a rainy day and practice. Build a few fires when you’re not cold and desperate. Learn what works in your local environment. The time to develop this skill is when you have a dry house to retreat to, not when you’re stuck on a mountainside as darkness falls.
Pack redundant ignition sources. Carry guaranteed tinder. And remember: the best time to prepare for a wet-weather fire is before it starts raining.
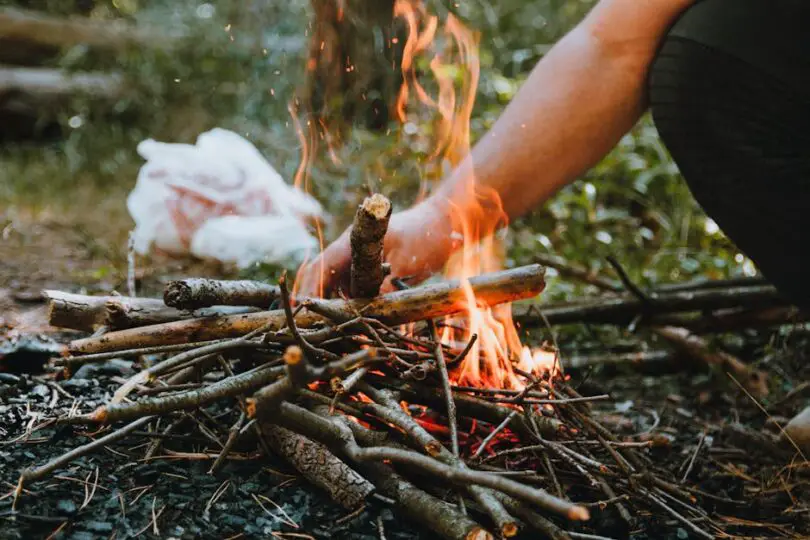
Featured Image Source: Pexels