If you love the outdoors and enjoy tramping through the snow, then you cannot miss owning a pair of snowshoes. They help spread the body weight across a larger surface area, ensuring that you do not sink into the soft snow.
You will now find it easier to walk on top of the snow. While you can purchase a pair, it is always a fabulous idea to learn how to make snowshoes. Building your shoes will help you survive during winter. The right pair of snowshoes will determine whether you get your way on snow or not, regardless of the distance you have moved.
Snowshoes resemble a tennis racket though they are different in purpose. These are attached to your shoes to help you have balance while walking on top of the snow.
See also: Best Boots For Snowshoeing: Footwear to Help You Explore The Winter Wilderness
You will be able to gain momentum so that you will not get stuck out in the cold. The following steps will guide you on how to make you own pair of snowshoes.
Who Needs Snowshoes?
Snowshoes are a necessity if you are a trapper whose business leads you out in the open during the winter season. These will surely be of great help when roads and trails are heavily blanketed by a deep fall of powdery snow.
You do not necessarily need to be a dweller in the wilderness to possess these shoes however. If you love taking part in invigorating winter sports, then you definitely should own a pair of snowshoes. Do check out our reviews of the top snowshoes for beginners for more options.
They are fast growing in popularity in and about our cities and towns because many people are interested in winter sports.
If you live in a place with deep winter conditions, then you have to master the art of making snowshoes. Think about a situation when you are in the middle of a heavy winter, and a blackout happens.
Moreover, there’s a foot or more of snow outside, but you need to get to a shelter or get your family to safety. You would not push your entire family through a foot of snow, right? You would rather everyone walk on top of the snow. That is why you need to develop snowshoe making skills.
Types of Snowshoes
To begin the process of making your snowshoes, you need to consider the condition you are going to use them in.
You will determine the type you should make and the material to be used. The available types of snowshoes you can make include:
- Flat Terrain Shoes. These are suitable when you plan to use them to walk on fields.
They are easy to use and adjust plus they do not need much traction. Snowshoeing amateurs can begin with these, but they are not suitable for aggressive terrain. - Rolling Terrain Shoes. If you are planning on hiking moderately aggressive terrain, this is the kind you should expect to make. You can use these on hills which are not too steep.
When making them, you have to add crampons and stronger bindings to help you keep moving and maintain your balance on the rougher terrain. - Mountain Terrain Snowshoes. You will need this kind if you are planning to travel long distances or there just might be some hard situations like mountains or icy, steep sections in your path.
You will have to make stronger bindings that you will not have to worry about when you are trying to travel through those harsher conditions. These will not break or wear out as fast as some other bindings that are not made for the same circumstances.
For the top snowshoes that won’t let you down, check our earlier piece to find out more.
Material to Be Used
For a start, you need first to collect all the material that is required to turn this idea into reality. The best alternative is to use traditional materials like the Native Americans used many centuries ago.
Choosing the frame
Ash wood is preferred as it is the traditional and best wood to make frames for snowshoes. Ash wood is bendy and can stay firm. However, you can use other hardwoods as well. Hickory and white birch can be dependable as substitutes.
You can obtain this from any lumber dealer. Sawing out the frames from the board is not a difficult task but you do have to split the Ash to make the bows for the shoes.
If you cannot access wood, you can always purchase aluminum alloy. It has proved to be strong and very light.
Scrap wood
Don’t worry about which type of timber to use; any kind can do. It is this that you will have to use when making the jig form for shaping the bows of the shoes.
Webbing material
The webbing you are going to make will help distribute weight for the person using the shoes. You have to manually make the lacing, with either nylon or traditional rawhide. The choice will be yours to choose which material to use. Nylon is durable, lighter, and stronger plus it cannot be affected by humid conditions. In comparison, rawhide stretches too much when wet.
Piece of paper
It can be of any material including newspapers. You will need a piece of large paper the size of the snowshoes you are going to make. It is what you will use to cut out a pattern for the shoes.
Noise reduction
You will need to oil the snowshoes to reduce noise if you plan to go hunting. If you do not then there will be friction from wood to wood, or rawhide to wood. They can produce enough noise to alert animals, particularly in icy weather. The sound of snow being compressed is loud enough in cold weather. You would not want to walk in creaking snowshoes.
Step by Step Guide
Now that you have all the material needed for the project in place let’s start with steps to make your snowshoes.
Coming up with a pattern for the shoes
You have to begin making your homemade snowshoes by designing a model for the frames. You can use a newspaper for the purpose; however, any large piece of paper can also work. If you decide to use a newspaper you must fold a full sheet diagonally to make a triangle.
The crease on opening the paper will reveal the centerline for the snowshoe. You must cut out the template when the sheet is still folded. This will make your finished shoe be perfectly symmetrical.
At this point, you may decide on the length for the shoes. About 30 inches can be perfect to distribute weight properly. Next is to mark a diagonal line around 12 inches to be the widest section for the shoes.
This is the leading edge where your feet will be hoisted. After this point, then you can begin to make the shoe smaller usually with curve tapering to the end of the heel. You can use a flexible meter ruler to guide you on maintaining a smooth curve.
Designing the frame
The frame has to be cut 2 inches longer than the length of the shoes you are making. When handling the wood, you should remember that the toe of the finished frame lies in the middle of the stick; the heel, the end of the stick. Moreover, the heart of the shoe has to rest in the midst of the heel and toe.
To build a form for the shoes, you will need to take a piece of plywood and nail two ¾ inch forms onto it. This comes together with 12 wedges which are ¾ of an inch from the forms. The Ash wood that you are planning to use has to be about 7 feet in length. This will produce the length of the ideal shoe you want.
Moreover, it should be around ¾ of an inch in thickness to get the desired stability.
Fit your frame
Please note that the wood does have to be without any knots or cracks before you start. Slowly bend the frame to fit into your wedges. If the wood looks like it does not bend easily, you must steam it to get it to soften more.
The cheapest method of steaming is to provide boiling water in a wash boiler. You place the wood over the top and soak thoroughly by mopping with the boiling water. The stick has to be shifted about until the fibers have become soft and pliable.
After 10 or 15 minutes of the hot-water treatment, you wrap the stick with a cloth. Then bend it back and forth so that it is rendered more and more pliable. Repeat the hot water treatment until the wood is sufficiently soft for easy bending without splintering.
Since the toe takes the greatest curve, it must be well softened before putting on the form. Or else all the fibers are likely to splinter off at this point.
After the frame is softened enough, place it on the bending form while still hot. Begin slowly bending it on the wooden inside blocks, and nail on the outside blocks. It should hold it to the proper curve. Start with the toe by tightening the outside blocks so that they hold this end. After finishing one side, work on bending the other half to shape.
You have to allow the bent frame to dry on the form for about a week. Don’t make a mistake and remove it before the wood has become well dried and has taken a permanent form, the frame will not keep its shape.
You can use the same bending form for both frames. If you are in a rush to finish the shoes, you should make two forms. You should be very cautious to make the frames alike in all aspects. Particular emphasis should be put on getting the boards exactly right. These are going to create the form and help you make the base for the snowshoes before can you begin trying to do anything else.
Insert the crossbars
For your snowshoes to be sturdy, you should insert crossbars that are a bit more than an inch wide into the frame. The crossbars will help to improve the stability of the snowshoes. There has to be four of them and inserting them into the frame will enable it to retain its shape.
To do this, you need to use a drill to make holes in the frame. Drilling the pieces first helps to avoid splitting them. Afterward, you have to insert the ends of the crossbars into these holes then glue and nail the slats in place.
They should fit tight but make sure you don’t crack your base when you’re putting them in. After this, you can smooth the frame and crossbars by meticulously sanding them.
Adding webbing to the shoes
It is a matter of what you prefer for this portion. The majority of people prefer more traditional rawhide strips for creating webbing and others like to use neoprene.
Being a synthetic material neoprene will last a lot longer. Which material you chose is entirely up to you. You have to keep in mind making sure that you create the right pattern for your shoes.
- Webbing with rawhide. If you choose rawhide then green, hair-free rawhide will be perfect for the job. You should weave it across and around the frame. If you weave it through stretching across the frame points, it will create a diamond pattern.
Though it will consume a lot of your time, the end product will prove to be a stellar snowshoe; one that will keep you floating even on powdered snow. Rawhide tends to absorb moisture when used on snow.
However, that is no cause for worry as it will dry up later and tightens to provide a fantastic cushioning effect. Walking on snow through the woods or any outdoor terrain will be great after that. Your shoes will get better with usage - Using neoprene. You can opt for the modern and synthetic neoprene for a hassle free experience. Neoprene can withstand the moisture and cold conditions resulting from exposure to snow.
You will use the shoes the same way for the entire period you use them. There won’t be a need for maintenance. You can complete making the snowshoes in a shorter time. You do not need any process of intricate lacing and threading when using neoprene.
This stuff comes in the pattern you need. What is required is for you to fix the neoprene webbing to the frame, and you are all ready to go, walking through the woods, digesting the serene beauty and quiet of the winter.
Adding straps
The last step is making sure you fix some straps to your snowshoes. Whether you decide to use rawhide or neoprene, you need to install sturdy straps to the shoes. Afterward, you have to be able to slip them on and off when you need to.
However, of course, it should be good enough not to allow your shoes to come off when you are moving.
Finishing
When you are satisfied with the way the shoes look, you can add a thick coat of varnish. The purpose of this is to thoroughly soak the lacing and bond everything on the shoes together.
Care for Your Shoes
You would not like all your hard work to go to waste after using the shoes for a few times. You have to take good care them. A well–made pair will stand a couple of seasons’ hard use or last for more than a year for general wear.
To keep them in good shape, dry them out after use, though it is never good to put them near a fire. The filling on the rawhide will get damaged.
You should avoid jumping in them as it puts a severe strain on the frame, though the damage may not occur when used in deep, soft snow. You should use them carefully to avoid any possibility of breakage.
Accidents are bound to happen like a snap of laces at some unexpected moment. Therefore always keep a strand or two of rawhide on hand, to meet this emergency.
The snowshoes that you have made have taken time, and they required you to put in much hard work and effort.
But you don’t want to forget that traveling on snowshoes is not always an easy feat. It is going to require you to practice quite a lot and improper snowshoes can make the problem worse.
Never risk improperly made snowshoes as they are dangerous in the long run. They could fall apart, and you will be trapped in deep snow.
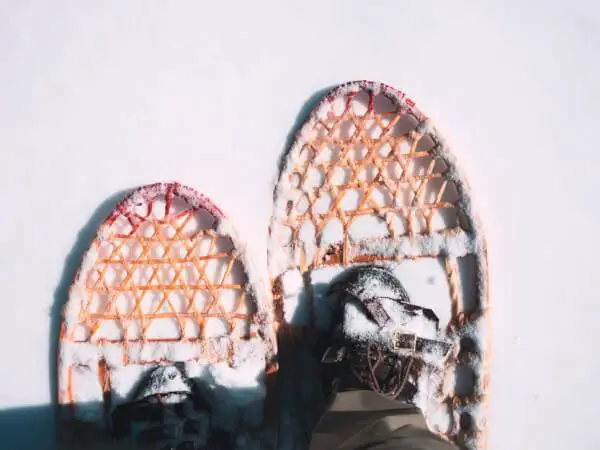
Featured Image Source: https://unsplash.com/photos/l7Kn_pt8N9E