How many times have you been in a situation where three feet of paracord could make all the difference? Perhaps your kayaks are atop the rack on your old Toyota truck and all you need is another two feet of cord for them to be perfectly secured. If you take an hour of time you can learn how to make a paracord lanyard. Suddenly, that extra footage of cord can be right at your fingertips.
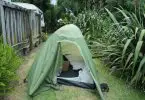
There is a set list of items any hiker will have in his or her backpack: first aid kit, water and food, compass, and, possibly most important, rope. While it may not be something a person will use every time they stop on the trail, rope and paracord are undeniably useful tools.
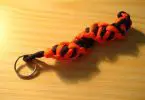
Learning the technique needed to make a paracord lanyard will move that tangled pile of cords from the bottom of your backpack to around your neck where you can hang your keys, name tag, or compass.

Paracord is a favorite variance of rope among backpackers. It is light, durable, affordable, and long lasting. These fibers can be braided, knotted, and tied to make bracelets, keychains, or lanyards. The genius of this is, if properly made, these pieces of jewelry can be unfurled in a matter of moments to produce any length of rope.
While a paracord lanyard in a store could range from $15 to $35, this simple version is made at a fraction of the cost.
In this article, there will be several options for your lanyard outlined, depending on the level of difficulty.
To begin, you will need the following:
- Small or Medium carabiner
- 18-22 feet of paracord (two 5 feet sections and three 4 feet sections)
- Scissors
- Needle nose plyers
- Lighter
After gathering the materials, find a spare hour in your day for this project. The estimated time of one hour could be shortened by someone who is experienced with braiding and knot tying. The most common method used when forming the lanyard is called the Cobra weave. With this design, the end result will be a complex looking knit made with minimal effort.
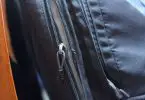
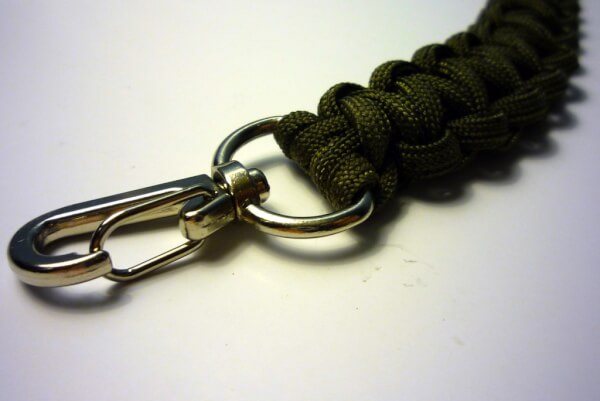
The first step is to attach your small or medium carabiner to an anchor point. This can be any stable anchor—from a hook screwed into a block of wood to the handle on your bedroom dresser. Finding the center of your five foot section of cordage, clasp it, forming a small bite.
See also: How to Tie Knots: A Guide to Knot Tying and Line Handling
With the looped area pulled through the carabiner, form a cow hitch knot. That is, pull the ends of your five foot section through the small loop at the center. The carabiner’s fat end should be caught inside the cow hitch knot.
Keeping the cow hitch loose, take the second five foot section and move it through the center of your cow hitch so it is woven under the outer sides of your looped knot and over the center strands at the base of the carabiner. Cinch this tight, leaving the four strands to hang down. With one of the four feet sections of rope, begin the cobra weave. Check out our earlier piece on how make paracord knots for your help.
Finding the center again, lay it over the four stands suspended from your anchor near the top.
Loop the right strand under the left strand on the right hand side of the stitch before pulling both strands to the left side and replicating the loop, the left piece going behind the central ones and the right going over them. Keeping it tight, continue on for five inches.
This will give you an even, zig-zag knit. Essentially, the cobra knit is nothing more than a series of loops on either side of a wide center area. After a few tries you will be able to do it without thinking.
After five inches, the remaining strands of the four foot length will need to be hidden. To do this, loosen the last three long frontal loops with the plyers and pull the strands through them. To tighten back up, simply use your plyers to tug the side loops until taut. With the scissors, snips the ends of the rope as close as possible without cutting the braid.
Using a lighter, quickly melt the ends so they will not unravel and pinch, hiding the core of the cord. With the plyers, you can nudge the melted ends back into the braid. Just remember, wet your fingers or use the tip of the plyers to pinch the melted the ends. They will be hot and may burn.
Now you have the meat of your lanyard. From here on out the design is relatively open. If this is as far as you want to go with this project you can end in a larger round knot, such as a Monkey Claw knot, lanyard knot, or a simple overhand knot. For any of these, the amount of cord listed in the supplies list can be lessened by 4-8 feet.
To finish out the longer paracord lanyard instructions, the next step is to construct a four stranded braid that will serve as the necklace portion. Split the remaining four long strands in half, two on one side and two on the other. Just like earlier, take the four foot length and find its middle. Push it between the two strands on the left and abut the cord to the woven portion completed earlier.
This is a four-strand braid. Once mastered, it is effortless to do. The key is to remember to keep two strands in the center while braiding. Begin by holding the farthest left strand out and then looping it over the two central strands but not the far right one.
Continue with the unused piece on the right, covering the central strands as you move it to the left. Keeping the braid tight, carry on with your weaving and looping.
The length of the necklace will vary, but generally each side should be somewhere between ten to twelve inches. Mind that you do not make your braid taut enough that it begins to curl into itself. If this does happen, simply stretch it out to loosen.
Once you have reached the desired length, cut the ends of the added section short. Using your lighter, fuse them together over the longer strands.
This will keep your four-strand braid from falling apart. After wetting your fingertips, pinch the burned ends together. Repeat the entire process to the other side.
Your lanyard is almost finished. The only step left is attaching a safely latch. Of course, if you are a risk-it-all kind of person, you can just tie the hanging strands together and call it a day. If you don’t want to chance the possibility of strangulation, simply push one end of the clasp through the end piece of cord.
Thanks to the safety latch, if one end of the lanyard gets caught, the clasp at the will break apart from the pressure. Make a small overhand knot and cut the ends short. Once again, burn the ends a pinch them down into the knot so that it can fit within the plastic clasp. Do likewise to the other end.
After ascertaining the ends can still fit together with the knots inside, you’re done! After all the looping and knotting, you have learned how to make a paracord lanyard.
There is nothing to do but put it on, attach a compass to the carabiner and step onto the trail. Whether you are doing a multi-day backpacking trip, traveling from one country to another, or going on a day hike at your favorite State Park, you can rest easy knowing a large supply of paracord and any gadget you might wish to attach is all within arm’s reach.
For more tips on how to choose the right types of outdoor ropes, check our our piece for more insight.
Featured Image Source: https://www.flickr.com/photos/41139106@N00/2960140618