Tying paracord knots can be fun, yet it can sometimes be a challenging task for a beginner like you. Learning what to do to get the right results can take some effort on your part.
Therefore, following an expert guide can work wonders in your favor and you can keep the skill for life.
Here are knots you can easily learn using paracord and chances are they will come in handy when you are outdoors camping.
Knot 1: The cobra knot
The cobra knot is widely used by military personnel. Whenever a pull-ring is attached to it, the knot is perfect to be used as a Girth Hitch.
See also: Types of Rope for The Outdoors: Tying It All Together
The cobra knot is a very easy tie to learn. Your first step is to gather two different paracords to make the knot.
Materials you need are:
- A sharp knife
- A buckle
- Cigarette lighter
- 2 different colors paracord
Here are the simple instructions:
- Take both strings in your hand and hold them straight with your fingers alongside each other.
- Take hold of the left cord with your hand and see that you form it into a loop.
- Then place the remaining cord behind both main strings.
- Make sure the right string is placed underneath the left string and then over the left string’s loop.
- Then it is now your job to make the knot tight.
For better clarity here are two videos below that show you how to get a paracord cobra knot going:
Knot 2: The Lanyard Knot
To tie the lanyard knot, all you will need is a single paracord with a length of your choice. This knot can be a bit complicated, especially for a beginner, but by following the instructions you are bound to get a great finish.
Material needed:
- Paracord
Follow the instructions below and you are good to go:
- First bend the paracord so that your two middle fingers can hold in the loop end.
- Make another loop at the right end and make sure it goes over the left end as you place it in your palm.
- Hold the left end, push it underneath the right end and then feed it through the loop resting in your hand-palm, while seeing to it that the string reaches over the loop as well as running underneath it. When this process is completed, your knot is supposed to look like the figure eight with a nice looking diamond shape lying in the center of your palm.
- After completing the three steps above, you must then take hold of each end and move them along counter clockwise around so they can go through the diamond shape in the palm of your hand.
Start tightening your knots so they do not appear loose. If the knot looks a bit out of shape, you can easily use your fingers to straighten it.
For more understanding of how to make a paracord lanyard knot please see the video below:
Knot 3: The King Cobra Knot
In the snake world, the king cobra is a very special cobra. Tying the knot is almost the same as doing a normal cobra knot. Therefore, to get another result from the cobra knot, all you have to do is a simple weave of another cobra knot at the top of the old one.
For a better look, you can use a different color than what you use when doing the cobra knot.
Materials needed are:
- Scissors or knife
- Lighter
- Buckle
- Paracord
See video instructions below:
Knot 4: The Snake knot
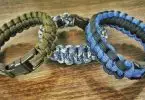
You might find it a challenging task doing this knot, but the end result will make it all worth it. For a more beautiful looking bracelet it is best to use two different colors of paracords. See how paracord bracelets can help you survive in the wild by reading our article on this topic.
Materials needed are:
- Sharp knife or scissors
- Cigarette lighter
- Paracord
Here are the instructions:
- If you decide to use two different paracord colors, melt both ends, connect them together and then bend the area at the place where you are melting. If your choice is to use only a single paracord all you have to do is just to bend it in half.
- Create an original loop in place so that you can join the two ends of your paracord bracelet. Form a knot and tie the loop very tight with it.
- Loosen the base knot from the first loop a bit then push the opposite string through it. When this is done, make sure to tighten the knot again.
- If you should turn the paracord over, you will notice that you have two loops at one end and at the other end is a single loop. Loosen only one loop and then pull through the string at the opposite end.
- Turn the bracelet on the other side and continue the same weaving process.
See video below to better understand the process of tying a snake knot:
Knot 5: The Monkey Fist Knot
This type of knot is difficult to tie, especially for a beginner. However, if you want to have a go at it then you are free to do so. It will look great as a bracelet on your hand, but most people wear it because they can defend themselves with it.
Hitting an attacker with it will give him a very painful experience and therefore, this bracelet with the monkey fist knot can be your best friend when things get rough between you and an attacker. For better self defense purpose, you can use a heavier ball if you like.
It takes three sets of wraps to get you reaching your target of having a paracord monkey fist bracelet.
Materials needed are:
- A heavy ball that is small in size (example, golf ball, or any heavy 1 inch ball).
- A needle to carry out weaving just in case
- Scissors or sharp knife
- Lighter
- Paracord
- Glue
- A jig
Instructions for you to closely follow:
- First, use the paracord to make a vertical wrap around the ball.
- Do it horizontally and then vertically again, but this time make sure to wrap the cord directly around the core underneath the last vertical wrap you did. Avoid making unequal passes on the sides. All sides are supposed to have the same equal sides.
- Later on after tying your knot you will have to complete the process by tightening it. To tighten the knot, locate each knot and pull the slack tighter. You have to pull the slack on all sides to get the bracelet tight. Once you tighten all six sides your monkey fist bracelet is ready for you to wear.
Please see video tutorial below:
Knot 6: Vertical Crown Knot Cross
Although the vertical crown knot is not difficult to do, still, you need to pay attention to detail if you want to reach a successful completion. Most persons choose to make this type of bracelet because of its religious affiliation they can identify with.
Materials that are needed:
- Lighter
- Scissors
- About 4 strands of paracord with each one measuring 1.5 ft in length (18 inches)
Follow the instructions as given below:
- Start making your cross from the top and then do the bottom part.
- Mark the halfway part of the cord.
- Push a second cord over the marked area. The second cord is supposed to run underneath the left side and over the right. At this stage you can go ahead and tie your cobra knot.
- Find the middle cords and place the right end underneath them.
- Bend the left end underneath the right end.
- Take the left end and overlap the middle cords then push it straight through the loop on the right.
- Tighten your knots.
The vertical crown knot is similar to your cobra knot but with a little different twist added to it. Here are the instructions for the vertical crown knot technique:
- Place your right end cord underneath the right end cord in the middle.
- Place the cord on the left side over the one in the middle.
- Now put a cobra knot tie on the right side.
- Move the cord at the right and put it under the two cords in the middle as well as over the one at the left.
- The left cord must be twisted into the right side loop and running over the top.
- Tighten your knots.
The above is a successful completion of the top part of the vertical crown. Let us now move on to the bottom part.
To make the bottom part, you will have to carry out just a little adjustment. The bottom part must have no loop at the top.
- The right middle cord must be placed over the middle cord at the left.
- Put the cords together and form a cobra knot then proceed to make 4 vertical crown knots. Therefore, you are to have 5 knots in total.
- Find the middle end at the left and put it over the middle end at the right.
- Make the sides by bringing together the two sections.
- You now have to get your top and bottom parts coming together. To do so, you have to put the middle cord at the right underneath the left cord.
- At this stage you should tie a cobra knot to secure the cords.
- Get your cord to go under the two cords in the middle and then put it over the left.
- Find the two cords in the middle and put your left cord over them.
- Proceed to put the cords that are over the middle into the right loop.
- Get your cobra knot tight and proceed to make three knots for each side.
- Find the cord at the right and put it over the middle one to the right. Have the cord at the left go over the cord in the middle.
- Make another cobra knot.
- Locate the right end cord and put it over the two middle cords as well as over to the left.
- Place the left cord over the middle and run it through the right loop.
- Tighten your knots.
- Put in one more vertical crown knot then go to the other side and do a re-rinse of the process.
- At this stage the cross might look a bit shabby so use a scissors and snip off any frilly edges. Your vertical crown knot cross is now complete.
See video tutorial below:
Common Mistakes Made
Here are some common mistakes you should not make when practicing to make paracord bracelet knots:
- Making the wrong knot. All paracord bracelets have to have a knot at the end to keep them in place. If you want to dismantle the bracelet you will have to untie the knot at the end. To not end up with the overhand knot as most beginners do, you should follow each the instructions given by an expert carefully.
- Doing too much melting at the end. Most knots during or after making them require you to carry out a bit of melting at the ends to make them neater. However, some beginners often spoil their bracelet by doing too much melting. You must try not to use too much heat so that the fire does not burn too much of the paracord away.
- Not making the two ends the right way. To get the two ends right, you should learn how to use two different paracords in a single project. To get the fusion properly, you will have to melt where the two ends meet. If not done right the bracelet will hurt your hand when you are wearing it.
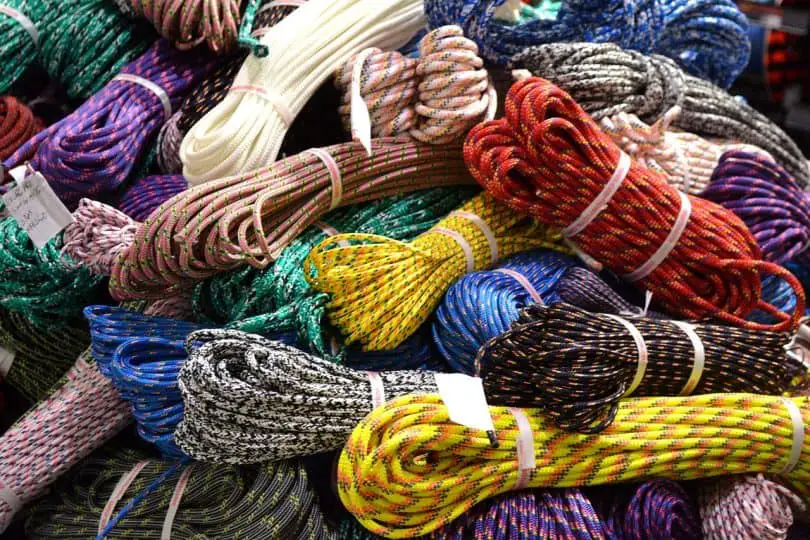
- Buying small amounts of paracord. Often beginners make the mistake of buying small lengths of paracord and when the time comes to make the bracelet they are always running out of cord. To get the real hang of working with paracord, you need to buy a good amount of cord so that you can practice over and over again.
- You run ahead of the instructions. Being too eager to see how your bracelet comes out can be a problem.
If you miss out on any of the given instructions, you will end up messing up your knots and hence you will not get a successful finish to your bracelet.
Your paracord bracelet can save your life and so it is better you get the knots right. Once you get your knots coming out right, with the bracelet you can probable save your life or the life of a loved one. It is not just good for fashion but a life saver as well. Check out our article on paracord tips and tricks to guide you on your next paracord project.
Featured Image Source: https://pixabay.com/photos/hawsers-ropes-cords-tightropes-241783/