Yes, you have evaluated your abilities and selected an appropriate hiking site. You have even researched about the site, planned on how to stay safe while hiking and tried your new equipment in advance.
See also: DIY Backpacking Food: An Organized Process That Will Make Your Excursion More Enjoyable
However, there’s this worry: how to keep food warm during hiking? Keeping food warm is a necessity due to one or more of the following reasons.
To prevent them from going bad or food poisoning
According to experts, most bacteria thrive and multiply rapidly in temperatures between 40 °F to 140 °F and they can reach hazardous levels within 1 to 2 hours. Keeping your food warm at temperatures above 140 °F will hinder their multiplication and consequently prevent any harmful effects associated with these bacteria.
To save time
While hiking especially for a long trail hike, your schedule may be tight leaving no time to warm food. As you’re responsible for your own safety while hiking; you don’t want to be climbing down rocky hills at night, do you?
To avoid this, you can carry readily edible foods such as fruits and snacks or Meal Ready-to-Eat (MREs) as an alternative. But since a lot of energy is utilized when hiking, heavy meals are most preferred.
In case campfires are prohibited
Following the rising cases of forest fires and their negative effects on natural resources, authorities in most of the possible hiking and camping sites prohibit campsite fires. In case your hiking location is one of such sites, your only option can be keeping meals warm for as long as possible. Consider this intensely if you cannot carry a barbecue/stove.
To keep warm
It’s summer yes, but while hiking you will experience a wide range of temperatures; from hot desert conditions to snowstorm at higher elevations. Considering that individuals opt to go on a hike during winter too, keeping warm become a necessity.
To achieve this, you can make use of hand and foot warmers, blankets etc. But nothing is as magical as eating warm food and taking hot drinks when shivering at the top of a rocky hill.
How to keep your food warm
In your research, you may have come across a recommendation: park light, eat right for a fun hike. The statement is irrefutable. You should carry just the essentials: food, water, light source, whistle, compass and more.
This can help you avoid too much stress especially when you’re stranded. In that light, it may be hard to carry a barbecue or a stove unless it’s possible to park your vehicle nearby.
It’s challenging but, keeping your food warm isn’t entirely impossible. The key lies in minimizing thermal conductivity between your food and ambient temperature while maximizing thermal mass (the amount of heat energy in your food) retention inside the insulator. Here is how to go about it.
Carry food with high heat retention capacity
Food is your body’s primary fuel source and as much as you’re not at home, you still need to eat the right ratio of protein/carbs/fats to compensate energy lost while hiking. The best option lies in carrying dehydrated foods such as beans, dried mushrooms, granola, oatmeal etc. They’re light in weight, last longer before spoilage, are easier to cook and retain heat for a longer time.
It’s recommended to dry your foods under low heat conditions to prevent excessive loss of essential nutrients. Moreover, you can supplement them with a multi-vitamin for a healthier diet.
Here’s a recipe of Pesto Pasta you may consider trying while on a long trail hike.
Ingredients: Dried mushrooms, dried pepper, dried onion, ramen, dried pesto and olive oil.
Methodology: Boil one cup of water, add mushroom and ramen two tablespoons each, turn off the heat source and wait for 5 minutes. Then add oil, pesto packet, and stir to produce a simple and a well-balanced meal. While preparing, ensure the amount of water present covers all the ingredients before covering.
Alongside dehydrated foodstuffs, consider packing thinner soups rather than thicker ones. This is so as liquid have higher thermal mass retention as compared to solids. Why soup? On serving, solid food tends to go cold faster and adding sauce or soup will help keep them warm longer.
Use Food Containers Made of Insulating Materials
This minimizes heat conduction from the food to the surrounding. Such containers include ceramic cookware, cast iron or clay points etc.
Better yet, you can go for containers specifically designed to retain your food’s thermal mass. These include:
- A crockpot. It’s a storage container that has a tight lid so as to prevent spillage and heat loss, a thermometer (for internal temperature determination) and a serving spoon which scoops right through the lid minimizing heat loss.
- Insulated carrying cases. IMPORTANT! As you order, ensure they have a lid, dish, insulating bag and hot packs. You can warm the hot packs in hot water for additional thermal mass.
- You are probably familiar with using them to keep your coffee or water warm. But you can also use flasks to keep your soup hot.
Insulate your food or storage containers appropriately
To ensure minimal heat conduction, wrap your food storage cans with at least 2 thick kitchen towels one facing a certain direction and the other at 90 degrees. This minimizes the amount of air available which result in increased insulation. You can also make use of wool and cotton as alternative wrapping materials or heated up moist towels for an increased thermal mass.
When wrapping food directly e.g. sandwich, make use of layered aluminum foils. The air trapped between these layers act as a heat insulator minimizing heat loss. You can also use bubble wrap to create a vacuum which is an excellent insulator. While you’re at it, remember that heat rises and therefore you should place more insulation cover at the top rather than the bottom.
For additional heat generation, add chemical heaters on top of the insulating materials. Much as they require oxygen to generate heat, they function excellently while enclosed in a cozy. Here is an example you might consider trying while on a hike.
Purpose: To keep food hot without any fuel wastage
Requirements: Reflectix insulation, aluminum foil tape, measuring tape, heavy-duty scissors, marker and Velcro strips.
Methodology: Trace the pot’s bottom on the Reflectix and extract the resulting disc, measure the height and circumference (outside) of the pot and cut insulation strips of similar dimensions, place the pot on the Reflectix disc and wrap the strips around it. Finally, tape all seams with aluminum foil ensuring the pot don’t slide easily. You can cut strips to fit the handles or add a smaller Reflectix disc inside the cozy to provide more insulation.
Make use of homemade ‘hot’ box
This can be achieved through modification of your cool box by filling it with hot air e.g. from a kettle. Once through, place your foodstuffs in the box immediately and seal tightly. You can rely on this method to keep food warm for hours.
Alternatively, you can place wadded-up newspapers in a cardboard box, add Styrofoam and a few kitchen towels. Next, place your covered food (direct from the oven) in the box and finish by covering them with extra kitchen towels.
Either of these boxes is helpful not only in keeping your food warm but also in making their storage and transportation easier.
Pack more food in a smaller container
As a rule of thumb, this will result in increased pressure. According to Charles’s Law, an increase in pressure without a significant increase in volume result in an increase in temperature. As a result, this can help keep your dish warm.
How do you go about it?
In your canister or an order-proof bag, you should pack grains, re-bagged energy drinks powder, nuts and other less bulky meals at the bottom. This is recommended as these foods will occupy all the space available at the base.
Next, add cliff bars or other types of food. Then, add bulkier items such as banana chips, cookies etc. Shim them with a bottle of olive oil, dehydrated soup packs and more. Finally, place the bulkiest foods at the top like ramen noodles (you can break them into regular packable shapes, though).
Note, the key lies in packing items based on their bulkiness. Also, other than caloric value, it’s wise to carry highly packable meals. Most importantly, avoid commercially prepared backpacking foods unless the company has a good reputation. This isto prevent you from incurring extra cost, extra packaging and weight for low nutritional valued meals.
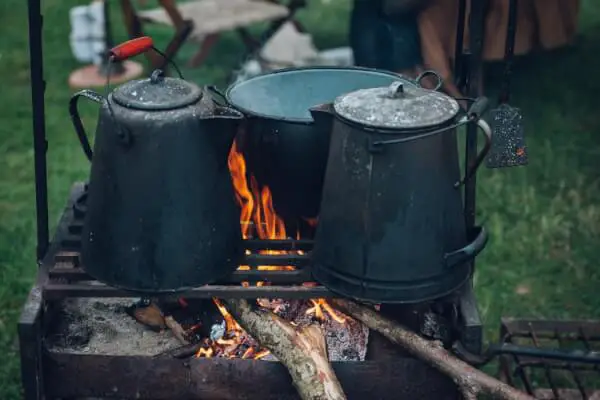
Make use of a stove or a barbecue
If you’re lucky to have a barbecue at the site, use it. Remember there’s a fine line between overcooking and keeping your dish warm for food safety. Good cooks require techniques for holding meals at the right temperatures but still remain tasty and delicious. Here is how to keep your food warm using a stove/barbecue till it’s served.
- Water bath method – If you adopt this method: first, place your food in a shallow pan and cover it, then add some water in another deeper and slightly larger pan. Put the smaller pan in the larger one and place them on a barbecue. Ensure the heat is low but steady. You can replace the evaporating water with warm water if need be.
- Slow cooker method – One of the easiest methods of keeping food warm is cooking on the trail. While at it, adopt a non-electric slow cooker. As their name suggest, your cooking will be slow giving you time for any short activity before the meal is served. In addition, they have a ‘keep warm’ setting that will serve the purpose.
Here are some points to remember as you try these two methods out:
- Water bath method works best while trying to keep food hot. Don’t use it when warming food from a cold state.
- Slow cookers work best with stew, soups, rice and beans.
- When using a stove as the source of heat, consider using a sturdy metallic pan as the outer pan.
- While keeping meat warm using a water bath, add broth or water to the meat to keep it soft.
- While warming fried food, leave them uncovered if possible to prevent sogginess.
- Do not warm food for more than one hour lest they lose their taste and nutritional value.
Round up hikers before serving the food
For it to be fun, memorable and safer, you shouldn’t go hiking alone. Try hiking with family members, friends, and workmates among other individuals and during meals, gather everyone around. This will ensure they get to dig in when the food is still warm.
As an alternative, you can make use of food warmers. They are commonly utilized in buffets to keep food at proper temperatures. For a quick pick and large selection at affordable prices, consider purchasing them from online stores e.g. Amazon.
Adopting any of these methods, you can be sure to retain food warmth for hours. That’s relieving, however, there’s no point trying just to have all your food eaten by bears, is there? To avoid this; keep your meals out of their reach, whether you’re cooking, snacking, eating, performing hiking activities or sleeping.
Here are some tricks on how to keep your meals bear safe.
- Put your foodstuffs in a suitable container/shelter
This involves placing your food in bear-proof locations such as bear-prove canisters, metallic food lockers, bear bags and cabins (if provided). Canisters are the best option and you should consider purchasing one if you hike often than not. All you need to do is: place all the food into the canister, close completely and locate it about 100 yards away from your sleeping area. See our review of the best bear canister to keep bears away from your campsite for more. - Create bear hangs
This is a better alternative in case you don’t have access to a canister or a safe shelter. To create a hang, select a spot (avoid obvious bear trails) between trees that are distanced at least 4 feet from each other and 100 yards from your tent, stretch a rope between them about 12 feet high and then attach your food in a sealed sack at the middle of the rope.
Note, bears are working out these trick in many places and thus creativity is required to keep your hang bear proof. Check out our article on how to hang a bear bag for more useful options. - Avoid cooking or carrying food with a strong aroma
This is so as strong smelling food e.g. bacon, attract bears. To avoid this, select your foodstuff wisely or just carry grains and dehydrated foods. Moreover, avoid taking food into the tent lest a bear rips your campsite open as it forages.
Also, consider inspecting your kids’ pockets and backpacks to ensure no cookie or candies are forgotten or sneaked into the tent. In addition, change your cooking wears and locate them a distance from the tent. - Keep everything neat and clean
This will not only avoid cross-contamination but will also keep off bears. To achieve this, dispose of all food scraps, leftovers, food particles and containers in bear-proof trash containers if provided. Wash all the utensils and cookware at least 100 yards from your tent and disperse dishwater over rocky area away from the tent.
Practicing these tricks will ensure your warm food is not only bear safe but it’s overall a set best backcountry practices.
Summing it up
In conclusion, it can be challenging to retain your meals warm when hiking especially if you go hiking out of season. But as outlined above, it isn’t entirely impossible. If you’re barbecuing food, use the slow cooker method, or water bath to keep them warm.
Consider wrapping the leftovers with layered aluminum foils before storing them to maintain their temperature. In addition, you can make your own ‘hot’ box that will keep your meals warm alongside making it easier to store and transport them.
However, there’s no point trying so hard to keep your meal warm only to have them eaten by foraging bears. Keep your meals bear safe regardless of your hiking site by making use of bear-proof canisters, bear bags, metal food lockers etc.
You can also create a bear hang if need be. In addition, maintain cleanliness by disposing of all food scraps, containers, leftovers and dispersing dishwater on rocky areas, yards away from your tent.
Hiking is all about having fun with your families and friends outdoors. It is important to maintain proper hygiene by observing the basics: cleaning your hands before cooking, after visiting a bathroom, boiling drinking water, measuring food temperature with a thermometer to maintain it out of the ‘danger zone’ etc. Remember, you should take water often, not just when you’re thirsty to avoid being dehydrated and other related illnesses.
So, how about you? How do you keep your food warm while hiking? How do your ensure your meals are bear safe? Share your methods in the comments section.
For other options on how to choose the best cooler bags, check out our article on this topic.
Featured Image Source: https://unsplash.com/photos/F0HUEpuXsoU