Going on hiking and camping trips are one of those activities that, if you don’t organize yourself properly, it can turn from the best experience you would ever had to the most unpleasant and even dangerous one.
As pretty much everything in life, it will all depend on how much time you spend planning everything beforehand and, of course, one of the major aspects you should always keep in mind is your food.
Since you will be constantly moving, the last thing you want is a 90-pound bag on your back, rotten veggies or, even worse, a bear stealing your dinner. So, we wrote this DIY backpacking food article to help you have a blast on your upcoming expeditions.
Deciding what to pack
Preparing some peanut butter sandwiches and buying a bunch of snacks might be enough for a camping night with friends and family; but if you are planning a long, outdoor tour, there are some aspects that you have to take into account about homemade backpacking food. Check out our useful guide on how to plan your next backpacking trip for more information.
Length of the journey
How much time will you spend on your trip? This is the perfect time to be realistic and cautious.
If you are going on a 5-day journey, you should pack enough food for 6 days. Better safe than sorry.
Weight of your backpack
Remember that for long trips you need to take a tent with you. They are certainly not that light and, given that carrying half of your weight on your back may not be the best option, you should try to pack your meals as light as possible. For the top ultralight backpack, check our reviews to help you with choices.
Nutrition of the food
Doing outdoor activities will make you lose a lot of calories, so you have to make sure that your food has enough nutrients that will refuel your body and give you back the energy needed to keep going.
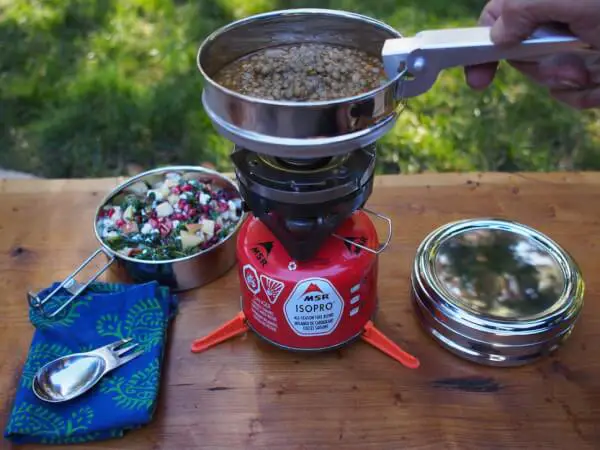
Time to cook
After a long day of walking up and down the mountains, the last thing you want is to spend two and a half hours cooking. Having food that only needs boiled water to be ready can help you out with this.
Refrigeration free
Even though taking your fridge with you would be absolutely helpful, that is impossible.
Make sure you pack meals that do not need refrigeration to avoid eating rotten food that can be dangerous and will make you finish the expedition earlier. For a must-read article on how to prepare no-cook camping meals, see our guide as reference.
Selecting what to pack
Thanks to the previous information, you know that to have the best homemade backpacking food, you should:
- Store enough food so you don’t run out of it in the first three days;
- Pack it as light as possible to prevent backaches;
- Select nutritious food;
- Make sure it is fast and easy to cook;
- Pick food that does not require refrigeration.
Now, it is time to decide exactly what to pack. The best way to organize this process is by making four different lists – one for each meal of the day and one more for snacks – and by placing check marks to keep control, just like most of us do when buying groceries in the supermarket.
Breakfast
Let’s start from the beginning. Most people say it is the most important meal of the day and, since it is the first one, it should be filled with carbs that give you the energy you need to start your activities; so, oatmeal packs are definitely the best option for you. They are cheap, light, small and you only need to add hot water to get it done.
However, some people think that oatmeal has little to no taste, so if you want to add something sweet yet healthy to enhance its flavor, just throw in some dried or dehydrated fruits. Apples, pineapples, peaches, coconuts, cranberries, dates and apricots are all good choices because they have a lot of natural sugar, micronutrients and antioxidants.
Additionally, for long expeditions, you should always take with you some prunes since they are natural laxatives. Again, better safe than sorry.
Pack some nuts along with the oatmeal and the fruits. Walnuts, peanuts and almonds are some of the most popular and they are a good source of vitamins and potassium.
|
Breakfast |
||
|
Oatmeal |
Dried/Dehydrated Fruits | Nuts |
|
Apples |
Walnuts |
|
|
Pineapples |
Peanuts |
|
|
Peaches |
Almonds |
|
|
Coconuts |
Hazelnuts |
|
|
Cranberries |
Pistachio |
|
|
Dates |
||
|
Apricots |
This is our version of the list mentioned before. You can copy it or make another one with your own choices. Just as a shopping list, check off each item after it is packed. This will make the list more organized and, if you happen to forget what you put on your bag, you could always take a look at it. A piece of cake!
Lunch
It’s lunch time! You need food to keep the track and refuel your body for all the walking you’ve done so far. In order to do that, protein, calories, fat and carbohydrates are your best options. Smoked meats, salami and tuna have the necessary proteins your body needs, you don’t have to cook them, and none of them need refrigeration.
For the calories and fat, you can pack strong cheese that does not require refrigeration to last. Aged Gouda, Parmigiano Reggiano, Pecorino, Aged Cheddar and Appenzeller are a few options you can consider taking with you.
As you may notice, all those types of cheese are hard so they will not melt, and they are aged so you can take them with you for long expeditions. Different kinds of cheese, like Brie or Camembert may be a good choice for short journeys, too.
Now that you’ve packed proteins and fats, it is time to deal with carbohydrates. In this case, sandwich bread and bagels are good options; however, remember that space is a thing when backpacking, so the best option for long expeditions are tortillas. They are cheap, flat and light, which is basically what you are looking for.
|
Lunch |
||
| Protein (meat) | Fat (cheese) |
Carbohydrates (bread) |
|
Salami |
Aged Gouda |
Sandwich |
|
Tuna |
Parmigiano R. |
Bagels |
|
Smoked meat |
Pecorino |
Tortillas |
|
Aged Cheddar |
||
|
Appenzeller |
||
|
Brie |
||
|
Camembert |
The best part about this list is that you can either eat each thing by itself, or take a 5-minute break to prepare a proper sandwich or wrap, depending on your bread choice.
Snacks
Even though you might be tempted to throw in your bag only a bunch of candy, cookies and sugary stuff, the most important aspect you should have in mind is eating snacks that power up your body. So, to begin with, pack some energy and protein bars. Depending on the brand, they can contain chocolate or nuts, making them healthy and delicious.
Now, it is time for candy, cookies and sugary stuff. Crackers may be the best option since you can just eat them alone or even put something on top to make them sweeter.
What would you use to cover up those crackers? A good option could be peanut or almond butter. You can smear your sandwiches and cookies with it, and it also has high levels of calories, protein, sodium and fat. Melting some chocolate would be a good idea, too.
Finally, packing some honey will give you the natural sweetener you will need for your drinks and breakfasts.
|
Snacks |
||
|
Crackers |
Granola bars |
Spreadable |
|
Energy bars |
Honey |
|
|
Protein bars |
Peanut butter |
|
|
Snack bars |
Almond butter |
|
|
Nutritious bars |
Chocolate |
Dinner
Preparing dinners can take a lot of time and energy and, of course, if you have been walking or hiking the entire day, all you want todo is eat as soon as possible. Fortunately, you just have to keep reading in order to know how you can have dinner on the trail, in no time.
For all those backpackers that are not willing to spend too much time cooking, instant dried meal packs are exactly what they need.
The most popular ones you can find in the supermarket are:
- Instant noodles. They are easy to prepare since all you have to do is add some boiled water, mix and wait from four to eight minutes. Instead of buying noodles that are sold in cups or boxes, try to find the ones in packages to save space.
- Instant rice. The process of cooking instant rice is very similar to the previous one. However, make sure you cook the rice for more time – from nine to thirteen minutes. Also, make sure you buy a type of rice that has any kind of seasonings to keep your food flavored.
- Dried vegetable packs. Tomatoes, corn, green beans, carrots and pretty much any other vegetable are sold dehydrated on stores, so take a look at this option for a healthy meal. There are some brands that sell a mix of veggies that would be perfect for backpacking and, just like the rest of the meals from this list, adding boiling water for a short period of time will rehydrate them.
- Couscous. It is high in fiber, fast to cook and has alight texture. It is the best alternative to rice, and it is even better because you can cook it in just five minutes.
- Macaroni. It is small, compact, filling and you can prepare it by adding hot water and covering the top for at least ten minutes.
- Instant potatoes. This is a pack with smashed, dehydrated potatoes that can be rehydrated by mixing them with hot water or milk. As you may know, potatoes have a lot of carbs and sodium that areexactly what your body needs, so it is basically a must for every backpacker.
- Spices. Not packing any spices at all is one of the most common mistakes, so make sure you take with you at least the basics: salt and pepper.
All foods mentioned before can be combined with some of the otherproductsyou packed to make a proper meal. Preparing some macaroni with cheese and salami, or some rice with a mix of veggies and tuna will definitely enhance your dinner’s flavor.
|
Dinner |
||
|
Base |
Side dishes |
Spices |
|
Instant rice |
Instant veggies |
Salt |
|
Instant noodles |
Instant potatoes |
Pepper |
|
Macaroni |
Bacon bits |
Garlic powder |
|
Couscous |
Salami |
Oregano |
|
Spaghetti |
Tuna |
Paprika |
|
Pecorino cheese |
Curry |
Again, this is only an example of what we believe are the best products you can take on your trips. However, you are free to add other things and see how it goes for you. Just keep in mind the aspects we previously discussed and everything should be fine.
Best way to pack your food
Even though feeling like a chef for having the alternative to choose and mix the ‘ingredients’ you want to eat on the trail sounds great, what if you could categorize all your meals at home?
Follow these simple steps to get an organized backpack that will make you save a lot of time when eating on your trips.
Classify the food according to meals
Put on your table everything you have bought and sort them by meals. Guiding yourself with the lists you filled before, put together the dehydrated fruits, nuts and oatmeal in the “breakfast spot”. Then, place the meat, the cheese and the bread in the “lunch spot” and keep doing the same with the rest of your food.
Put the food in bags
Fill different zip-lock bags with exactly what you will eat each time, dividing them by meals. Now, let’s say that you are packing your dinner and, for your first expedition night, you want a light meal, so you grab some couscous, a few bacon bits and dehydrated tomatoes, and throw them all in one bag.
Then, for your second night you want something heavier, so you fill another bag with macaroni, instant potatoes, some oregano, salt and pepper. That’s the process you should do for the rest of your meals. When you finish, put all the bags again in their “spots” to keep everything organized.
Label each bag
Now that you have all your food set inbags, it is time to identify them. Using tape and a marker, name what is in each bag, what kind of meal it has and the day you are planning to eat it. For instance, for your first lunch, write on a piece of tape “Friday – Lunch – Tuna Sandwich”, and stick it to the bag. Repeat this process for each bag and, instead of organizing them again by “spots”, do it this time by days.
Put the bags together
Next, grab a bigger zip-lock bag, identify it by day and fill it with the corresponding smaller bags. Now, let’s say that you want to pack your Sunday’s meal, so you write on a piece of tape “Day 2 – Sunday”.
Then, you attach it to your big bag, and load it with the corresponding smaller breakfast, lunch, snack and dinner bags. Once you finish, order them day by day.
Pack them in order
Finally, it is time to pack them in your bear barrel or stuff sack. The best way to do it is by placing first the bag that has the meals for your last day, and at last, the one with the food for the first day. This way, when you look for your food, the “Day 1” bag will be on top and the “last day” one will be on the bottom.
Following these steps will make you save a lot of time when looking for your food on the trail, since all you would have to do is picking the bags day by day and taking out the corresponding meal. See also our review of the top backpacking food in our earlier article.
Before you go…
There are few more useful tips you can consider when backpacking your homemade food. Some of them are:
- Go for a short trip first and be aware of how much food you need. Keep that in mind when backpacking for longer expeditions.
- Buy your food as fresh as possible since it will not be refrigerated for a long time, and old products can go bad quickly.
- Freeze your food and drinks before packing them to make them last longer.
- Before you go to sleep, put your bear barrel or stuff sack on a high spot, like a tree. This will prevent it from being stolen by a bear or any other animal.
In conclusion, good planning is the key.
Even though this organized and elaborated process might seem long, it is actually really easy and can be done in only one night. Always keep in mind the following questions when deciding on your food: How light is it? How many nutrients does it have? And, how much time would you take to cook it?
Remember, it will always be better to spend time at home preparing everything the night before you go on your trip, than running out of food or packing random stuff that will not refuel your body with the nutrients it needs. To find out more tips on backpacking food, see our must-read piece on this topic.
Featured Image Source: https://unsplash.com/photos/jMbpZh6QrK4