How many times have you found yourself in need of a quick and effective sleeping bag zipper repair? In fact, we would be willing to bet you couldn’t count all the times a zipper has gone rogue on your watch, causing you to curse at the heavens and wonder what you did to deserve such a plight.
When you go camping, a good sleeping bag can be your best friend. It can offer you a warm embrace, comfortable shelter, and protection from the elements. No matter the climate or terrain, when you’re camping you will want to bring along a decent sleeping bag because long days on the trails can leave you exhausted. There’s nothing quite like a soft place to lay your head after an extremely strenuous day braving the outdoors.
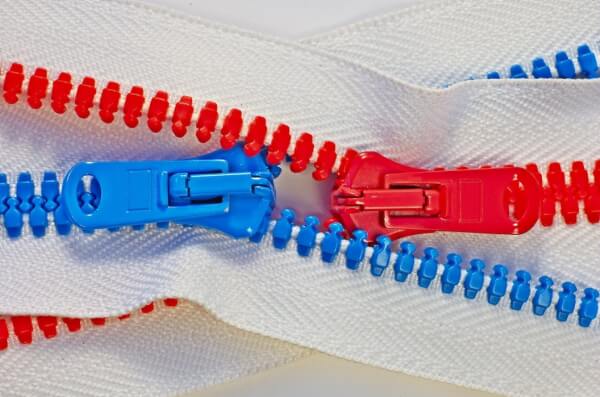
However, your sleeping bag can only operate at its utmost efficiency when all of its pieces are in order. And one of those pieces is the zipper. That small bit of technology can make or break your sleeping bag and, unfortunately, we as a species have yet to invent a fail-proof, invincible zipper.
See also: Tent Zipper Repair: It’s Easier Than You Think
It can be easy to panic when a zipper breaks, but it doesn’t have to be the end of the world. Knowing how to repair the zipper on your sleeping bag can save you time, money, and a lot of headaches. With this guide, we will outline the steps you need to repair your own sleeping bag zippers.
How to Repair a Sleeping Bag Zipper
To repair a sleeping bag zipper you should perform several actions.
Diagnose the Problem
Zippers can stop working for a variety of reasons. It’s important to understand why your zipper isn’t working so you can decide on the best course of action for repairing it!
Sometimes, dirt and dust can get into your zipper’s teeth, warping them and preventing them from connecting properly. If debris is the issue, you can determine how serious the problem is by cleaning the debris from the zipper. If clearing the debris fixes your problem, well, you’re all set. If it doesn’t, try going down the list of other possible problems.
More often than not, the issue lies with the slider on your zipper. The slider is the mechanism that slides (go figure) up and down, connecting the two sides of the zipper to one another. If that slider gets worn out or warped, it can stop doing its job well.
Frequent use can wear a zipper out, making it unable to remain closed. Other times, a tooth might have fallen out and the sides of your zipper are no longer able to attach themselves together.
Pack the Right Tools
There are a few tools you’ll need to have on hand if you want to repair your sleeping bag zipper on the fly. You’ll want to keep a set of pliers with you for your camping adventures. Pliers are super versatile and they don’t take up much room, so it’s a good idea to always have them in the case of an emergency — like a broken zipper!
If you’ve cleaned your zipper and realized that the dirt stuck in the slider caused it to stretch and warp, the pliers will be just what you need to try and remedy the situation. Often, a slider will stop shutting your zipper because it’s been loosened up too much and tightening it with pliers can usually get it working like new again.
Remember to only tighten the slider a bit at a time. You can always tighten more, but it’s easier to do a little at a time than to tighten it too much and have to loosen it again.
Another great tool to bring with you on any outdoor adventure is a zipper repair kit! That’s right, the gods of the outdoor industry know that you’re likely to encounter a broken zipper at some point. That’s why they’ve put together several zipper repair kits that include pretty much everything you could need to replace a broken zipper in the field.
These zipper repair kits include zipper sliders and pulls of many sizes. Luckily, on a sleeping bag, the zippers are not typically sewn into the seams of the bag so you shouldn’t have to perform any sewing miracles. All you’ll need to remove the stopper from the bottom of the zipper is those trusty pliers you definitely brought.
There is no shortage of repair kits available for purchase. These kits usually don’t cost more that about $11 and they come with several pieces so it’s definitely worth it to keep one on hand during your camping trips.
If for some reason you don’t have a kit of zipper pulls and sliders hanging around, you can always borrow one from another item that has a zipper. We wouldn’t recommend stealing the zippers off fellow campers’ sleeping bags, but it’s also an option if you’re feeling very rebellious. Otherwise, the zipper from a jacket will do.
Tighten with Pliers
When tightening a zipper, it’s better to tighten a bit at a time and take stock of your progress rather than tighten too much at once. If you do find that you’ve tightened the slider too much and it won’t slide properly, you can always slowly stretch it back out by inserting something into the slider. It’s just not much fun.
To tighten a zipper slider that has been stretched out from debris or overuse, place your pliers on the outside of the slider with one side on the left of the slider and one side on the right. Squeeze gently and then do the same on the inside half of the slider. Your pliers should be held parallel to the slider, not perpendicular.
After you’ve tightened each side of the slider a bit, test it out and see if it keeps your zipper shut. If it still isn’t tight enough you can repeat those steps until you determine your slider is able to adequately connect both sides of the zipper’s chain and keep it closed.
Replace with a Kit
If your slider is too worn out to be fixed by mere tightening, grab your trusty pliers and a repair kit and go to town. Zippers on sleeping bags will typically have a metal stopper at the bottom of the zipper that keeps the slider from sliding off into infinity. Your first step will be to gently remove that stopper with your pliers.
Then, you’ll search through your repair kit to find a zipper slider with a pull that looks to be a good fit for the zipper you’re repairing. You’ll slide that slider (has the word “slider” started morphing into something weird to you yet?) up the zipper and attach a new stopper from your zipper repair kit. Voila! You’ve just replaced the slider.
The easiest way to attach a new slider is by feeding each side of the chain into the top of the slider (the curved part) and out through the bottom. Make sure you’re installing the slider the correct way! Guiding the teeth through can take a little while since sliders are made to be tight, but don’t worry, you’ve got this.
Most of the time sleeping bag zippers are not encased in seams on both ends like the zippers on backpacks or tents. If you happen to have a super rare sleeping bag that does feature a zipper like this, you’ll need to rip the seam around the stopper in order to remove it. A seam ripper can help you do that and a needle and thread will help you attach the new stopper to the bottom of the zipper.
To remove an enclosed zipper stopper, use a seam ripper to remove the seams around the stopper. Be sure to keep the bottom of the zipper attached to the fabric of your sleeping bag. You can pull the seam apart on your own but using a seam ripper is more precise. If you tear up the fabric around the zipper, you’ll end up having to replace more than just the zipper.
Skip the Professional
Unless your zipper is ruined beyond repair, you can avoid visiting a seamstress or replacing your whole sleeping bag. Seamstresses can charge high prices for replacing a zipper. Eventually, it might be cheaper just to replace your sleeping bag altogether. We are trying to help you avoid all of that!
These methods for repairing or replacing a zipper on your sleeping bag will save you the time and money. Plus, more often than not, you might not be near a seamstress when your zipper gives out.
If you’re camping in the woods, you need to be able to repair your zipper yourself with the materials you have on hand. A sleeping bag is a necessity when camping so you can’t go without a functional one! Thankfully, this guide should have shed some light on how to complete these repairs yourself.
Other Sleeping Bag Fixes You Can Do Yourself
There are several other improvements you can do with your sleeping bag.
Patching a Tear
Aside from a faulty zipper, a rip or tear is the most common issue you’ll encounter when using your sleeping bag. Since you use sleeping bags outdoors, they can sometimes be exposed to sharp branches or rocks. The outdoors are relentless and even when you take the best care of your gear, tears happen.
To patch a tear, you’ll want to have a needle and thread as well as duct tape. These are three things you can always benefit from carrying with you, no matter the type of trip. You’ve heard that duct tape fixes anything, and it definitely comes in handy at the campsite.
First, you’ll need to make sure you haven’t lost too much of the stuffing in your bag. For some reason, the stuffing in your bag will gravitate toward the hole and try to escape. Just shove it back inside, taking care to not rip the hole further, and ignore the guilt.
Then, fold the tear inward so that the frayed sections are hidden inside and the duct tape can stay attached more easily. Place a piece of duct tape about the same size as the tear over the damaged section.
Fold that piece of duct tape inside like you did with the tear itself. Then you can take your needle and thread and sew the sides of the duct tape together over the indented part. Tie the thread in a knot so it won’t come unraveled and cut off any excess. You can then cut off the excess duct tape so your work looks a little better.
There you go! It may not be the most beautiful job, but now you won’t have to worry about your tear getting bigger.
Laundering a Dirty Bag
Your sleeping bag should hopefully last you for years so you want to make sure you’re taking good care of it. It’s too essential a piece of gear to have to replace often. No one wants to throw away money on a new bag when you could keep your current bag going strong.
To avoid getting your sleeping bag too dirty in the first place, you’ll want to keep it protected from the ground as best you can when you camp. Use a footprint in your tent so that your sleeping bag is never directly touching the dirt or sand on the ground.
You also should wear clean clothes when you zip yourself up in your sleeping bag. If you’re wearing stinky, sweaty clothes, that must is going to get trapped in your sleeping bag and that won’t be pleasant for anyone involved. There are also sleeping bag liners available that will keep your sleeping bag from coming into direct contact with your skin, keeping it cleaner longer.
If you do find that your bag needs cleaning, decide if it can be done by hand or if a full wash is in order. Spot cleaning a bag is gentler and you won’t be exposing your bag to unnecessary damage that can occur in a washing machine. To spot clean, just use soap and water and a cloth or toothbrush on the sections that look the dirtiest. For more easy tips on how to clean a sleeping bag, see our must-read article.
If your bag has undergone a rough experience, it may need a full wash. You should never dry clean your bag, though! Some of the chemicals in dry cleaning can damage the outer shell of your sleeping bag, lessening its functionality.
It’s best to follow the manufacturer’s washing instructions to get the best results. You’ll need to find a non-detergent soap that is designed for washing items that have stuffing, whether it is down or a synthetic material. Use a washing machine that is large enough to hold your sleeping bag and that doesn’t have an agitator that can hurt the seams of your bag — a front-loading laundromat washer is a good choice.
Drying a sleeping bag will take a long time but you must make sure you let it dry thoroughly and regain its shape and stuffed-ness as best you can!
Don’t Sweat the Small Stuff
Now that you are more familiar with repairing a sleeping bag zipper as well as other care techniques, you can breathe a sigh of relief. There is no telling how many unexpected things will happen on any given camping trip. That’s probably why these things are considered “unexpected” in the first place.
A bear may eat your supplies, you might fall in the water and soak through your clothes, a multitude of events can occur. The best news is, your zipper breaking does not have to be one of these trip-ruining occurrences.
When you are prepared for a zipper emergency, you can look up at the vast universe above and laugh smugly because you’ll be able to make that particular repair yourself in a jiffy. “You can’t rattle me that easily,” you’ll exclaim to Mother Nature. Because you packed pliers, a repair kit, and sewing utensils. And because you’ve read this guide. For more useful and easy instructions on how to repair a zipper, find out by reading our earlier article on this topic.
Now go out there and adventure. The wilderness awaits you, and so does your sleeping bag, because it has your back, and now you can have its back too. So what do you think about repairing a sleeping bag zipper on your own? Have you done it before? The comments section is below.
Featured Image Source: https://unsplash.com/photos/plwud_FPvwU