Are you going camping anytime soon? You have probably made a long list of gears to buy for your outing. This is when you realize that the total cost is considerably higher than you initially thought. It is always an issue to most people when buying equipment at a high price that does not end up not meeting your specifications.
What if you had a way of making some of the equipment you required? To make this a reality, we have scoured the web and produced for you this list of DIY backpacking gear.
We recognize the fact that for camping to be exciting and unforgettable, it does not have to be sophisticated and expensive. Some of the stuff you need can be made from the ordinary and simple possessions that we have.
See also: Car Camping Checklist: Beginner’s Guide to Fun Car Camping
Some of these items can be made while still at home, while others can be made while you are on your way to or during camping. They are made just when their need arises. Through this, you do not have to worry about packing everything all at once. This saves valuable space and makes your gears lighter. There is no need to pack the “whole house” in simple terms.
There exists a range of items that you do not have to buy while going camping. These include cooking items, bags for sleeping (you can stitch one by yourself!), furniture (there is a lot of wood out there that can be used) even tents can be sewn at home. To get you off, here are some of the items that can be made at home which we hope will make your camping super fun and low-tech.
Pant bag for roasting sticks
Your camping will not be complete without having to roast meat from the jungle. Nothing beats the excitement that comes with going hunting for wild meat during camping. This might be prohibited in some areas, but when it is allowed, you cannot resist the temptation of trying it out.
Hot dogs together with marshmallows also form very good foodstuffs for roasting. The problem arises when it comes to storing the roasting and cooking sticks during and after use. Putting them in polythene bags is futile as they easily tear and are an environmental pollutant.
To keep track of them, you need an impenetrable bag that you can readily make at home just as any homemade camping gear. All you need is an old pair of jeans. The environmentalists advocate for reuse, and this item perfectly fits the purpose.
What you need
- A pair of jeans not being worn
- Sewing threads
- Ribbon for “handles.”
- A pair of scissors
- Pins for safety
- You can choose to use a sewing machine or sew it by hand if you so wish.
Instructions
- Use the longest stick to determine the length of clothing you will need. Use the longest straight part of the leg. Remember to give some extra allowance.
- Close the base of the cut portion by sewing it. Choose any stitch type that you fancy. We recommend you do not turn it out and leave the hem outside.
- You can now turn the pant on the reverse side. Fold it uniformly along its opening and sew the edges all round.
- Turn the leg back to its normal side and cut some sort of slit carefully on either side.
- Cut pieces of the ribbon and pass through one of the slits to the other. Once through, tie the edges together.
- You can choose to apply any decorations you desire on the bag, but those are not necessary as it is usable at this stage.
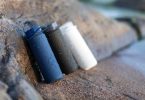
Bottle lamp
When going camping, one thing is for sure; you will need a source of light no matter where you go. Walking in the woods at night, one comes across all sorts of creatures that you probably do not want to step on. A bottle lamp is therefore one of the homemade camping gear that you would not have to buy.
A homemade lantern would not be so good to be used inside your tent as compared to Light Emitting Diodes and fluorescent lights. However, it is perfect for your outdoor lighting. Some people find the LEDs and fluorescents to be too reminding of the life they are trying to get away from (the city life) and hence do not consider packing them.
The lamp is simple and uses very ordinary stuff that one always has. Who does not have beer bottles (glass) and that old mop? It is that simple.
What you need
- Glass beer bottles
- A screwdriver
- Hammer
- Carefully removed beer caps
- Mop head strands
- Oil (that can burn)
Instructions
- The beer caps that pop off are perfect for this purpose as they fit back properly than those that are twisted. Using a sealant will not be necessary in this case.
- Use the screwdriver to make a hole on through the cap. Ensure the trimmings are not cut off. They will later hold the wick in place. A smooth hole will not produce the desired end results.
- Properly clean the old cotton mop to remove any residue detergents. The mop has to be made of pure cotton. Maximum absorbency is needed for the wick.
- Pass the strands of cotton through the made hole. Make sure it slightly fills the hole; not too much and too loosely. There should be some room for adjustments as the wick will continue to burn. Give an appropriate wick length. You do not want it to burn out during camping. The amount of light produced and oil used up depends on the length of wick that sticks out above the cap. Provide a reasonable balance between the two.
- Fill the bottle with oil making sure not to fill it completely. The oil might heat up, blowing up in the process.
Fire starters
Imagine waking up in the morning, and you cannot start the fire just because the lighting twigs are too damp. Then you remember you have to use a dryer which happens to emit fumes you cannot withstand. This is a scenario we once found ourselves in when we went camping upcountry during the rainy season.
Using gasoline is also quite expensive and dangerous too when not properly handled. This is not a very good recipe for a low-tech and successful camping.
To make a fire that will not blow up on your face and save you from the hustle of looking for dry wood on a wet morning, we have provided you with the best solution.
What you need
- Soy candle
- Coffee grounds
- Dry ground
- Cookie sheet
- Egg carton
Instructions
- Spread some coffee grounds on the cookie sheet.
- Oven dry at 2500C (ensure you drive out all or most of the moisture)
- Pour some dry ground into the egg carton. Add small pieces of filters into the ground. For more efficiency during service, stick out sticks of matches.
- Pour the melted wax on each egg holder. Allow it cool and separate each egg cup.
- When you want to light a fire, just ignite the match.
The Cat stove
Almost all campers have to prepare a meal once in a while during the camping period. Making a homemade camping gear that you can use to cook your meals might look challenging when viewed from a broader perspective.
A decent cooking stove goes for a decent amount at your shopping stores. However, with the Cat Stove, you are sure to save a decent amount of money by just using ordinary items. Most of us have cats which we feed, right? You would be too cruel not to feed it. This stove is made from the cans of cat food.
This stove is very light and costs next to nothing to make. The steps involved are also few, and almost anybody can make one. The stove also utilizes itself as its support during cooking. The only drawback it has is probably its inability to be used to simmer food and also sloshing in the alcohol fuel during stirring of food.
What you need
- A three ounces can of cat food
- Hole punch
Instructions
- Using the hole punch, make holes round the can ensuring they are at the can lip. The holes should be smaller than the spaces between them.
- Make another row of punched holes, ensuring they are between two of the previous row.
- For a snuffer, use a bigger can of cat food to cover the one that has been punched.
- Fill the stove with denatured alcohol such that it does not spill from the holes.
- When lighting it, pass the matchsticks through the holes and not at the top.
- Use the snuffer to put out the flame once you are done cooking.
Do check our our must-read article on how to assemble a desert survival kit to learn more.
Bugs spray
Bugs can really ruin a perfect camping outing. The woods and grasslands are generally composed of all manner of bugs, mosquitoes and ticks included.
The situation worsens when one pitches a tent close to a water body which provides a natural habitat for bugs.
- Sprays for fending off such bugs are some of the homemade camping gear that we have outlined. You do not have to buy any of those sprays used to keep the likes of ticks and crickets at bay. With natural ingredients, you can make an anti-bug at your place.
- To keep off ticks, mix water and tree oil in the ratio of one to one (1:1). Sprinkle the mixture onto your pants, shirt cuffs, and socks and if any, shoes.
- Mosquitoes, however, require a different approach.
- Boil some water and add hazel extracts.
- Add to this mixture various concoction of lavender, clove, cinnamon rosemary. The strength of the spray depends on the amount of these added.
- In the absence of these oils, you can use a mixture of hazel and rubbing alcohol.
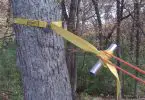
Recycled tents
Buying tents periodically when you are going camping is not an expense many of us want to incur. You are dreaming of one day owning your tent that is cheap and meets all your requirements to the point. You do not have to feel alone. There are many of us out there. For tips on how to make a DIY tarp tent, see our earlier article on this topic.
There is no better feeling than that of having a homemade backpacking gear that you invested all your efforts and time in making. It also reduces the toll on landfills by disposed of tents all over town one your tent malfunctions. There are only a couple new items that you will need, and you will be good to go.
What you need
- Outline what you will need your recycled tent to achieve for you. Fine tuning it to meet your specifications is one of the numerous advantages you get by making your own tent.
- You need an old tent/discarded tent. Ensure it is still in a good state. You do not want the tent to crumble under you when the weather becomes extreme while camping. It should be big enough to provide under parts that you will require.
- Tensioning of parts together is crucial too. The tent should be strong enough to withstand these.
- You need washing detergents.
- Tape measure
- Strands of strong strings
- A pair of scissors.
- Waterproofing agents are also crucial.
Instructions
- Wash the tents thoroughly until they are sparkling clean. Use normal detergents. Remember the aim of this process is to cut down costs as much as much as possible.
- The washing process probably washes away the waterproofing properties of the tent. This is one of the fundamental characteristics of a tent. Water should not penetrate through it at any time.
- Separate the tent parts at their seams. These should be as large as the tent can allow. You will fit all these together later. Do not throw away the zippers as they will be used to make the openings.
- Use the tent design you had chosen to create a model of what you want it to look like. You can do this by laying out on the ground all the stuff you might want during camping. Mark out the area that best fits all the gear and your movements.
- Use the pegs to mark the four corners, making sure that the sides that need to be parallel are so. Adjust the heights too as you progress along. Be keen not to make it too high up or too low down. Tune it to your imaginary movements.
- Give some allowances for the doors and windows that you will include later. You should be able to fit through!
- Wrap the tent material you have got around the pegs. Use the zippers to make the doors together with the windows.
- Sew the seams in place and watch your tent take shape! Can be either by hand or machine.
- Your tent is now ready. It may not look great, but it will do the job just as any new one would.
Backpack cooler
Let us take this scenario: you have gone camping somewhere in the tropics where temperatures reach highs of 40+ degrees. There is no way the cold drink you brought along will stay warm for the duration of your stay.
With this homemade backpacking gear solution, you are assured of a very cold drink during and after the camping. The total cost is also very low as does the weight.
What you need
- Thermal bags (two of them)
- Cold packs
- Weather blanket (Mylar)
- High-density duct tape
- Pair of scissors
Instructions
- Cut the handle off one of the thermal bags, then in its center, using the scissors.
- One side that had been cut is to be taped, excluding the top.
- Place this into the other half bag. Close the long side with tape.
- Provide a double thickness to the wall
- The second bag is made in basically the same way. The only difference is the single thickness layer. It is the one responsible for the dispersion of coldness throughout the bags.
- Put all the stuff you want to remain cold like eggs, cans of soda; you name it into the smaller bag.
- The ice pack goes into the thermal bag, with the small bag into it. Place more ice packs round the bag.
- All these are placed into the Mylar bag, and you are ready to go!
Walking stick
Going hiking? Camping in the woods? Then you really need a walking stick to move along. Walking sticks aid in reducing your weight that is supported by the knees as you walk. Without one, be sure to get tired pretty fast out there.
Walking sticks are some of the homemade backpacking gear that you do not have to buy. You do not have to worry about slipping while crossing streams, walking over logs and loose rock. For easy instructions on how to make an excellent walking stick, check out our article to find out.
Making a walking stick is pretty straightforward. It can be as easy as just identifying a strong piece of wood that is of the right length, and that is it. You can, however, decide to make it a little fancy by taking it through extra steps.
What you need
- A straight, strong and crack free stick. Ensure it does not surpass your armpits and preferably 2 inches thick.
- Pocket knife
- Sandpaper
- A lace (can be from old shoes)
- A drill
- Wood varnish
Instructions
- Remove any twigs if any and bark using the pocket knife. Make the sharp parts smooth.
- Hold out the stick in a hiking position to locate where the grip is. To better the grip, groove (shallow) places where the fingers hold.
- Use the drill to make a hole ½ inch for the wrist loop.
- Sandpaper the surface of the stick, this makes it smooth.
- You can decorate the stick in any way you want, and then leave it out to dry as it cures.
- Apply the varnish to prevent rotting after some time. You will be able to use the stick over and over again.
- Pass the lace through the drilled hole and loop it to fit your wrist. Knot the loose ends.
- Your amazing stick is now ready. You did not have to buy one at the stores!
Final Thoughts
Making your own backpacking gear is a fun activity for camping. That feeling of satisfaction that you made that all by yourself is unrivaled. You can design items to your specific requirements unlike buying where you make do with what you get.
The do it yourself backpack items are a great way of cutting down on costs of hiking and camping. You use resources that you might already be having or can cheaply acquire at the nearest stores. By reusing of resources, we are also saving the planet from pollution. Recycling and reusing reduce the effects of landfills on the environment.
We are always committed to enabling people to have self-belief in their capabilities. Everybody can make anything for him/herself provided the right information and procedures are availed to them. The ability to be self-reliant and dependent helps out a great deal especially when you have limited money, but you have to go camping anyway.
To help trigger the immense potential in you, we have outlined various examples of DIY projects that you can implement on your next outing. Cooking stoves, walking sticks portable furniture are just the examples of some of these you can implement.
We have included the methods of going about realizing the project as well as the materials you need.
Some of these are: pant bag for roasting sticks, a bottle lamp to illuminate your campsite at night, fire starters to ease the morning fire lighting blues, a cat stove to make your meals cheaply and easily, a homemade bug spray to keep annoying insects at bay while you sleep, recycled tents to keep the rain while saving a lot of bucks, a back cooler to keep you refreshed with an ice cold soda when temperatures become unbearable and a walking stick to ensure you do not wobble as you cross that river. Do check out our other easy DIY camping gear to save money.
You can choose one of the projects that suits you to try out. You can also implement all of them at once, and you will not have any regrets.
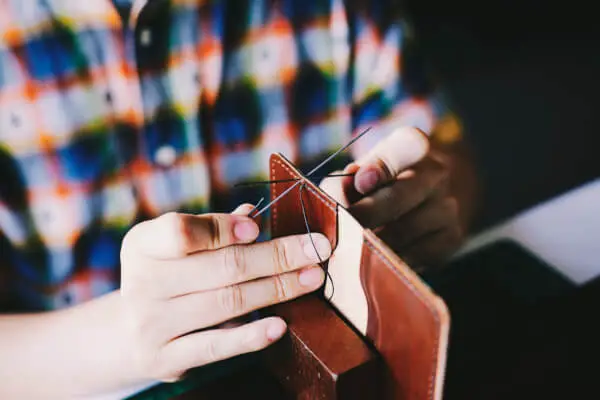
Featured Image Source: https://www.pexels.com/photo/person-knitting-brown-leather-textile-982657/