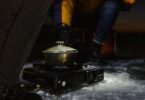
If you love cooking and camping, you already know that these are a match made in heaven. There’s nothing like preparing and eating your meals in the wilderness. The fresh air will enhance the flavors a million times over, and your taste buds will be ever so grateful.
Must read: DIY Backpacking Food: An Organized Process That Will Make Your Excursion More Enjoyable
But if you want to add extra taste to your food, you need a DIY camping spice kit. It’s easy, affordable and great for satisfying all quirks and preferences. Don’t know how to make one, or what you can use? That’s why we’re here for, so read on.
Some DIY Kits You’ll Love
There are several kits you can try out, and you can start with our projects below. We love diversity in our cooking because versatility is one of our top priorities.
The M&M Kit for Dry Ingredients
This one is great because you can squeeze in different spices inside the M&M tube. You can make more than one such kit, and each can have a different theme. The main advantage is that you can organize your spice kit so you’ll always find the flavors you need fast.
Other advantages relate to the M&M tubes, which are easy to find in literally any supermarket. These containers are light and resistant to scratches, they’re easy to open and waterproof. So without further ado, here are the materials you need:
Materials
- Pack of M&M’s. No surprise here.
- You can select different types of straws depending on what you want to put in your kit. Very large straws are great if you’ll make just a couple of blends. They’re more resistant, but they lack diversity. If you choose smaller straws, you can squeeze in more, but they won’t be as sturdy.
- You’ll be cutting things!
- That’s for assembling the packs.
- Colored tape. This is optional if you’re not making many different flavors for different meals. Otherwise, it’s a great idea to label your spices so you know what you’re using.
- The spices you’ll use. Think of all the great flavors you want, yum!
Instructions
After gathering the materials above, you’re ready to make your kit.
- Take one straw out of its wrapping.
- Mark the straw in three places: at 4.5 inches, at 5 inches and 6 inches.
- Cut the straw in these three places.
- Each straw is now divided into three parts.
- Take the longest 4.5 inches part and fold one of its ends back just a little. No more than 0.25 inches will do the trick.
- Thin out the folded tip so you can insert the medium 1-inch part of the straw on top of it.
- Tie it with scotch tape to secure the end so you’re sure the spices won’t leak out.
- Do this for all the straws you want to use.
- Pick the spices you’re going to use. The best ones are dried spices because they won’t spill as easily as liquid ingredients under the scotch tape.
- Fill your straws with these spices.
- Now, you can fold the other end of the filled parts, following the same movements.
- After you’ve folded them and thinned them out with your nail, place the small 0.5-inches pieces of the straws on top of each.
- Use scotch tape for extra protection again.
- Remember to label each one of your straws immediately after you’ve placed the ingredients inside.
The Altoids Kit for Liquid Ingredients
If you’re a true cook, dry spices aren’t the only thing you’ll use for adding flavor to your meals. Lots of times the liquid ingredients are essential, so you need to carry these safely too. That’s why you need a more secure container that won’t leak in your backpack.
However, you can store dry ingredients in this kit too, if you don’t want to make two different projects. Another advantage of this kit is that you can fit in more spices, about 15 of them. That means 15 different meals, as opposed to just 5 that you can fit in an M&M’s tube.
Materials
- Altoids container. No surprise here either.
- Again, you’ll need bigger straws for more resistance and volume, and smaller straws for increased diversity.
- You’ll be cutting things here too.
- Great for grabbing small stuff.
- Great for burning and sealing things.
- Paper funnel. This is for easily placing the spices inside the straws.
- Yes, don’t forget the essential ingredient.
- Labeling tape. Always important to know what’s inside, especially considering the Altoids container isn’t see-through. You can use a transparent Tic-Tac box or any other sort of similar container if you don’t want to use labels, but these are smaller.
Instructions
The steps you should take are:
- Grab your container.
- Cut the straws so they can fit inside this container.
- Use the tweezers to grab one tip of your straw, but leave a bit of it hanging out.
- Use the lighter to melt the tip well so it stays sealed.
- Wait a minute until the straw cools. Otherwise it can stick to your skin and give you a nasty burn.
- Grab the paper funnel and fill the straw with the spices you want. You should leave quite enough room at the tip, and this is especially important if you’re using liquid ingredients you don’t want to be spilled.
- Use the tweezers again to grab the other tip of the straw.
- Burn it again with your lighter so it seals shut, then wait until it’s not hot and sticky anymore.
- Do this with every one of your straws.
- Start labeling your ingredients.
- Put all the straws in the Altoids container and you’re done.
Other Containers and the Delicious Ingredients
Now that you can make at least a couple varieties of spice kits, you need to choose the spices you’ll take. But it’s also good to know you can use other, different containers from the ones we’ve suggested above. Combining these containers and ingredients below, your options are unlimited.
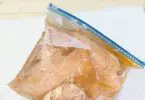
Ziplock bags
These have the advantage of being easy to find in your local supermarket or even online. You can also use resealable bags you have in your home, maybe from a pack of Q-tips. Since you can easily reseal them, the spices won’t spill off so easily.
They’re resistant to water, but they can puncture really fast, so you should maybe place more such bags into another bigger container. We like these as a good option because they’re see-through so you don’t need to label them. Besides, you can choose different sizes. Do use these sturdy bags when you bring your homemade trail mix with you.
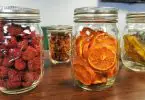
Jars
Jars are also see through, they can easily be resealed and they’re easy to find too. They’re heavier, though, but they’re bigger and more resistant to scratches. If you buy aluminum jars, these won’t be transparent, but they’re not as easy to break and weigh less than glass jars.
Jars are amazing for all sorts of spices, including liquid ingredients as well as dry ones. They’re also great for Pesto or other kinds of sauces you can prepare at home.
Mini-bottles
If jars sound a bit too much, you can always buy mini-bottles. These can be purchased online, they come in different shapes and sizes, and are great for all sorts of ingredients. Depending on their corks, their contents can spill or not, but they weigh less than jars, so you can bring more along for increased diversity.
Ingredients
Depending on the meals you want to cook, here are some of the best ingredients you can take:
- Great for soups of any kind, especially vegetable soups and stews. If you’re using your camping stove to bake apples, it’s great with them too.
- This is great to add in most types of dough and batter, like those for pancakes and bread.
- If you ground this, you can add it to doughs along with anise.
- Cayenne peppers. Dry cayenne peppers and crush them for a hot spice on any sort of roast meat or baked vegetables.
- What can be more delicious then a bit of cinnamon in your pancake batter, on your French toast or in your cup of warm milk?
- Another miracle ingredient for sauces, soups and stews.
- If you’re baking potatoes, you need to add coriander for a more aromatic taste. But it works very well with baked fruit, too.
- Can’t have macaroni and cheese without a touch of coriander for a more exotic aroma.
- The perfect spice for all chicken-based dishes.
- Garlic powder. Can’t go wrong with it for roast beef or pork, and it goes great with fish.
- Great if you have an upset stomach, so you can add it to foods you know can have this effect.
- Amazing for all cheese or vegetable-based dishes.
- Olive oil. You need it for frying, or for making salads.
- Onion powder. Can be used in soups, stews, salads or sandwiches.
- Works with all sorts of meals, including some sweet hot chocolate or boiled red wine.
- Soy sauce. Amazing for rice and pasta, but it’s also great for chicken-based dishes.
- Awesome for sweet drinks, warm or cold, or for some fruit salads made from wild berries.
- Another essential ingredient for vegetable salads.
- Thanks to its strong aroma, this is great for any milk-based beverages you can think of, and it will quiet down your stomach before bedtime.
What Can You Do With All That?
If you want to mix all your spices from home, here’s what you can put together:
Meat seasoning
- 1 tbsp salt
- 1 tbsp paprika
- 1 tbsp garlic powder
- 1 tbsp onion powder
- ½ tsp cayenne pepper
Soup seasoning
- 5 tbsp dried onion
- 2 ounces bouillon
- 5 tbsp onion powder
- A dash of salt
- A dash of pepper
Vegetable seasoning
- 3 tbsp chili powder
- 5 tbsp onion powder
- 2 tbsp cumin
- 1 tbsp garlic powder
- 2 tbsp paprika
Barbecue seasoning
- 4 tbsp paprika
- 1 tbsp salt
- 1 tbsp pepper
- 1 tbsp garlic powder
- 1 tbsp onion powder
Tips and tricks
Even after you’ve concocted your spice kit, there are a few things you’ll want to take into account:
Consider the Restock Points
It’s really not worth it to carry a whole lot of food and spices for your journey, particularly if you’re not traveling by car.
Hikers, beware, some of your food is perishable, so it can go bad pretty fast. Besides, it’s always nice if you have some man-grown fresh fruit or vegetables instead of the wild fruit you find in the forest.
Plan Your Meals
You should plan all your meals accordingly, so you won’t feast one day then starve the rest. It’s great that you now have a lot of spices that will add taste to your food, and people in your group might want a refill. But don’t give in to the temptation of overeating, or you’ll just run out of food. Do check out our tips on how to prepare dehydrated food recipes for more convenience on the go.
Bring the Right Condiments
Once you start your spice kit, you might be tempted to add a lot of spices to it simply because you can. But it’s better to consider exactly what you’ll be cooking so you’ll bring the appropriate spices for that. Otherwise, you’ll just waste a lot of time focusing on the wrong DIY project.
Don’t Leave Food Out in the Open
There are lots of wild animals around, so it’s best not to leave your food uncovered outside. There are special camping kits now that mask the smell of your food completely, so use those. We’re not just talking about big animals like bears or wolves, either, since mice, squirrels and raccoons can just as easily steal your provisions.
Don’t Cook Near Your Tent
This is particularly important so as not to attract the animals in the first place. And it’s also a preventative measure against the bigger, scarier predators like Master Bruin.
For more backpacking food tips you can use, see our article on this topic.
Featured Image Source: https://pixabay.com/photos/spices-shelf-jar-kitchen-cooking-2454799/