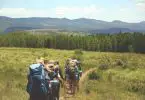
Your First Backpacking Gear List: Take a Deep Breath
I still remember standing in an REI for the first time, staring at wall after wall of gear I didn’t understand. Ultralight titanium this, waterproof breathable that. My credit card was trembling. The internet had given me fourteen different “essential” gear lists, each one longer and more expensive than the last.
Here’s what I wish someone had told me: you don’t need the best gear to have the best time. You need gear that keeps you safe, reasonably comfortable, and doesn’t break on the trail. That’s it. Plenty of incredible backpacking trips have happened with borrowed equipment and a grocery-store meal plan.
This backpacking gear list is built for beginners planning their first overnight or weekend trip. I’ll walk you through every category, suggest specific products at different price points, and help you understand why each item matters — not just what to buy. By the end, you’ll have a complete backpacking checklist you can print out and start ticking off.
One more thing before we dive in: this list follows the Ten Essentials framework that search-and-rescue teams have recommended for decades. Those ten categories — navigation, sun protection, insulation, illumination, first aid, fire, repair tools, nutrition, hydration, and emergency shelter — form the backbone of every responsible gear list. Everything here maps back to keeping you safe and self-sufficient in the backcountry.
The Big 3: Shelter, Sleep System, and Backpack
In backpacking, we call these “The Big 3” because they account for roughly 60-70% of your pack weight. Dialing in these three items makes the single biggest difference in how your body feels at mile eight. If you’re going to spend money anywhere, spend it here.
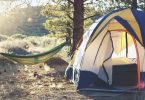
Shelter (Tent or Tarp)
Your shelter is your home out there. For beginners, I strongly recommend a freestanding tent — something you can pitch on any surface without needing perfect stake placement. You want a tent that’s easy to set up because you’ll probably be doing it for the first time in fading light after a long day of hiking.
What to look for:
- Two-person tent (even for solo trips — the extra space is worth the few extra ounces)
- Double-wall construction (inner mesh tent + rain fly) to manage condensation
- At least one vestibule for storing your pack and boots
- Weight under 5 lbs for a 2-person model
Budget pick: Naturehike Cloud-Up 2 (~3 lbs 10 oz, ~$110). Surprisingly capable for the price. The zippers won’t last forever, but they’ll last long enough for you to figure out if backpacking is your thing.
Mid-range pick: REI Co-op Half Dome SL 2+ (~4 lbs 1 oz, ~$280). Roomy, well-ventilated, and REI’s return policy gives you peace of mind.
Premium pick: Big Agnes Copper Spur HV UL2 (~2 lbs 12 oz, ~$450). This is where you land when you catch the ultralight bug. Incredibly packable.
Beginner mistake to avoid: Don’t buy a “camping” tent from a big-box store. Those 8-lb monsters are designed for car camping. You’ll hate every uphill step with one strapped to your pack.
Sleep System (Sleeping Bag + Pad)
Sleep quality makes or breaks a trip. I’ve seen people quit backpacking entirely because they spent one miserable, shivering night on a thin foam pad. Don’t let that be you.
Sleeping Bag: For three-season use, get a bag rated to 20°F (-6°C). Yes, that sounds cold for summer — that’s the point. Temperature ratings are survival ratings, not comfort ratings. A 20° bag keeps you comfortable down to about 30-35°F.
- Budget: Kelty Cosmic 20 (synthetic, ~3 lbs 3 oz, ~$100)
- Mid-range: REI Co-op Magma 30 (down, ~1 lb 9 oz, ~$280)
- Premium: Western Mountaineering UltraLite (down, ~1 lb 14 oz, ~$430)
Sleeping Pad: This is the piece beginners most often cheap out on, and it’s a mistake. Your pad insulates you from the cold ground (measured as R-value) and provides cushioning. You want an R-value of at least 3.0 for three-season use.
- Budget: Klymit Static V (~18.6 oz, R-value 1.3, ~$45) — honestly marginal for shoulder-season trips, but fine for summer
- Mid-range: Nemo Tensor Insulated (~15 oz, R-value 4.2, ~$180) — the sweet spot for most people
- Premium: Therm-a-Rest NeoAir XTherm (~12 oz, R-value 7.3, ~$250) — warm enough for four-season use
Backpack (50-65 Liters)
Your backpack is the last of the Big 3, and I mean that literally — buy it last. You need to know how much gear you’re carrying before you can pick the right pack size. A 55-60L pack covers most beginners for trips up to 4-5 days.
Critical fit tip: Go to a store and get fitted. Your torso length matters more than your height. A poorly fitted pack transfers weight to your shoulders instead of your hips, and after five miles you’ll feel every ounce.
- Budget: Osprey Atmos AG 65 (~4 lbs 8 oz, ~$250) — outstanding suspension for the price
- Mid-range: Gregory Baltoro 65 (~4 lbs 11 oz, ~$300) — legendary comfort for heavier loads
- Premium: Granite Gear Crown2 60 (~2 lbs 5 oz, ~$200) — proof that ultralight doesn’t mean ultra-expensive
Beginner mistake to avoid: Don’t buy a pack that’s too big. A 75L pack will tempt you to fill it with things you don’t need. Constraints breed creativity — and lighter packs.
Clothing and Layering System
The layering system is one of the most important concepts in backpacking. Instead of wearing one heavy jacket, you build warmth from multiple thin layers you can add or remove as conditions change. There are three layers: base (moisture management), mid (insulation), and outer (weather protection).
Base Layer
Worn against your skin, a base layer wicks sweat away from your body. Never wear cotton. I cannot stress this enough. Cotton absorbs moisture, loses all insulating ability when wet, and takes forever to dry. “Cotton kills” isn’t just a catchy phrase — it’s a real safety concern in cold, wet conditions.
- Merino wool top and bottom (~$60-120 per piece) — naturally odor-resistant, temperature-regulating, and comfortable
- Synthetic polyester (~$20-50 per piece) — dries faster and costs less, but gets funky after one day
Insulating Layer
Your puffy jacket. This is what you throw on at camp when the temperature drops, or when you stop for lunch on a windy ridge. Down is lighter and more packable; synthetic insulates when wet.
- Budget: Amazon Essentials Puffer (~12 oz, ~$35) — genuinely decent for fair-weather trips
- Mid-range: Patagonia Nano Puff (~10.1 oz, ~$200) — synthetic, works when damp, bombproof durability
- Premium: Mountain Hardwear Ghost Whisperer/2 (~7.6 oz, ~$325) — absurdly light and warm
Rain Shell
A waterproof-breathable jacket is non-negotiable. Weather changes fast in the mountains. You want something with taped seams, a hood that fits over a cap, and pit zips for ventilation.
- Budget: Frogg Toggs Ultra-Lite2 (~5.3 oz, ~$25) — disposable-feeling but genuinely waterproof
- Mid-range: Outdoor Research Helium Rain Jacket (~6.4 oz, ~$160)
- Premium: Arc’teryx Beta LT (~11.6 oz, ~$400) — you’re paying for Gore-Tex and bulletproof construction
Hiking Clothes
Keep it simple: a moisture-wicking t-shirt, convertible hiking pants or shorts, underwear (synthetic or merino), and a sun hat. Pack one extra pair of underwear and socks. That’s it. You’re going backpacking, not to fashion week.
Socks and Footwear
Good socks matter more than good boots. Darn Tough merino hiking socks (~$25) come with a lifetime warranty because they almost never wear out. Bring two pairs — one to hike in, one to sleep in.
For footwear, trail runners have replaced heavy leather boots for the vast majority of backpackers. They’re lighter, dry faster, and require zero break-in. Brands like Altra Lone Peak (~$140) and Salomon X Ultra (~$130) are backpacker favorites.
Navigation and Safety
Your phone’s GPS is amazing until it isn’t. Battery dies, screen cracks, signal vanishes. Always carry at least one backup navigation method.
Navigation Tools
- Physical map of your area — a waterproof topo map from National Geographic (~$15) or a printed map in a Ziploc bag
- Compass — Suunto A-10 (~$30) is reliable and beginner-friendly. Learn the basics before your trip.
- Phone with offline maps — download your area in AllTrails, Gaia GPS, or CalTopo before you leave cell range
Headlamp
A headlamp is on every version of the Ten Essentials list for good reason. You will need light at some point, whether it’s a predawn start, a late arrival at camp, or a nighttime bathroom trip. The Petzl Actik Core (~$70, 2.9 oz, 450 lumens) is rechargeable and bright enough for trail navigation. The Black Diamond Spot 400 (~$45, 2.9 oz) is a great budget option. Always pack a spare set of batteries.
First Aid Kit
You can buy a pre-made kit or build your own. At minimum, carry:
- Adhesive bandages, moleskin, and athletic tape (blisters are the #1 beginner complaint)
- Ibuprofen and antihistamines
- Antiseptic wipes and antibiotic ointment
- Triangular bandage or elastic wrap
- Tweezers (tick removal)
- Emergency whistle (three blasts = universal distress signal)
An Adventure Medical Kits Ultralight .5 (~$30, 5.4 oz) covers solo or duo trips nicely.
Emergency Shelter
Even if you’re carrying a tent, an emergency bivy or space blanket (~2 oz, ~$8) is cheap insurance. If you get separated from your pack, this could save your life.
Food and Water
Eating well on the trail takes some planning, but it doesn’t need to be complicated. For a beginner’s first two- or three-day trip, simplicity wins.
Cooking System
A canister stove is the easiest option for beginners. Screw on a fuel canister, turn the valve, click the igniter, and you’re boiling water in three minutes.
- Budget: BRS-3000T ultralight stove (~0.9 oz, ~$20) + any 750ml titanium pot (~$25) — absurdly cheap and works fine
- Mid-range: Jetboil MiniMo (~14.6 oz with pot, ~$135) — integrated system, fast boil times, simmer control
- Premium: MSR PocketRocket Deluxe (~2.9 oz, ~$60) + Toaks 750ml pot (~$30) — the classic lightweight setup
Bring a long-handled spork (the Light My Fire titanium spork at $15 is perfect), a small fuel canister (a 100g canister lasts most people 3-4 days), and a lighter as a backup igniter.
Water Filtration
Never drink untreated water from streams or lakes, no matter how clear they look. Giardia doesn’t announce itself. You have several options:
- Squeeze filter: Sawyer Squeeze (~3 oz, ~$35) — the most popular choice for good reason. Filters to 0.1 microns, weighs nothing, lasts effectively forever.
- Gravity filter: Platypus GravityWorks 2.0L (~11.5 oz, ~$110) — best for groups or if you hate squeezing
- Chemical treatment: Aquamira drops (~3 oz, ~$18) — ultralight backup, but takes 15-30 minutes to work
Carry at least 2 liters of water capacity. I recommend two 1-liter Smart Water bottles — they’re cheap, tough, and thread onto the Sawyer Squeeze perfectly. Ditch the heavy Nalgene.
Food Planning
For a two- to three-day trip, plan for roughly 2,500-3,500 calories per day depending on the difficulty. Prioritize calorie-dense foods (125+ calories per ounce).
Easy meal ideas:
- Breakfast: Instant oatmeal packets with peanut butter, dried fruit, or a pre-made Mountain House breakfast (~$10)
- Lunch: Tortillas with hard salami, cheese, and mustard (no bread — it crushes). Trail mix, jerky, and energy bars for snacking.
- Dinner: Freeze-dried meals (Peak Refuel and Mountain House are crowd favorites, ~$10-14 each) or ramen noodles upgraded with olive oil packets and summer sausage
Bring an Ursack Major (~$80, 7.6 oz) or a bear canister if required by your trailhead regulations. At minimum, hang your food in a stuff sack using the PCT method.
Camp Essentials
Knife or Multitool
You don’t need a Rambo knife. A small, sharp blade handles 99% of backcountry cutting tasks — trimming moleskin, cutting cordage, opening food packaging, slicing cheese. The Victorinox Classic SD (~$20, 0.7 oz) is all most people need. If you want pliers, the Leatherman Squirt PS4 (~$40, 2 oz) is a great compact multitool.
Fire Starting
Carry two fire-starting methods: a standard Bic lighter and either waterproof matches or a ferro rod as backup. Toss a few cotton balls smeared with petroleum jelly into a small Ziploc — they catch flame instantly and burn for two to three minutes, even when damp. Fire starting is one of the Ten Essentials, even if you plan to cook on a stove.
Hygiene Kit
Keep it minimal:
- Small tube of biodegradable soap (Dr. Bronner’s, 2 oz)
- Travel toothbrush and toothpaste
- Hand sanitizer
- Trowel for cat holes (the Deuce of Spades at $25 and 0.6 oz is the standard)
- Toilet paper in a Ziploc bag + extra Ziploc for packing out used TP
- Sunscreen (SPF 50, small tube) and lip balm with SPF
- Bug spray (Picaridin-based repellents work great without melting your gear like DEET can)
Leave No Trace reminder: Do all washing, brushing, and rinsing at least 200 feet from any water source. Scatter strained dishwater broadly. Pack out everything you pack in.
Trekking Poles
Optional but highly recommended, especially for beginners. Trekking poles reduce impact on your knees by up to 25% on descents, improve balance with a heavy pack, and help you cross streams safely. The Cascade Mountain Tech Carbon Fiber poles (~$40, 8 oz per pole) are an outstanding value. Adjust them shorter for uphills, longer for downhills.
Electronics and Extras
Phone and Power Bank
Your phone does triple duty as camera, GPS, and emergency communication device. Keep it in airplane mode to preserve battery — you’ll get 2-3 days easily. Bring a 10,000mAh power bank (~6 oz, ~$25) as insurance. The Nitecore NB10000 (~$35, 5.3 oz) is a favorite among weight-conscious hikers.
Camera
Your phone camera is honestly great for most people. If you want better shots, a compact like the Sony RX100 series adds quality without bulk. Don’t bring a full DSLR on your first trip — you’ll resent every ounce of it on the climbs.
Stuff Sacks and Organization
A few lightweight dry bags or stuff sacks keep your gear organized and protected. At minimum:
- A waterproof pack liner (a trash compactor bag works perfectly for ~$1)
- A small dry bag for electronics
- Stuff sacks for your sleeping bag and clothes
Repair Kit
Small and light but can save a trip:
- Duct tape wrapped around a trekking pole or water bottle (a few feet is enough)
- Tenacious Tape patches for tent and pad repairs
- Spare buckle and safety pins
- A few zip ties and a needle with dental floss for thread
The Complete Backpacking Gear Checklist
Print this out, stick it on your fridge, and check items off as you pack. Weights listed are approximate averages for mid-range gear.
| ☐ | Item | Weight (oz) | Priority |
|---|---|---|---|
| ☐ | Shelter & Sleep | ||
| ☐ | Tent (2-person) | 52 | Essential |
| ☐ | Sleeping bag (20°F) | 35 | Essential |
| ☐ | Sleeping pad | 16 | Essential |
| ☐ | Pillow (inflatable or stuff sack) | 3 | Nice to have |
| ☐ | Backpack | ||
| ☐ | Backpack (55-65L) | 70 | Essential |
| ☐ | Pack rain cover or liner | 2 | Essential |
| ☐ | Clothing | ||
| ☐ | Base layer top & bottom | 12 | Essential |
| ☐ | Insulating jacket (puffy) | 10 | Essential |
| ☐ | Rain jacket | 7 | Essential |
| ☐ | Hiking shirt (synthetic/merino) | 6 | Essential |
| ☐ | Hiking pants or shorts | 8 | Essential |
| ☐ | Hiking socks (2 pairs merino) | 4 | Essential |
| ☐ | Underwear (2 pairs synthetic) | 3 | Essential |
| ☐ | Sun hat | 3 | Recommended |
| ☐ | Warm beanie | 2 | Recommended |
| ☐ | Gloves (lightweight) | 2 | Recommended |
| ☐ | Navigation & Safety | ||
| ☐ | Map (paper/waterproof) | 3 | Essential |
| ☐ | Compass | 1.5 | Essential |
| ☐ | Headlamp + spare batteries | 3 | Essential |
| ☐ | First aid kit | 5 | Essential |
| ☐ | Emergency whistle | 0.5 | Essential |
| ☐ | Emergency shelter/bivy | 2 | Essential |
| ☐ | Food & Water | ||
| ☐ | Stove + fuel canister | 10 | Essential |
| ☐ | Pot/mug (750ml) | 4 | Essential |
| ☐ | Spork | 0.5 | Essential |
| ☐ | Water filter (Sawyer Squeeze) | 3 | Essential |
| ☐ | Water bottles (2x 1L) | 3 | Essential |
| ☐ | Bear canister or Ursack | 8 | Situational |
| ☐ | Camp Essentials | ||
| ☐ | Knife or multitool | 2 | Essential |
| ☐ | Lighter + backup fire starter | 1 | Essential |
| ☐ | Trowel | 0.6 | Essential |
| ☐ | Toilet paper + pack-out bag | 2 | Essential |
| ☐ | Sunscreen + lip balm (SPF) | 3 | Essential |
| ☐ | Bug repellent | 2 | Situational |
| ☐ | Trekking poles (pair) | 16 | Recommended |
| ☐ | Electronics & Extras | ||
| ☐ | Phone (airplane mode) | 7 | Essential |
| ☐ | Power bank (10,000mAh) | 6 | Recommended |
| ☐ | Charging cable | 1 | Recommended |
| ☐ | Repair kit (tape, patches, pins) | 2 | Recommended |
| ☐ | Stuff sacks / dry bags | 3 | Recommended |
Budget Breakdown: What Does a Complete Beginner Kit Cost?
One of the biggest barriers to backpacking is the perceived cost. Yes, you can spend $5,000 on ultralight gear. But you can also get on the trail safely and comfortably for a fraction of that. Here’s what a complete setup looks like at three price points.
The $500 Starter Kit
This kit prioritizes getting you on the trail. Gear is heavier but functional. You’ll be carrying around 25-30 lbs base weight (before food and water).
- Tent: Naturehike Cloud-Up 2 — $110
- Sleeping bag: Kelty Cosmic 20 — $100
- Sleeping pad: Klymit Static V — $45
- Backpack: Osprey Atmos AG 65 (on sale or used) — $180
- Stove: BRS-3000T + pot — $45
- Water filter: Sawyer Squeeze — $35
- Headlamp: Black Diamond Spot — $45
- Rain jacket: Frogg Toggs — $25
- Total: ~$585 (use clothing you already own for everything else)
The $1,000 Sweet Spot Kit
This is where most people land after their first season. Better materials, lower weight, and gear you’ll use for years. Base weight around 18-22 lbs.
- Tent: REI Half Dome SL 2+ — $280
- Sleeping bag: REI Magma 30 — $280
- Sleeping pad: Nemo Tensor Insulated — $180
- Backpack: Osprey Atmos AG 65 — $250
- Stove: MSR PocketRocket Deluxe + Toaks pot — $90
- Water filter: Sawyer Squeeze — $35
- Headlamp: Petzl Actik Core — $70
- Rain jacket: Outdoor Research Helium — $160
- Insulating jacket: Patagonia Nano Puff — $200
- Trekking poles: Cascade Mountain Tech CF — $40
- Total: ~$1,585 (yes, it creeps over — buy the jacket and poles later)
The $1,500 Lightweight Kit
Optimized for weight without going full ultralight. Base weight around 14-17 lbs. This is the setup where hiking starts to feel effortless.
- Tent: Big Agnes Copper Spur HV UL2 — $450
- Sleeping bag: Western Mountaineering UltraLite — $430
- Sleeping pad: Therm-a-Rest NeoAir XTherm — $250
- Backpack: Granite Gear Crown2 60 — $200
- Stove: MSR PocketRocket Deluxe + Toaks pot — $90
- Water filter: Sawyer Squeeze — $35
- Headlamp: Petzl Actik Core — $70
- Rain jacket: Outdoor Research Helium — $160
- Insulating jacket: Ghost Whisperer/2 — $325
- Trekking poles: Cascade Mountain Tech CF — $40
- Total: ~$2,050 (spread purchases over several months)
Pro tip: Check REI’s garage sales, the r/GearTrade subreddit, and Facebook Marketplace. You can easily save 30-50% buying gently used gear. A lightly used tent is still a perfectly good tent.
Frequently Asked Questions
How heavy should my backpack be for a weekend trip?
A good target for beginners is a base weight (everything except food, water, and fuel) under 20 lbs. With 2 days of food and 2 liters of water, your total pack weight will be around 28-32 lbs. As you gain experience, you’ll naturally shed unnecessary items and invest in lighter gear. Most experienced backpackers carry a base weight of 10-15 lbs.
Do I really need a water filter? Can’t I just boil water?
You can boil water, but it’s slow, fuel-intensive, and means you have to wait for it to cool before drinking. A Sawyer Squeeze weighs 3 ounces, costs $35, and gives you clean water in seconds. It’s one of the best value-per-ounce purchases in all of backpacking. If you only buy one piece of dedicated gear, make it a water filter.
What’s the difference between backpacking and hiking gear?
Day hiking gear is designed for trips where you return to your car by nightfall — you need water, snacks, a rain layer, and navigation. Backpacking gear adds everything you need to sleep in the backcountry: shelter, sleep system, cooking equipment, extra food, and a larger pack to carry it all. Many items overlap, so your day-hiking gear isn’t wasted — it becomes part of your backpacking kit.
Should I buy gear all at once or piece by piece?
Piece by piece, absolutely. Start with what you already own — a rain jacket from your closet, a fleece you already wear, sneakers if you don’t have trail shoes. Then invest in the Big 3 first (tent, sleeping bag, pad) because you can’t borrow those easily. Fill in the rest over time. Many backpackers take a full year to build their ideal kit, and that’s perfectly fine.
Can I go backpacking with cheap gear from Amazon?
Yes, with caveats. Budget gear from brands like Naturehike, Kelty, and TETON Sports has gotten remarkably good. Where cheap gear fails is in durability and weather extremity — a $40 rain jacket works until it doesn’t, and that “doesn’t” tends to happen in the worst possible conditions. Spend money on the items that keep you alive (shelter, insulation, rain protection) and save money on comfort items. Never cheap out on your sleep system or rain gear.
Final Thoughts: Just Go
The single best piece of backpacking advice I ever received was from a grizzled thru-hiker at a trailhead in the Smokies. I was fiddling with my overstuffed pack, convinced I was forgetting something critical. He looked over and said, “You’ve got a tent, a sleeping bag, water, and food. Stop worrying and start walking.”
He was right. Your first trip won’t be perfect. You’ll pack too much, forget something small, and probably get a blister. That’s not failure — that’s learning. Every experienced backpacker started exactly where you are: staring at a gear list, wondering if they had the right stuff.
You do. Print the checklist, pack your bag, pick a trail, and go. The mountains have been waiting for you.
Featured Image Source: Pexels