I still remember my first real job interview. I was applying to work as a deckhand on a private yacht and the Captain, a former British Navy officer, really put me through the paces. After twenty minutes of hard questions, he pulled out a small length of line and flipped it toward me, asking me to tie a reef hitch.
I knew how to tie knots. I was a boy scout and an avid sailor for years before this test. I had even worked as a commercial fisherman in Alaska. But I was stumped.
He could see my discomfort and didn’t help matters when he told me the reef hitch was the easiest thing in the world to tie. Laughing, he took the line and quickly formed a perfect knot. I looked closely at his creation and was confused. He had tied a square knot.
When I asked, he grew sterner and informed me the proper name was reef hitch. He also told me knots were accidents which can’t be untied. Hitches are done on purpose. It was the first of many truths I learned from him.
See also: Types of Rope for The Outdoors: Tying It All Together
Now, I don’t care if you call them knots or hitches as long as you know how to tie them and when to use which one. That is the important part of any decent knot tying guide, not the names. But, if a cantankerous sea Captain angrily corrects your nomenclature don’t say I didn’t warn you.
Speaking of proper names, it might be helpful to go through a few that pop up from time to time when talking about knots.
Knot Terms
Firstly it is a good idea to get acquainted with major knot terms.
- Hitch: A knot tied on purpose with the intent of being able to untie when necessary.
- Bend: A knot used to tie two lengths of rope together.
- Mat: A knot which uses connecting loops in a rope to create a flat surface or net.
- Line: Alternate word for rope.
- End Loops: Knots which form static and non-static loops at the end of a line.
- Mid Loops: Knots which form a loop in the middle of a line.
- Stoppers: Knots tied at the end of a line to prevent the line from running through devices such as cleats or pulleys.
- Slide: Knots used to tie onto another line which can be moved along the line as needed.
- Grip: Slides which incorporate a loop for a grip. Often used in climbing.
- Bight: A slack part or bend in a rope.
- Bitter End: The part of a rope that is tied off.
- Running End: The part of a rope that is free.
Types of Knots
There are many different types of knots. Far too many to include them all in one article, guide, or even book. But most are just variations on a simpler version. It is these simple versions you should focus on. The essential knots. They are the building blocks. The fundamentals of knot tying.
You may even recognize some of them, by name at least. Each is useful and easy to tie. Most have applications in camping, climbing, and emergency care, making them a great tool to have no matter where you are or what you are doing.
Ten Basic Knots Every Person Should Know
- Overhand Knot
- Square Knot
- Clove Hitch
- Bowline
- Figure Eight
- Sheet Bend
- Fisherman’s Knot
- Half Hitch
- Rolling Hitch
- Noose
The Overhand Knot
The simplest of all knots, the overhand knot is also the most commonly tied. Most likely it is also the first learned. This knot is used to tie two ends of a line around an object. To tie this knot, simply place one end of a line on top of another. Tuck the top line under the lower and then pull tight. If you do the exact same thing again, you have a double overhand knot.
These are very hard to untie if pulled tight, so instead of using the ends of the line, make loops and tie the loops together with a second overhand knot. This is a shoelace, or granny, knot. Tie yet another overhand knot with the loops, and you have a double granny knot or a triple overhand with loops. Simple, right.
Other Knots that Start as an Overhand Knot:
- The Simple Noose
- The Fisherman’s Knot
- The Square Knot
- The Angler’s Loop
- The Water Knot
The Square Knot
The problem with an overhand knot is it comes loose quickly. Doubling it solves the loosening issue, but it becomes very hard to untie. That is why the square knot or reef hitch is a popular choice. The reef knot joins two lines together, but it doesn’t lock, making it a poor choice to use as a hitch. It does do well when tying a line around an object, especially when it comes time to untie.
To tie a square knot, start by tying an overhand knot. Then tie another overhand knot but reverse which line goes under the other. Pull tight, and you will have a square knot. To untie, break the top loop loose which will open the entire knot.
Historical Uses of the Square Knot:
- Reefing Sails
- Belt Fastener
- Bandage Tie Off
- Sack Handle
- Package Twine
The Clove Hitch
The clove hitch is simple to tie but extremely functional. Used primarily for tethering an object to a rail, the clove hitch can be tied and untied with one hand. It is the knot of choice when tying bumpers to the rails of a ship or a horse to a hitching post. Very versatile, indeed.
To tie a clove hitch, throw the end of the line over the rail. Bring the line back under the rail to the right of the original, or running, line. Go over the rail again but to the left of the original line. Finish by taking the line through the loop you just created and pull to lock the knot in place.
Alternatives to the Clove Hitch:
- The Slippery Hitch
- The Buntline Hitch
- The Cow Hitch
- The Constrictor Knot
- The Snuggle Hitch
The Bowline
The bowline is an end loop knot and is a favorite in climbing, boating, and emergency rescue. Quite frankly, it is the first knot you should learn because of its value if someone is stranded and needs to be hoisted to safety. The bowline can easily be tied one handed and when done correctly is a strong knot which can be untied by unlocking the top loop.
To tie a bowline, take a line and wrap it around your waist with the end in your right hand and the longer line in your left. Use your right hand to pinch the end and take a bight of line in your left, creating a loop with the end inside. Run this end up and around the line in your left hand coming back through the same bight or loop. Pull tight.
Alternatives to the Bowline for Rescue:
- The Double Strand Bowline
- The Alpine Butterfly Loop
- The Spanish Bowline
- The Handcuff Knot
Figure Eight
A figure eight is a popular stopper knot but can be used as the base for several other more sophisticated knots used for very specific purposes. In boating, figure eights are used for keeping sheets from running through cleats or windlasses. They serve a similar purpose in climbing.
To tie a figure eight, take the end in your right hand and make a loop by crossing it over the running line in your left hand. Tuck the end under the line and feed it back through the loop. You will now see the shape of the number eight. Pull tight to create a stopper. To untie, loosen by breaking the top loop.
Variations of the Figure Eight:
- Figure Eight on a Bight
- Figure Eight Follow Through
- Double Eye Figure Eight
- In Line Figure Eight
Sheet Bend
Tying a sheet bend is the preferred method for attaching two ropes together. Yes, the square knot could accomplish the job but the locking nature of the sheet bend makes it more reliable for this purpose. And, tying a sheet bend is easy.
Take two lines and face the ends toward each other. Make a loop in the end of the line in your left hand, bringing its end alongside the running length of line to your left. Take the end of the right line and feed it up through the loop you just made, pass it behind the loop and then back under itself without going back through the loop.
Both ends should finish on the same side. Pull tight. The sheet bend is most useful when tying two line together of different sizes. To make it easier, always form the initial loop out of the larger line.
Alternatives to the Sheet Bend:
- The Carrick Bend
- The Zeppelin Bend
- The Double Sheet Bend
- The Figure Eight Follow Through
Fisherman’s Knot
The fisherman’s knot only has one real purpose, but it is important. It is used to tie a fish hook to a line. When done properly you land the trophy. If not, you lose dinner and the hook. To tie a fisherman’s knot make a loop through the ring on the hook and twist it several times. Between six and ten twists is common.
Pass the end through the loop again and then back under itself. Pull tight. There are many variations on this simple knot, and each has its own strengths and weaknesses but most start with this basic form of cinch knot and build from there.
Alternatives to the Fisherman’s Knot:
- The Palomar Knot
- The Turle Knot
- The Blood Knot
- The Double Surgeon’s Knot
- The Wire Line to Mono Knot
Half Hitch
A simple knot, the half hitch is rarely used alone as it easily becomes loose. It is invaluable, however, as a component of other knots either used consecutively for the body of the knot or as a locking feature.
To tie a half hitch simply loop a line around an object. Pass the end around the loop and then through the loop. To lock the knot, add another half hitch as a single half hitch will not hold when strained.
Crafts Which Use the Half Hitch Knot:
- Macramé
- Knitting
- Beading
- Jewelry Making
Rolling Hitch
The rolling hitch is an interesting knot in that it solves a very specific problem. The rolling hitch allows a second line to connect to a primary line if the pull on both ropes is parallel. Think about it, most knots would simply slide down the initial line, but this hitch is designed to create a small shelf to hold its half hitches.
Tying the rolling hitch is fairly easy. Take your secondary line and make one wrap around the primary line and return under the running end, making a half hitch. Complete another wrap forming another half hitch. These two half hitches will create the shelf. Lock the knot with a final half hitch.
Alternatives to the Rolling Hitch:
- Taut-Line Hitch
- Adjustable Grip hitch
- Midshipman’s Hitch
- Icicle Hitch
Noose
Before you get too excited, this is not the hangman’s noose from the movies. This noose is a simple sliding end loop knot which comes in handy when you need to tightly secure a line around an object. Tying a basic noose is not difficult. Start with forming a loop in the line with the two ends coming back parallel to each other.
Take a bight from the end of the line and lay it over the running end. Tie an overhand knot with end of the line into the bight. Pull tight and the knot will slide firmly against the object in the loop.
Alternatives to the Noose:
- The Hangman’s Noose
- The Slipknot
- The Strangle Snare
- The Gallows Knot
These ten basic knots should cover every need you may have that can be addressed with a rope. Mastering these techniques is a practical skill to have and will come in handy in a myriad of ways in your everyday life.
Knot Tying is Still an Important Part of the Modern World
Of course, there are some who rely on knot tying for different purposes. In the shipping and fishing industries, knot-tying expertise is expected and is used daily. Even with the advancement of technology ropes are used to move cargo around the world.
See also: Best Knots for Hammock: Secure Your Hammock Like a Pro
Some of the greatest knot tying proficiency in the world can be found on the Panama Canal, where pilots and laborers hurl lines back and forth to ensure safe delivery of the ships in their care.
Rock climbers take a special interest in tying knots correctly. Hanging from the side of a cliff there is little between you and death, except a single knot. Talk about pressure. That would not be the time to tie your first bowline or figure eight follow through. If you have ever belayed your child on a climbing wall, you know the anxiety which occurs when the rope initially pulls against the knot you tied moments before.
Search and rescue teams rely on ropes to reach and secure stranded hikers against impossible odds. At times, these brave rescuers have to know their knots well enough to teach novices to tie them perfectly the first time. Lives depend on it.
Learning to Tie Knots is Accessible to Everyone
Fortunately, not many of you will have to tie knots in such stressful environments. But there is no reason you couldn’t. Proficiency just depends on practice. No other special physical or mental gifts are required to be an expert. And, as a hobby, the barrier to entry is low. You just need a length of line and the internet. Small price to pay for the development of a lifelong skill.
Knot tying was once a common activity for children and young adults through the work of various organizations. Sadly, participation in this activity is lessening every year. Knot tying is a skill that should be taught to everyone. It is useful and builds confidence. It can be practiced in the outdoors or inside the home, by people of every level of fitness and every age.
A Knot for Every Occasion
Once you have learned the ten knots we explored in this guide, branch out and try new things. It is very satisfying to learn a new knot. One that solves a specific problem or has a specific purpose.
Complex knots can be beautiful in their intricacy. And in their functionality. Look around and find something that can be made better with a well-tied knot. Maybe the kayaks hanging from your garage rafters could use a more secure system.
Perhaps splicing a loop at the end of a line to create the handle for a dog leash would be fun. No matter the project, working with rope is enjoyable and rewarding. Now that you have the basics down tackle something amazing. See our tip on how to learn six paracord knots to help you outdoors.
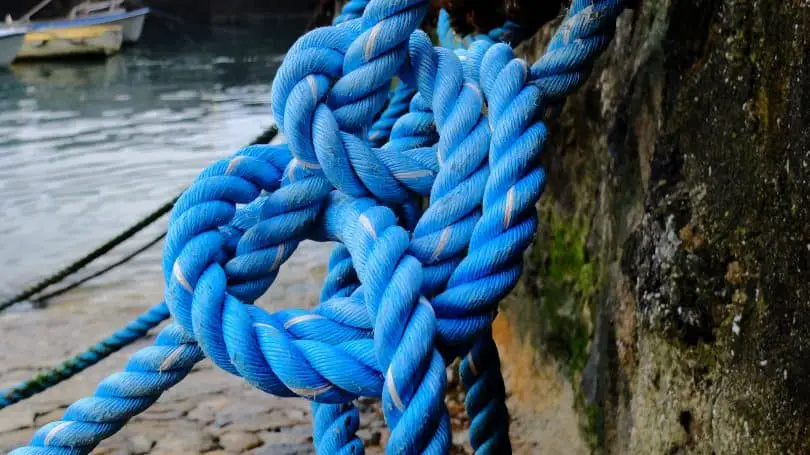
Featured Image Source: https://pixabay.com/photos/blue-rope-rope-knot-tight-blue-1149024/