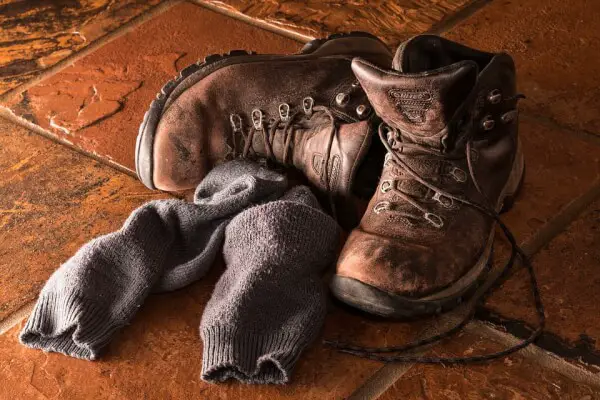
When you find a pair of hiking boots which fit you perfectly, they feel amazing, they look equally fantastic, and you trust them to take you over any kind of terrain, you will want to look after them as much as possible. Finding this kind of hiking boot is something to do with destiny after all!
Of course, problems occur from time to time, and in that case you will need to know how to repair leather hiking boots, to help them stay in your life for as long as you need them to.
This subject isn’t just about how to fix a problem when it occurs, it’s also about how to maintain your hiking boots so they don’t have a problem in the first place!
Depending on how often you use your boots and where you go with them, the type of ground you’re covering, and the activities you do, there is inevitably going to be an issue at some stage, but properly cleaning and maintenance is key in helping your favorite boots last longer.
First things first, however, what should you look for when you initially purchase your new hiking boots? Of course, you want them to look great, but when you’re heading over some rough and rocky terrain, it’s about much more than how they look!
What to Look For When Purchasing Leather Hiking Boots
There are certain things you need to tick off your requirement list, including what the boot is made of, the type of sole, your budget, brand name, and of course, testimonials. Leather is always going to be the best type to go for, because this is the most long-lasting and durable material to opt for, but there are subcategories within this too.
For instance, you can opt for full grain leather, split grain leather, or nubuck leather, and then we get to the midsole, which also has options – namely, EVA or polyurethane.
The internal part of the boot is something which needs major thought, because this is where your comfort relies, so you need to think about the shanks and the plates. You don’t want to slipping and sliding either, so then you turn your attention to the lug pattern, or the heel brake.
See also: Boot Sole Repair: Tips and Tricks To Get Your Pair Working Again
Complicated? Not really, you just need to do your research beforehand and shop around properly. Of course, your budget it something you need to think about carefully, but thankfully there are many options out there for every type of budget.
Repairing Your Leather Hiking Boots
Now you have found your ideal pair of boots, you’re going to wear them countless times on your outdoor adventures. If you’re thinking that nothing is ever going to go wrong with them, then you have your head in the clouds!
Even if you stick to hiking trips on relatively even ground, you’re going to find that your boots wear over time, but there is no need to throw them away and replace them, you simply need to form a little non-invasive operation on them from time to time!
Of course, first of all you need to identify what is wrong with them, and from there you can get to work on fixing the issue. Leather boot repair isn’t difficult, but it will require tools to get the job done, and it will also require time, to ensure that you allow each stage to be completed properly.
The most common issues with hiking boot wear and tear include:
- Worn out heels
- Breaks in the heel
- Breaks along the rubber sole and the leather upper
- The sole wearing down on one side (many of us tend to lean more towards one side when we walk)
- Broken laces
- Gaps forming between the sole and the leather part
- Tears in the leather
The good news is that all of these issues can be fixed at home, other than the need for re-heeling, which can be done for a good price if you shop around and find a reputable, high quality professional to do the job for you. Don’t just go with anyone for this, you need someone who knows his or her stuff.
Let’s check out a few basic repairs you can do yourself.
Broken or frayed laces
This is the most easy fixes of the lot! You simply need to take the laces out of your hiking boots and check them over. Are there are any breaks? Are the laces fraying?
The best course of action is to replace them, and this is something you can do very cheaply and easily. It’s a good idea to replace your laces regularly, as the last thing you need on a hiking expedition is your laces snapping!
Repairing a broken or split sole
Always clean your boots properly before doing any repairs, and we’re going to run through exactly how to do that in our next section. Once the boots are clean and totally dry, the material is much more likely to accept the glue you are going to use.
- Clean the boots properly
- Allow them to dry completely
- If the boots are a variety which have a rand in place, or a rubber strip and this has come away, you can now simply glue it back in place. This works best with dedicated glue for hiking boots, so do some shopping around online for this; always go for a strong, translucent drying type of glue
- The gap needs to be filled with the glue and you can use a toothpick or cocktail stick to spread it around properly
- Using some tape, strong masking tape is good (a tape that doesn’t leave a residue), smooth it along the gap you have glued
- Leave it to dry completely, before removing the tape slowly and carefully
Once the glue has dried you need to go back over the waterproofing process, just to ensure that you’re not going to have any damage occurring through water leakage.
You can easily find a hiking boot waterproofing product on the market, and again, it’s a case of shopping around for the best product for you; one tip however, check that the one you do use doesn’t affect the fabric’s breathability.
Applying a waterproofing product is easy, and can be done either with a small cloth, or with your fingers; fingers are probably better in this case, because you can really work it into the fabric without worrying about missing anything – just remember to clean your hands well afterwards.
Fixing a hole in the leather outer
Just because a small hole has appeared, this doesn’t mean that your boots are for the bin! Far from it! You can easily patch the hole, and all you need is a piece of leather which is the same colour as your boots – nobody need ever know!
For this process, you will need:
- Waterproof glue, specifically for leather – ensure it dries clear
- A piece of leather the same colour as your boots
- Sanding paper
As with any repair you do to your boots, always clean them properly first and allow them to dry completely.
- Using the sanding paper, rough up the area of the boot – make sure you really get into the part you’re going to fix, as this will help the glue adhere to the surface much better
- Take the piece of leather you’re going to use to patch the hole and make sure it is the right shape – cut it down if not, you don’t want any excess leather, just enough will do
- Apply the glue to the back of the strip of leather, and make sure that you cover it all really well, especially on the edges – if you don’t do this, the strip is going to curl up over time and will come away, as well as looking unsightly and really obvious
- Carefully place the strip over the hole and press down hard and evenly, making sure you apply pressure all over
- Hold the strip down for a few minutes and make sure the edges are adhered well
- With a cotton bud, smooth off any excess glue which has seeped out from the edges of the patch
- Allow your boots to dry well, overnight is best
These are really the main issues you may need to fix with your leather hiking boots, most things require glue! For that reason, only use products which are specifically for leather, because this is a heavy duty and hard wearing material, and therefore it needs an adhesive which is the same quality.
Using substandard adhesives is only going to be a temporary fix for your boots, and you will simply need to reapply much more often in this case. On top of this, any fixing you do to your boots shouldn’t be done close to a hiking trip.
The process of cleaning, drying, fixing, and dry again can take anything up to three days, because you need each stage of the procedure to be completed 100% before you move onto the next one – if you are too premature with any of it, you’re going to have a poor outcome. Don’t take short cuts, and be patient!
How to Clean Your Leather Hiking Boots Correctly
Cleaning your leather hiking boots is not a particularly difficult procedure, but it is something which needs to be done thoroughly and carefully, in order to ensure they stay in great condition or much longer.
You can buy specific leather cleaning products in store and online, and again, shop around to find the best quality. Using any cleaning product such as this should be done sparingly, because too much is just going to mean you end up with excess product inside the material, and it won’t dry very effectively, and could even leave stains or marks. For that reason, less is more!
Warm, soapy water is often the best course of action, but there are a few smaller details you need to pay attention to.
- Make sure you clean your boot completely, and that means getting into those nooks and crannies.
- Use a toothpick or a cocktail stick to pick out any dirt or grime which has lodged itself between any grooves. If you have any gaps between the sole and the start of the leather material, make sure there is nothing lurking inside there too.
- Using your leather cleaning product, gently scrub the outer and remove any marks before rinsing – be carefully not to totally soak the boot, as it’s just going to take longer to dry.
- You now need to apply the waterproofing solution to your boots, as cleaning them could have removed some of the barrier. Again, find a good quality product before deciding which to go for, and use it sparingly, according to instructions. Each product has different usage methods, so this is something you will need to check with the particular product you opt for.
- Allow the boots to dry completely. You can do this by ensuring any excess water is removed, and that they are just damp before you begin the drying process.
The best course of action is just to leave them somewhere airy and warm, so they can dry naturally – outdoors is ideal, but make sure it doesn’t rain on them otherwise you’ll simply need to start the process again!
How to Maintain Your Leather Hiking Boots
Part and parcel of owning a pair of high quality hiking boots is maintaining them. If you clean and look after your boots properly, there will be much less risk of any damage occurring in the first place, and therefore less repairs you need to do.
Regular and thorough cleaning is the best course of action, and always allowing your boots to dry properly and completely before wearing them, and before doing any repairs. When you do any repairs, always allow each step to completely 100% before moving onto the next one, i.e. make sure the glue dries completely.
A few hints and tips to maintain your leather hiking boots and their supreme quality include:
- Always waterproof your boots when you have cleaned them or carried out any repairs – this will ensure that damage from rain and general countryside water doesn’t cause any issues over time – leather might be a strong material, but it degrades with time and misuse just as much as any other material. As a side note, remember to use an oil-based product for leather boots; silicone products are for fabric boots. See our informative article on how to waterproof your boots to make them sturdy.
- Always wear socks – This might sound like a no brainer, but you will not only be more comfortable if you wear good quality socks, but you’ll help the interior of your boots stay in better condition for longer too.
- Break in your boots carefully – When you first purchase your new leather hiking boots, it’s a good idea to break them in very carefully first. You can do this by wearing them around the house, around the garden, basically allowing them to move and mould to the shape of your foot.
Heading off on a small outing wearing your new boots is always a good first go to, to avoid any painful blisters, and to ensure that the boot has the time to mould properly. - Check the lace eyelets and D rings – Are there any cracks in these? If so, you should get these replaced or fixed, otherwise when you are out and about, you could end up with a further breakage.
- Regularly check your shoe laces – Laces do fray over time and they lose their strength, so regularly replace these to avoid snapping, and to ensure that you get the support you need.
In Conclusion
Repairing your leather hiking boots is not rocket science, far from it, but it is something which takes time and patience. We’ve mentioned several times that you need to allow one step to be totally completed before moving onto the next one, and this imperative.
Regular cleaning and drying is also something which will help your boots stay stronger for much longer too, whilst also looking as fantastic as the day you bought them.
You will probably already be aware of the fact that good quality leather hiking boots are not cheap, they cost a lot of cash, especially in order to get a pair which suits your needs and stands up to the heavy duty rigours of certain terrains you might like to get out and about amongst.
If you don’t look after your boots, you’re basically not looking after your feet, because all that stands between your rough, sometimes rocky terrain, and your bare feet, is the boot you are standing in! For the top mountaineering books you can use, see our earlier article on this to find out more.
Regularly do some hiking boot MOT testing, especially after a long expedition, and check for any signs of wear and tear; small holes or tears can be fixed much easier than big gaping holes which have been left to grow over time, and if you can fix the problem before it becomes a massive issue, you can avoid having to throw your boots away entirely.
Featured Image https://pixabay.com/photos/boots-footwear-workwear-socks-3450702/