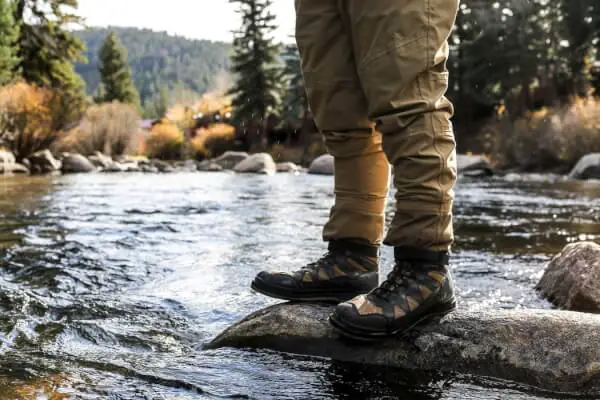
I have been swept out to sea by a rip tide. I have also fallen off a sailboat in the middle of the ocean. But the most challenging survival experience I have ever endured in the water was the time my feet were taken out from under me while attempting to cross a river.
For a few tense moments I was carried downstream, miraculously avoiding boulders and trees, only to find myself alive in slow moving water when the river widened just a few hundred feet from where I fell. I got lucky. And I swore to myself that I would learn how to ford a river.
So, properly motivated, I sought out some advice from people I know with experience in fording a river. The information I received was all over the map, but it was better than my previous of plan of just walking straight ahead until I reached the other bank.
See also: Best Waterproof Hiking Shoes: Keep Your Feet Nice and Dry While Hiking
In the years since my fall in the river, I have tested many of the techniques I was given and have determined the best way to cross a river, ford a stream, or overcome a creek and live to tell about it.
Understanding Rivers and Their Currents
To safely cross a moving body of water it is best to be familiar with how water moves. No matter how the surface appears, different parts of the river will flow at different speeds and with different amounts of force. To easily understand this the river can be broken down into four parts, each with their own current behavior.
- Banks. The river is slowest along the bank as it loses force while continually impacting the land. This makes testing a river’s speed difficult from land.
- Surface. Although dynamic, a river’s surface moves more slowly than the water just underneath due to surface tension and factors such as the wind.
- Bottom. The water along the very bottom of the river moves slowly as it makes contact with the river bottom. The water flows much faster only a few inches from the bottom.
- Middle Depth. The water between the surface and the bottom is the most powerful in the river. Capable of quickly knocking a person down who stumbles while crossing.
The differences in flow demands care is taken when in the water. Near the shore, the walking is easy. Soon the force of the water between your shins and your waist begins to grow and maintaining a perfect line from bank to bank becomes difficult. This is normal. Once the center of the waterway is passed, you can look forward to a gradual lessening of the current until you land.
But how strong that current is in the center will be hard to determine. Judging exactly how quickly a river might be moving is difficult to do without getting wet. That is why the best approach is always to assume the river is more powerful than you think. This way you won’t be taken by surprise when hit with the sudden burst of a strong current in the middle of the crossing.
5 Things Not to do When Crossing a River
As with anything, there is a right way and a wrong way to cross a river. Some mistakes will result in unnecessary loss of gear or a wet pack, but others will endanger lives. Here are five things not to do when crossing a river.
- Never Cross a River You Do Not Have to Cross
- Never Go Barefoot Across a River
- Never Cross a River If You Don’t Know the Depth
- Never Attempt to Swim Across a River
- Never Tie Your Pack to Your Body
These are all common mistakes made every year by people in the outdoors. Some, unfortunately, result in injury and even death.
See also: Best Water Shoes for Men: Footwear to Help You Make the Most Out of Your Water Activities
Crossing a river successfully demands that you respect the power and unpredictability of nature. Not doing so will turn a simple hike into a horrible experience.
Thoughts on Ropes and Lines
Using a line to assist in confronting a river is a reasonable idea, but is not recommended. Why? It seems that more harm than good can occur and in reality, a rope is not very practical for this use. Using a line would require at least two people. One in the river and one on the bank, presumably holding the rope.
If the person in the river falls and is carried downstream by a force of nature potent enough to create the Grand Canyon, would the remaining person be able to do anything? Most likely both would end up in the river, tangled and wet.
Also, crossing a river of any significance would require a serious amount of rope. First, you have the width of the river. But you are not going to land directly across from where you started. The current is going to take you hundreds of feet downriver. If it doesn’t, you most likely did not need a line in the first place. Rope is heavy. This extra travel would require carrying hundreds of feet. Most hikers I know would take a pass on that much weight in their pack. So, rope is out.
Ten Steps to Crossing a River Safely
Now that we know what not to do we can concentrate on the right way to navigate this watery obstacle. Keep in mind; every river is different as is every person. These guidelines are meant to be general suggestions. Crossing a river is dangerous and should not be attempted unless you are entirely confident about your chances for success.
- Step 1: Plan Your Hike for Success
- Step 2: Check Conditions Before You Go
- Step 3: Choose Your Crossing Wisely
- Step 4: Have a Plan For that Crossing
- Step 5: Prepare for After
- Step 6: Do not Hurry. Explore and Feel
- Step 7: Shuffle. Shuffle. Shuffle
- Step 8: Two Points of Contact and Balance
- Step 9: Finish on Your Feet
- Step 10: Fight Hypothermia Immediately After
Step One: Plan Your Hike for Success
Crossing a raging river should never come as a surprise. Do your homework. Map your route when planning the trip and communicate where you will be each day and night to someone who will come looking for you if things go wrong.
If a river stands in the way of your route, find information on the best places to cross and what conditions are typically like at the time of year you will be there. Make sure you have a good topographical map in case alternative crossing points will be needed.
Step Two: Check Conditions Before You Go
Bad weather changes rivers in a hurry. So does snow melt. Call the local ranger station before you leave on your trip to check how the water is flowing. Many states have sites designed to monitor the flow rates in rivers. Get a feel for how the river is behaving. And, check again immediately before you start your trek. A little information goes a long way once you are in the woods.
Step Three: Choose your Crossing Wisely
Just because it looked good on the map doesn’t mean it will look that way in person. Don’t be afraid to scout around and find the absolute best route available. Rivers are easiest to cross at their widest and most shallow points. Taking a few minutes to look around is a wise investment in time and energy if it means you find a much better crossing.
Step Four: Have a Plan
This is not the time to bravely rush forward. Even if you are solo, make a detailed plan. Carefully examine the opposite bank and make a note of obstructions and good landing sites. Take the current into account and plan on landing far downriver. View the crossing from the highest point possible and look as far downriver as you can. You will be amazed how far you will travel if you lose your footing.
Step Five: Prepare for After
Reorganize your pack, if you have one, to move a change of warm clothes as high as possible. Anything extremely buoyant, like a sleeping pad, needs to be high as well. Expect to be cold when you come out of the water. Make preparations, so your fire making kit, clothing, and shelter remain dry, if possible.
Step Six: Do Not Hurry. Explore and Feel
Your first steps will be the easiest of the entire crossing. Use this time wisely to explore the bottom and find your footing before experiencing the full power of the rushing water. Face the current and get used to moving slowly but deliberately.
Step Seven: Shuffle. Shuffle. Shuffle.
The easiest way to walk in a current is by shuffling your feet. Remember, the water along the bottom is moving slowly so it offers less resistance. Shuffling will keep your feet out of the more forceful current and allow you to plant your foot if you are pushed off balance quickly.
Step Eight: Two Points of Contact and Balance
A trekking pole or hiking stick comes in very handy in this situation. Maintaining two points of contact with the bottom of the river will help your balance and allow you to push off more forcefully. Even an impromptu staff whittled on the shore will improve your balance significantly. And, you can use it to probe the bottom for sudden changes in depth.
Step Nine: Finish on Your Feet
It is tempting to swim the last few feet to shore. Do not do this. Overhanging trees and rocks will cause significant injuries if you misjudge the current. Also, currents tend to eddy around shoreline features which could result in a swimmer being pushed back out to to the middle of the river.
Step 10: Fight Hypothermia Immediately After
Even tired and wet, it would be understandable for a moment of celebration to occur on the opposite shore after a successful crossing. To ensure hypothermia does not occur, warm yourself immediately. Do a quick round of calisthenics, change into dry clothing, eat some food, and drink water. All of these things will combat the onset of hypothermia and keep you well for the rest of your hike.
Alternative Methods for Groups
Crossing a river becomes far easier when attempted in groups. The key is connecting each person, so the combined weight is holding the group to the bottom of the river. The following are two favorite techniques used when more than two hikers are present.
Tripod
Three people can effectively cross most rivers using the tripod method. All three form a circle and lace their hands around each other’s waists. Shuffling into the river together, the tripod makes its way slowly across, maintaining multiple points of contact with the river’s bottom at all times.
For best results, only one person steps at a time, ensuring five points of contact are maintained throughout the crossing.
Group Chain/Interlock
For groups larger than three, the chain method is useful. In a line, each person locks arms around the waist of the hikers on either side, forming a chain. The chain enters the water parallel to the current. The leader breaks the flow for the rest, so often this is the largest or strongest in the group.
By staying connected, the weight of the unit will prevent any individual from being swept away. When the chain is long enough some will be in the slower moving parts of the river at all times to provide stability for those in the swifter water.
Information is Your Greatest Tool
Regardless of how many are in your group, the key to successfully crossing a river is preparation and research. It is critical to find out as much as possible about any river you are thinking about passing long before your reach its shores. Rivers are highly variable. Between snow melt and seasonal rains, rivers can rise several feet in a few hours. In the desert, normally dry washes run strong enough to move cars for several hours after a thunderstorm or monsoon.
Any river crossing is potentially dangerous. The biggest mistake a hiker can make is stubbornly refusing to have a plan B if the river is too high to cross. Every year, people lose their lives this way. It is much better to camp on the bank and wait it out than never hike again. There is always another way.
For more hiking safety tips, check out our article to find out.
Featured Image Source: https://unsplash.com/photos/SMtUXvrChDQ