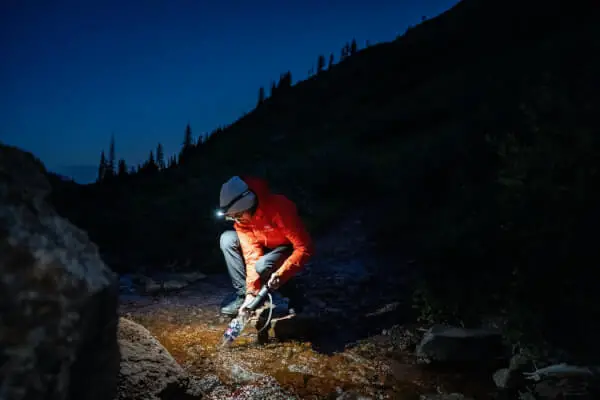
Access to clean water is essential when camping and hiking. Before embarking for your next adventure, you should learn how to make a water filter – it might literally make the difference between life and death.
Dehydration is a huge danger when hiking, and can cause serious symptoms (sleepiness or tiredness, confusion, disorientation, lethargy, irritability, headaches, fever) in a matter of hours, which will have a huge negative impact on your chances of survival in the wilderness.
Factors such as high altitude or humid, hot environments (which are pretty common when hiking) increase the chances of becoming dehydrated). During periods of intense physical effort, a person needs to drink two-three liters of water each day to be at his or her full physical capacity.
See also: How to Stay Hydrated: Tips and Tricks Beyond Water and Bottles
There are a few things you should do to avoid the dangers of dehydration when camping: bringing a supply of water with you, camping near a source of water (spring, lake, river) and checking your map to identify all the sources of water located near the hiking trails you want to undertake. Still, you can’t plan for everything and you definitely can’t carry all the water you need for a long hiking trip.
Drinking water from sources you find in the wilderness has its own risks: you could get sick, which could, paradoxically, lead to even more serious dehydration, due to vomiting and diarrhea. You need to be able to turn any type of water, even muddy pond water, into potable water. It can be complicated, however, by using a water filter and some iodine, you can obtain potable water in no time.
Homemade Water Filter
When packing for your camping trip, you should always include a water filter and some iodine in your luggage. Iodine kills the bacteria in the water, but, on its own, it can’t transform dirty or muddy water into drinkable.
See also: Best Backpacking Water Filters: Keepin’ it Clear
The first step is filtering the water and you need a water filter to do that. Making a water filter that you can use while camping is pretty easy and it requires only a few everyday items.
Materials you need:
- A plastic water bottle;
- Coffee filter (or cotton balls, or even a clean piece of cloth);
- Activated charcoal;
- Sand;
- Gravel;
- Small rocks;
- Scissors or knife;
Instructions:
- Using the scissors or the knife, cut the bottom of the plastic bottle;
- Make some small holes in the cap of the water bottle and make sure that the cap is closed tightly;
- Put the coffee filter inside the bottle through the cut-out bottom, making sure that it covers the cap and its holes completely.
- Crush the charcoal and mix it with the sand. Fill about two inches of the plastic bottle with the mixture of charcoal and sand;
- Add two inches of gravel on top of the sand and charcoal;
- For the final layer, you need about two inches of small rocks;
The filter is pretty easy to use. You just put it on top of a container and pour the muddy water on top of it. The water will get through the layers of rock, gravel, sand and charcoal, and ultimately through the coffee or cloth filter and the impurities will remain inside the bottle.
Depending on the water source you are using, you might not get clear water after filtering it only once – you might need to filter it two or three times. Also, clear water doesn’t mean bacteria-free water. After filtering it, you should also boil it or add a few drops of iodine.
As you can see, it’s not very difficult to improvise this type of water filter, even in the wilderness.
You probably have a plastic bottle and some cloth on you, gravel, rocks and sand are pretty common, and the charcoal from the last night’s camp fire is good enough. However, it’s best to plan ahead – if you don’t want to carry gravel and rocks in your backpack, it’s totally fine, but make sure that you do have at least the plastic bottle, some coffee filters and iodine on you.
DIY Water Filter for when You Are Stranded in The Woods
Despite all the planning, you still might end up stranded in the wilderness, without water, shelter or food. Finding water and some sort of shelter should be your first concerns – you can go for days without food or with limited amounts of food, but you definitely need water and to be protected from extreme heat/coldness, wind, rain and so on. Check out our tips on how to choose the best gravity water filter to help in your survival.
The type of water filter we described above is pretty easy to make if you have access to a few basic supplies (plastic bottle, knife, a cloth) and if you find some sand and gravel nearby. But there are areas where sand and gravel are not available (for example, in the woods or in a swamp), so here are some alternate methods of getting clean (or at least cleaner) water:
Decantation
The first method would be to simply put the water inside a container and to wait until the impurities fall at the bottom of the container. After that, slowly pour the water inside a different container, trying to keep the impurities on the bottom of the first container, then boil the water.
The disadvantages of this method are that it takes a little bit of time and you don’t get perfectly clear water– just less muddy.
Evaporation trap
It helps you get water when you can’t find an above-the-ground source of water. Here is how to make one:
- You need a container, preferably one with a wide opening (not a bottle, but a mug or an old can) and a piece of plastic sheet.
- Find an area that gets a lot of sunlight throughout the day. It helps if the soil in that area is wet, and you can spot a moisture-rich area by taking a look at the plants. Lilies of the valley, reed, rush, rose mallow, irises, northern sea oats, Indian grass, cordgrass, or waterhyssop are just a few of the plants that prefer wet soil.
- Dig a shallow hole in the ground and place the container inside the hole, keeping the dirt from getting inside the container.
- Cover the entire hole with the plastic sheet, to capture the moisture from the ground. Then, place a small rock on top of the sheet, above the water container, to form a dip.
- As the sun heats up the soil, the water in the ground evaporates, the vapors rise and condensate on the plastic sheet. The water drops drip inside the container in the form of purified water.
- The advantages of this system are that it provides access to water even in areas without a source of water above the ground, and that the water you obtain is pretty clean. Yes, it takes a while until you obtain the water, but, in the same time, it’s a steady source of clean water.
Solar still
Uses the same principle of water evaporation and condensation to purify it, but you don’t collect the water from the ground. Instead, you are purifying the dirty or muddy groundwater.
- You need a larger container, like a basin of some sort, a mug and a plastic sheet. Put the mug inside the basin – its upper rim has to be lower that the basin’s upper rim.
- Slowly pour water inside the basin, without splashing any of it inside the mug. If the mug is light and it doesn’t sit on its own, put something heavy inside it(a clean rock, for example).
- Cover the basin with the plastic sheet and put a small rock above the plastic sheet, on top of the mug, to form a dip.
- Place the basin in direct sunlight. The water inside the basin will evaporate, then condensate on the plastic sheet, and the purified water will start dripping inside the mug.
Solar disinfection
It is a method that purifies water a little bit before you can drink it, especially if you can’t build a fire to boil it or if you don’t have a container that allows you to boil water. All you need is a clear, transparent container: a plastic or a glass bottle.
Fill the container with water and put it in direct sunlight. If the water is clear or almost clear, from sources such as a spring, river or large lake, exposing it to sunlight for a few hours will kill most of the bacteria, but it’s still a good idea to add a few drops of iodine, if you have it on you.
If the water comes for a muddy pond and it’s cloudy, you should leave it in sunlight for a couple of days. The heat from the sunlight will kill some of the bacteria, and by keeping the container still the dirt particles will fall at the bottom of the container.
Make a plant filter
Certain plants can help you obtain clearer water. Sapwood, such as pine, contains xylem, a water transportation system that can filter the dirt and the bacteria from the water.
- You need a bottle, a small branch from a pine, and a second container to collect the clean water.
- Fill the bottle with water. Cut a 10 centimeters piece from the pine branch and peel the bark off. Make sure that the branch fits tightly inside the top opening of the bottle.
- Turn the bottle upside down and suspend it on top of the container where you will collect the clean water.
- Don’t let the pine branch to dry out, as it won’t be as effective the next time you want to use it.
- This type of water filter is quite efficient, and it cleans 99% of the dirt and the bacteria. It does not filter the viruses in the water, so it’s important to boil it before drinking it.
- Depending on the area where you are hiking, you might find other plants that will help you filter the water. For example, banana peels make a pretty efficient filter. Crush the banana peel with a rock, put it on a cloth and use it to filter the water. Citrus fruit peels and fibers from coconut husks also make pretty efficient water filters. If you have citrus on you, add it to the water and expose the water to direct sunlight: the combination of heat and citric acid kills the common E.coli bacteria.
- Tea bags, crushed cilantro and crushed plum seeds can also be used for filtering dirty water.
For more tips on how to make a homemade water filter, check out our article.
Boiling your water with hot stones
Filtering the water is not enough to keep you from getting sick: you also need to sterilize it, and the best method to do so is by boiling it. If you don’t have a metal container on you for boiling the water, don’t worry – you can obtain the same results using a plastic container and hot stones.
You need to build a fire and gather rocks with a decent surface area that fit inside the container that you have on you. Put the stones inside the fire until they become hot: 15 minutes inside the fire should be enough, even for larger stones. Drop the rocks in the water – the water should reach the boiling point in a few seconds. If it doesn’t, you don’t have the correct hot stones to water ratio, and you need to heat up more stones.
Turning salt water into drinkable water
Imagine getting lost on an island and not having access to potable water, only salt water. Is there something more frustrating than seeing all that water while dying of thirst? Fortunately, you can use the evaporation method to turn saltwater into drinkable water.
The method is the same as described above: two containers, a large one and a smaller one that fits inside the first. Put the small container inside the large one, cover both with a plastic sheet and use a rock to form a dip on top of the clean water container.
When the water evaporates, the salts remain behind, which means the water that condensates is not salty. If you don’t have two containers, you can set an evaporation trap: dig a hole in the sand, in an area exposed to direct sunlight, put your container inside the hole, cover with a plastic sheet and form the dripping system using a rock on top of the plastic sheet. For instructions on how to purify salt water, see our article on this topic.
It should work pretty fast, as the sand on the beach is saturated with water.
Another Important Tip
Purifying the water through this evaporation/condensation method (or distilling it) actually kills all the bacteria and the viruses in the water, and it’s the closest thing to a sterile fluid you can obtain in the wilderness. If you have cuts or any type of wounds, it’s a good idea to distill the water you are going to use for cleaning those wounds.
It reduces greatly the risk of infections. Distillation doesn’t clean heavy metals like lead or mercury, but you usually found such pollutants in tap water, not the groundwater in the wilderness.
Featured Image Source; https://unsplash.com/photos/FjJ5hsnqnz0


