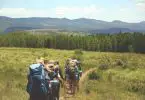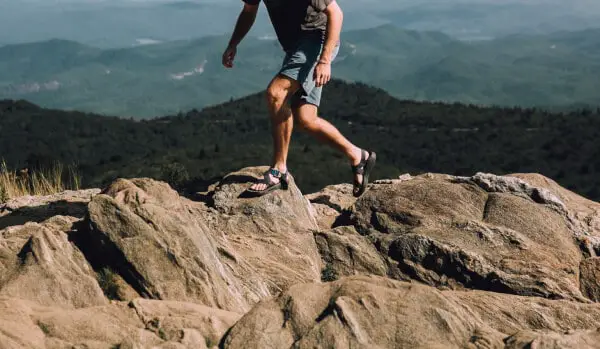
Unless you live on a runway, going uphill is an unavoidable fact of life for any hiker. Uphill hiking is a test of strength and endurance, and being able to hike uphill effectively opens endless doors for the kinds of destinations you can reach. However, getting there is tricky!
See also: Tips on Training for Backpacking: Preparing Your Body for the Great Outdoors
Luckily, while training is hard work, we’ve got the research bit covered. In this article, we’ll go over which exercises help prepare for uphill hiking best, from stretching to strengthening to powering-up your cardiovascular endurance.
Exercises: Stretching, Strengthening, and Endurance
As with any physical activity, uphill hiking utilizes a ton of muscles, ligaments, tendons, and joints. Some of these are obvious , of course you need to use your knees to walk, but others are often overlooked, leaving even the strongest hikers with pain, limited performance, or even injuries.
Below, we’ll go through several exercises to help strengthen the major muscle groups and joints required for uphill hiking, including calves, quads, hamstrings, hips, core, and lower back. We’ll give a detailed look at these activities and how to utilize them safely and effectively.
As always, never do exercises that your body can’t handle. If you have an underlying medical condition, be sure to check with your physician before doing any training regimen, and give yourself plenty of rest between training!
Stretches
Stretching may not seem all that glorious (unless you’re doing hot vinyasa yoga), but it’s one of the most important steps in developing strength and preventing injury. Many people overlook stretching before or after exercise, and even more dismiss it as part of their at-home training routine. Before we get into specific stretches, keep these few tips in mind:
- Never stretch cold muscles! Pre-exercise stretching is best done after a quick warm-up (5-10 minutes of light activity) so that your blood is already flowing. Stretching muscles cold can result in muscle tearing and reduced performance, leading to less strength and more issues over time.
- Before and after! Once you warm up, short or dynamic stretches are great before launching into your full-blown activity. Stretching before major activity prevents muscle tearing, joint strain, tendon and ligament damage, and increases performance. Stretching after activity helps prevent your muscles from healing out of flexibility. Bulky muscle build-up, which may seem like a good way to get a date, actually indicates poorly stretched muscles and reduced muscle functionality. Aim for lean, flexible muscle for peak performance and prevention of issues down the line.
- Don’t stretch it! All stretches should be done within your current range of flexibility. You should feel a nice pull of your target muscle, but if you experience intense pain or discomfort, you’ve gone too far! Flexibility builds over time, so if you can’t do the scissor splits just yet, don’t force it. Instead, keep practicing daily.
Without further ado, here are the stretches!
Quadriceps Stretch
The quadriceps is the group of four muscles that run down the front of your thigh. This muscle group is ultra-strong, and often over-used by many hikers. This over-use and lack of flexibility can cause knee pain and tendinitis, diminished muscle tone in the glutes, and hip and lower back pain. Here are two quad stretches to keep your muscle lean:
Standing Quad Stretch
- In a standing position, position your feet next to one another so your knees touch.
- Reach behind you and grab your right foot with your right hand. If necessary, hold a chair or a wall for support with your left hand.
- Keeping your chest forward and upright, pull your right foot towards your back.
- Pull until you feel a stretch, but do not lean forward. Hold for 30 seconds, switch sides, and repeat.
Partial Lunge Quad Stretch
- If the standing quad stretch does not provide an adequate stretch, try this exercise instead.
- Take a lunge position by placing your left foot on the ground and bending the knee at a right angle. Drop your right knee to the ground behind you.
- Keeping your chest forward and upright, reach your right hand behind you and grab your right foot at the toes.
- Pull your foot towards your lower back until you feel a stretch in your quad and just above your knee.
- Hole for 30 seconds, switch sides, and repeat.
Seated Hamstring Stretch
Your hamstrings, the group of muscles that run down the back of your thigh, are another common culprit for pain, injury, and lowered performance. These muscles complement your quads and need proper flexibility to stabilize the knees, hips, and back. Stretching them out prevents over-use of the quads as well.
- Sit on the floor or a pad with your legs stretched in front of you.
- Bend your left knee and frog it to the side, bringing your left foot to the middle of your right thigh.
- Slowly lean forward and extend your arms towards your right foot, bringing your chest as close to your thigh as comfortable.
- Extend as far as you can until you feel a stretch, hold for 30 seconds, switch legs and repeat. You may feel a stretch in the lower back as well.
- Do not lean forward to “touch your toes” with both legs extended, as this can put strain on your lower back and destabilize the pelvic muscles.
Standing Calf Stretch
The calf muscle, or gastrocnemius, is another important hiking muscle and is usually the source of most of our uphill-hiking soreness. Stretching the calf allows for better endurance and prevents muscle strain and tendonitis of the ankle.
- Stand 1-2 feet away from a wall and place your hands in front of you on the wall, with arms slightly raised.
- Bend the left knee slightly and place your left foot in front of the wall.
- Extend your right leg straight out behind you with your toe on the floor.
- Slowly press your right leg down, trying to touch your heel to the floor.
- Lean into the wall until you feel a stretch, hold for 30 seconds, switch legs, and repeat.
Seated Ankle and Foot Stretch
Ankles and feet are a commonly overlooked source of both strength and soreness in uphill hiking. Maintaining good ankle flexibility prevents injuries like tendonitis and helps stabilize the foot – very important for hiking on rough terrain.
- Sit in a chair with your right knee crossed over the left.
- Hold the top of the right foot and roll the toes in towards the sole of your foot until you feel a stretch.
- Hold the outside of your right foot and pull the foot upwards and inwards, stretching the outside of the ankle.
- Hold the inside of your right foot and push the foot down and outwards, stretching the inside of the ankle.
- Hold each stretch for 30 seconds, switch feet, and repeat.
For more samples of basic ankle strengthening exercises, check out our earlier article for more.
Core and Back Stretches
Moving on from the commonly used hiking muscles in the legs and feet, these next two stretches focus on core and back strength. The lower back and abdominal muscles help to stabilize the hips and allow you to maintain proper posture while hiking. Both muscle groups are extremely important for all walking, but especially when carrying weight and traveling on difficult terrain.
“Cobra” Abdominal Stretch
- Lay face down on the floor or a pad with your hands flat on the ground next to your shoulders.
- Relaxing your back and stomach and keeping your legs straight, slowly push up from your hands and allow your back to arch.
- Push upwards until you form a “cobra” pose with your chest pointing forward. For additional stretch, look up at the ceiling or sky.
- Hold for 30 seconds and release slowly down to your starting position.
Lower Back Stretch
- Lie on your back on a pad or soft surface.
- Slowly bring your knees to your chest and hold with your arms.
- Pull your knees towards your chest until you feel a stretch.
- Hold for 30 seconds and release, allowing your knees to straighten and fall back to the laying position.
Gluteus Maximus and Medius Crossover Stretch
This is another often-overlooked group of muscles that is extremely important to improving performance and preventing injury while hiking. The gluteus maximus and gluteus medius are two of the large muscles that make up your butt and hips, and must be stretched regularly.
It’s well recognized that knee pain is often linked to weak glutes, and they often cause an imbalance between the quads and hamstrings when not strengthened.
- Lay on your back on a pad.
- Bend your right knee and bring it to your chest.
- Pull the knee towards your chest until you feel a stretch and hold for 30 seconds.
- Allow the knee to fall towards the left across the chest.
- Pull the right knee towards the left side of the body until you feel a stretch in the side of your hip.
- Hold this second stretch for 30 seconds, switch legs, and repeat.
Strengthening Exercises
When most people think of training, strengthening exercises are what come to mind. These are incredibly helpful activities when used effectively, and can boost your performance significantly between hikes. As with stretching, there are a few things to keep in mind before taking to the weights.
- An ounce of prevention! It’s always rewarding to up your weight, finish a few more reps than you did last time, or push your body to that post-workout exhaustion. While all of these things can indicate that you’re getting stronger, you can’t rush progress. With body-weight and weighted exercises, start small and build slowly. Use a spotter with heavier weights or if you struggle with balance. If adding more weight or more reps causes your form to go out of whack, slow it down immediately – adding a little bit more to your routine is worthless if you end up doing the activities wrong, and can result in significant and chronic injuries.
- Manage your sets and reps. These two buzz words are a little hard to understand if you’re not already engrossed in the world of working out, so we’ll clarify: “sets” refer to how many groups of activities you do, e.g. two “sets” of ten bench presses or four “sets” of 12 body-weight squats. “Reps”, or repetitions, refers to how many of the activity you do in each set. For strengthening, focus on few sets with few reps. If using weights, use just enough that 8-10 reps is really tough but doable, and limit yourself to 2-3 sets in a day.
For body weight exercises, advance your activity to the same limit – you should be able to get to about 10 reps before you start to shake. If you only make it to 5, adjust down. If you make it to 20, adjust up.
With those things in mind, here are a few strengthening activities to implement in your preparation!
Leg Extension for Quads
As mentioned above, quads are usually a little over-powered in hikers who don’t pay attention to the other muscles of the legs and hips. Nonetheless, it’s important to maintain quad strength as you work on strengthening the rest.
- Sit on a chair with your back straight and feet resting on the floor.
- Maintaining a straight back, lift your right foot off the floor and straighten the knee.
- Tighten the quad muscles and hold for a few seconds, then release back to the floor.
- After 8-12 reps, switch legs and repeat.
- Once you can do 2 sets of 10-12 reps, add resistance by using ankle weights, as little as 1lb.
Hamstring and Glute Bridge
There are several hamstring strengthening exercises that will help stabilize your knees and hips and give you an extra boost hiking uphill, but the bridge can be modified for the weakest hams up to the strongest. This exercise also works the glutes, making it a great all-around activity.
- Lay on your back with knees bent and feet flat on the floor, about hip-width apart.
- Lay your palms flat on the floor at your sides and press your legs into the floor through your heels
- Slowly lift your hips off the floor, maintaining a straight, diagonal line from the top of the knees down to the shoulders. Do not let your back bend and hips dip towards the floor.
- Tighten the hamstrings and glutes and hold for 10-30 seconds, then release. Do 2 sets of 8-12 reps.
- If this activity is too easy, modify the exercise by extending the right leg straight, in line with your straight body. Hold this position the same as above, then switch legs.
- For a more advanced position, rest your feet on an exercise ball. Push your hips up to form a bridge while maintaining balance with your feet on the ball. Do 2 sets of 8-12 reps.
Core Plank
This exercise strengthens both the lower back and the abdominals, and can be done with no additional equipment.
- Place your hands about shoulder-width apart on the floor with your legs outstretched behind you.
- Push the toes into the floor and push off from your hands, forming a straight line with your body from heels to head.
- Without letting your hips dip down or push up, tighten the abdominals and hold the straight line for as long as you can. Aim for at least 30-60 seconds, but release as soon as your form begins to weaken.
Gluteus Medius Leg Lifts
Once again, the glutes are often a hidden culprit for knee pain and reduced performance. This exercise helps stabilize the hips and keep your natural gait straight.
- Lie on your right side with your right arm extended above your head and left palm down on the floor next to your chest.
- Lay your right leg flat with the left resting on top and rest your head on your right arm.
- Lift your left leg up and slightly back while tensing the glute muscle. Release and repeat, at least 2 sets of 8-12 reps. Then switch sides and repeat.
- Try to relax the quad so you feel strain only in the glute on the side of the hip. For added resistance, use ankle weights or increase the number of reps.
Endurance Exercises
And finally, the last group of exercises to prepare you for your next slog. Endurance exercises are fairly straightforward and focus on increasing cardiovascular health. This is especially important when your uphill hike enters high-altitudes, as lower air pressure can put serious strain on your heart and lungs.
As always, pay attention to your body. Stop and consult a physician if your endurance training causes significant pain, lightheadedness, dizziness, or vomiting. Here are several options for endurance training that focus on whole-body strength and cardiovascular health.
Spinning, Cycling, and High Intensity Interval Training (HIIT)
Spinning and cycling are a good way to build endurance by pushing your cardiovascular system for extended lengths of time. Unless you have a condition that prevents it, try to use a traditional upright bicycle or stationary bike, which will help strengthen your back and core and perfect your posture. For additional endurance build-up, try utilizing High Intensity Interval Training, or HIIT.
This is a method in which you alternate between 45 seconds to 1 minute of high-intensity cardio and 45 seconds to 1 minute of low-intensity exercise. On a stationary bike, elliptical, treadmill or other cardio equipment, push your resistance to the maximum you can handle for one minute, trying to get your heart rate into, or close to, it’s max, then drop it for a short rest period.
While HIIT is a great way to gain strength and endurance quickly, check with your doctor before doing any activity that pushes your heart rate to make sure your body can handle it.
Swimming
Swimming is a fantastic way to build endurance and maintain full-body fitness. The resistance of water prepares your body for extreme strain, and forces you to engage muscles in your core as well as your arms and legs.
Lap swimming is especially useful, as it builds up cardiovascular endurance as well as muscle endurance. Swimming can also be utilized in a HIIT routine.
Piercing Together Your Program
Now that we’ve gone over which exercises will help you on your next altitude-gaining adventure, it’s your turn to put them together! Assess which areas you need to focus on most, and use the rest of the exercises to maintain full-body strength, flexibility, and endurance. Check out this table for a run-down of the exercises, and work on your own routine for including them all!
| Stretch | Strength | |
| Legs and Feet | ||
| Quadriceps/Front of Thigh | Standing Quad Stretch; Partial Lunge Quad Stretch | Leg Extension |
| Hamstrings/Back of Thigh | Seated Hamstring Stretch | Hamstring/Quad Bridge |
| Calves | Standing Calf Stretch | Running, Cycling, Walking |
| Ankles | Seated Ankle and Foot Stretch | Running, Cycling, Walking |
| Core | ||
| Abdominals/Stomach | “Cobra” Stretch | Plank |
| Lower Back | Lower Back Stretch | Plank |
| Hips and Glutes | ||
| Gluteus Maximus/Piriformis | Crossover Stretch | Hamstring/Glute Bridge |
| Gluteus Medius/Side of Hips | Crossover Stretch | Hamstring/Glute Bridge; Leg Lifts |
Also, find out why hiking is a complete lower body workout by reading our previous piece on this topic.
Summing Things Up
We’ve gone over a comprehensive set of exercises to prepare you for hiking uphill, including stretching, strengthening, and building endurance. All you need to do is get out there and do them, and hiking uphill will soon seem like less of an uphill battle. Don’t forget to measure your progress. Check out our review of the best waterproof fitness tracker to help you.
Featured Image Source: https://unsplash.com/photos/u4PaJmbHUjI