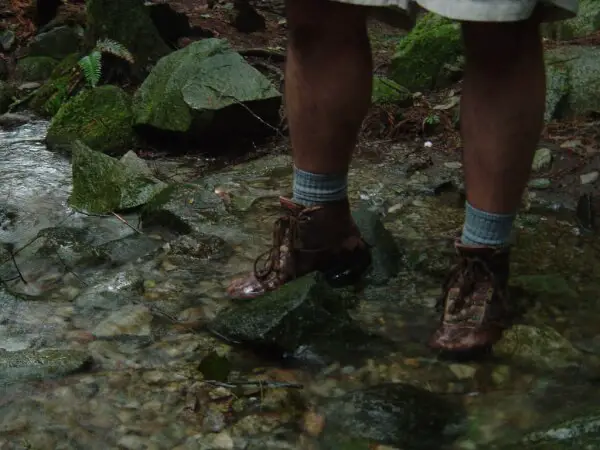
Being outdoors in the rainy season can be fun and yet challenging. Wearing the wrong kind of footwear can cause problems to your health. Therefore, it is to your benefit that you learn the various ways of how to waterproof boots so that you can protect your health by stopping water from entering your footwear as well as protecting your boots from getting damaged.
Making sure to follow the different ways of carrying out the process of keeping water from getting into or damaging your boots is a sure way to beat getting sick, especially from the effects of stagnant water.
Three ways you can waterproof your boots and stay healthy as well as keep your boots safe from damage
- Use waterproofing spray on your boots
- You can cream, wax and put paste on your boots
- You can use the do it yourself (DIY) method, but this will only give you temporary results
How to Use Spray To Waterproof Your Boots
Using spray to waterproof your boots is quick and easy. This method is more suitable for you if you are on the run or not interested in waterproofing the more difficult way. All you have to do is just hold your boot in your hand and spray it using the other hand. To keep your boot from losing its shine, you will have to make sure to spray it every other week.
The types of sprays that will result in a good finish are silicone or oil based ones. If you are wearing boots that are tight-grained leather, nu-buck leather, suede, or of an acrylic copolymer nature, the spray method is more suitable for these kinds of footwear.
How to apply the spray method
- Use soap and water or cleaning cream on footwear to get rid of any dirt on your boots.
- Make sure the spray can is about 6 inches away from your face and then start spraying your boot. Apply only a little spray at a time to the boot.
- After completing the spray process, leave your boots to dry overnight.
If you are a beginner, it is always best to read the instructions on the can first before applying the spray. Some boots require a second coating of spray so pay attention to the instructions on the can.
See also: Boot Sole Repair: Tips and Tricks To Get Your Pair Working Again
Some waterproofing sprays that can come in handy to keep your boots safe from damage are:
- Nikwax, which is good for a great nylon finish
- Grangers
- Isotex
- Goretex
See video tutorial above on how to apply spray to your boots
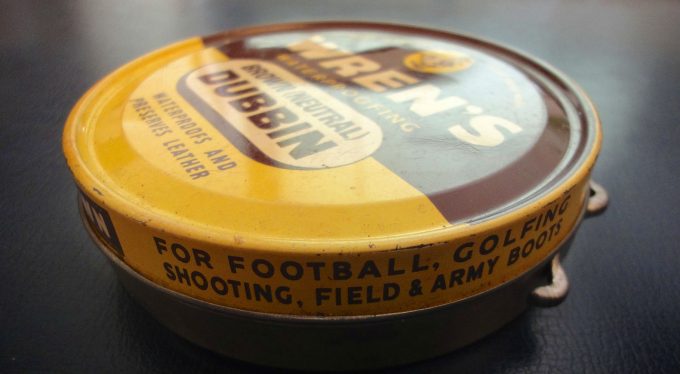
How to Apply Pastes, Creams And Wax to Your Footwear
Applying pastes, creams and wax to your boots is the other easy way to get the job done.
Just like the spray application, you have to make sure to continue the process every few weeks to keep your boots waterproofed and in tip-top shape.
Method
- If your boots are dirty or muddy, the first step for you to carry out is to wipe them clean using cleaning cream specially designed for footwear. If you have soap and water handy, you can use those too.
- You can use your hands or a clean cloth to apply the paste, cream or wax to your boots. Make sure though to apply the substance in a circular motion and do not forget rubbing into the seams as well.
- After applying the product for a few minutes, remove excess paste, cream or wax from your boots with the aid of a clean piece of cloth.
- Leave boots overnight to dry.
Above is a short video tutorial teaching you how to apply pastes, creams and wax to your boots.
How to DIY
If you are adventurous or want to just get it over with quickly, you can go for the DIY technique. However, doing the application your way will only keep your boots waterproofed for a temporary period and not for too long.
In addition, when you are ready to go the traditional ways like applying paste, cream, wax or spray, you must make sure to properly wipe your boots clean from all regular compounds left on it after you did it your own way.
3 methods to easily DIY
Follow the three easy DIY methods of waterproofing your boots
- Method 1: Use some transmission oil and smear it all over your boots. However, your footwear might turn red from the oil.
- Method 2: Apply a bit of clear coat enamel spray onto your boots.
- Method 3. Use Vaseline cream and rub all over your boots.
Warning: None of the above methods will last long.
See the above tutorial about how to waterproof your outdoor boots.
Steps to waterproofing your full grain leather boots
Carry out a proper reproofing job
- Carry out the cleaning process of your boots first by using a clean fabric material or soap and water.
- Use the cloth and rub a small amount of wax on it. Then rub the waxed cloth all over on the leather. If the wax on the cloth is too hard to apply on the boots, you can use the aid of a hair dryer to soften the wax and then apply it to the boot’s leather
- If you think the boots need more waxing then go ahead and give it some more.
- Allow to dry for about 30 – 60 minutes.
- With the help of a dry cloth, remove any additional wax seen on the boots.
Conditioning your full grain leather boots
- Use a light coating of conditioner and rub on the boots.
- Allow your boots to stay at room temperature for a short while.
- Use a piece of dry cloth and remove any excess conditioner from your boots. Refuse to use any form of heat source as this can cause the leather on the boots to start cracking up.
Steps to waterproofing your fabric boots
- Make sure to remove all dirt substance from your boots
- Choose the spray or aerosol you are using.
- Since the fabric boots are specially made, they can be re-proofed when dry or wet.
- After reproofing your dry or wet boots, you must now leave it to air dry for a while. It is better to leave it overnight to dry.
Steps to waterproofing your suede and nu-buck leather boots
- Start by properly cleaning your boots.
- Choose a suitable re-proofing spray that goes well with suede and nu-buck stuffs.
- From about 5 cm away, start spraying evenly over the entire surface of the boots.
- Allow time for it to dry naturally.
- If you have a suede brush in your possession, you can use it to lightly pass over the boots so that they can return to their original state.
Test your boots before waterproofing them
Like everyone else, you want to have a great finish on your boots. Therefore, the wise thing to do is to first test your boots with the cream, paste, wax or spray that you are putting on them.
- Properly clean off your boots by removing mud, dirt, dust or grime from them with a clean piece of material or using soap and water.
- Choose a discreet or small part of your boots to test the product. For example, you can choose a small portion underneath the boot’s lace where the tongue is.
- Carry out a second test at the shoe’s back if you are satisfied with the first test.
- If you are satisfied with both tests then you can move forward by applying compound to the rest of the boots.
Using waterproofing tools to lengthen the life of your boots
Apart from waterproofing your boots by hand, manufacturers created some awesome tools to help you do a fine job. While using your hand to get the job done can be good, still, not everyone can carry out a well orchestrated hand waterproofing job.In fact, one manufacturer created a devise known as the stripper heat gun that is capable of going into crevices where the hand cannot reach.
The stripper heat gun
A tool that every boot owner should own is the stripper heat gun. With this tool, you can ensure that your boots get the proper treatment they deserve, especially after wearing them in hard areas. The gun has the capability to warm and has a temperature control to go with it.
After conditioning the boots with any one of the waterproofing products such as cream, wax, spray or paste, instead of wiping off the excess by hand with a cloth, you just place the heat gun close to the boots and in a matter of seconds it begins to cause the conditioner to be absorbed into the leather.
Not only will the heat gun absorb the waterproofing product into the leather, but any remaining shoe polish on the boots as well.
However, if after using the heat gun and there is any components still remaining, your best move is to use a piece of cloth and wipe it from your boots. In no time your boots will start showing the beautiful results of what a heat gun can do and will limit any wear and tear that often shows on the outside of your footwear.
Waterproofing Compounds that Are Suitable for Your Boots
Specialty waterproof compounds – The job of waterproofing compounds is to protect and lengthen the life of your boots. Two main compounds used for boot waterproofing are Sno-Seal Weather Protectant and Heavy Duty Leather Preservative made by Obenauf.
Waxed based polishes – You can create a great shine on your boots by using waxed based polishes. The polishes acts by creating a protective layer that can protect the boot leather from getting damaged by water easily.
Both Meltonian and Lincoln provide top quality waxing products that provide a thin layer of protection over the shoes so that water does not soak in them. However, to get regular protection from water for your shoes, you will have to consistently be waterproofing your footwear.
Waterproofing compounds that you can spray on your boots – Most people do not use spray compounds to protect the wear and tear on their boots because they are of the opinion the leather does not gets enough in it. In addition, they believe that if there is too much silicone residing into the compound, the leather will get dry too quickly.
Still, if you prefer an easy way to get the job done, then go right ahead and use your spray compound. Meltonian developed a compound that is safe to use on suede and leather because the compound dries in about 30 minutes after application. Therefore, in just a few minutes afterwards, you can start wearing your boots outdoors again.
Why Water And Salt Can Damage Your Boots
Water and salt are two compounds that can cause serious damage to your outdoors boots and this is why you need to waterproof them regularly. Water is a main problem that often decrease boots wear and can destroy their leather suppleness.
The leather used to make boots is taken from the skins of animals. Therefore, it is very delicate and can only hold a certain amount of moisture in it. If the fibers should get damaged by excess water then the leather will quickly become thin and in a short while you will be unable to use your boots to protect your feet outdoors.
Salt is also another enemy of leather because when the salt touches the boot’s leather, it leaves a glowing stain on it. The stain is difficult to remove from the leather and when left untreated, you are setting up your boots top layer to begin to show signs of weakness. In addition, one drop of a salty substance can damage your boots finish.
By putting some wax on your boots, you can beat the odds of any salt damaging your footwear’s leather.
For more information on how to choose the best hiking boots for men, check out our useful article.
Featured Image Source: “Waterproof Boots” by Katie Cawley is licensed under CC BY-NC-SA 2.0