Do you always go hiking, hunting or fishing? Are you a survivalist or a prepper? Then you must know the importance of having a knife with you, one that can help you cut through brush or skin your game. Still, it’s essential that you find the appropriate cover, which is why you might want to learn how to make a knife sheath.
Why not buy one that’s already made, though? Well, for starters, you might be a DIY addict and that’s reason enough for some. But the truth is that with a homemade sheath, you know exactly how sturdy it is, you can customize it to your knife and you can choose what sort of finish you apply. But where can you start?
You’re on the right page because, in this article, we’ll take you through all the necessary steps of making a knife sheath. We’ll cover everything from materials to the optional coatings, and we’ll even give you a second option if this plan sounds too much. Curious yet? Read on!
Things You Need
There are plenty of materials and tools required for this project, but the most important of all is a great workspace, filled with natural light. You also need a big, sturdy table you can work on. Apart from that, don’t forget the:
Materials
- Cardboard
- Graph paper
- Leather dye
- Leather: 8 – 9 ounces thick
- Masking tape
- Neatsfoot oil
- Waxed thread
Yes, you’ve guessed it. We’re making a knife sheath out of leather!
But that means you’ll need some amount of planning as well as sketching and using diverse tools like the ones below.
Tools
- Awl
- Belt sander
- Cleaning cloths
- Coarse sandpaper
- Compass
- Contact cement glue
- Dauber
- Drill
- Fine sandpaper
- Needles: 2
- Overstitch wheel
- Pencil
- Ruler
- Scissors
- Thin-bladed utility knife
- Water in a spray bottle
- Wood rasp
The Sketch
This is definitely an important part seeing as it’s easier to work on and improve a faulty design, rather than constantly improvise on your ongoing project. Besides, it will help you save time and possibly even give you better ideas on how to improve our instructions.
So follow these steps:
- Get a sheet of graph paper and draw its diagonals so you can find its center point.
- Draw a vertical line on this paper so you can fold it in half, keeping in mind that now you have the sheath fold.
- Take your knife and put it on the left side of the paper, with 1/8 inches between the tip and the centerline, and the sharp blade facing the outside of the paper.
- Now get your pencil in the mix and trace the blade, following its shape but 1/8 inches below the tip.
- `The line should be traced a bit above the blade line, so the shape you’ve drawn is bigger than the blade so you get some extra material.
- Don’t draw along the shape of the handle, though, but about two thirds up inside the handle.
- Draw the welt by creating a second line, at a distance of about 5/8 inches from the line drawn at steps 4 – 6.
* You can skip this step if you don’t want to have a welt, but we think it’s pretty necessary for some extra protection. The welt goes inside the sheath so it guards the blade, meaning it won’t pierce the sheath. So basically a welt provides increased durability, endurance, it’s fairly easy to make and it saves you from accidental stabbings.
- Draw a point about 1 inch above the top part of the curved exterior line draw at steps 4 – 6.
- Draw a line between this point and the top part of the line drawn at step 7.
- Move the centerline 0.25 inches to the left, and then take it further up from the top part of the handle about 4.5 inches.
- Make a curved line between the real centerline and the new centerline at step 10.
- Make a line from the new centerline to the left, about 0.75 inches.
- Now draw a line between the second curved line from step 7 and this one at step 12, following a 45ᵒ angle.
The Cutting
It’s now time to start the actual work.
So you should cut the sketch you’ve drawn, as well as the leather by following these steps:
- Fold the paper in half, following the real centerline.
- Unfold so you can cut the left part.
- Fold the sketch again, then cut the right side.
- Now you have the sheath design, so you can place that on top of the leather you’ve bought, securing it with tape.
- Place the leather on the working table, with its softer side upwards.
- The belt loop should be placed on the leather on the same side as your dominant hand: so on the right side if you’re right-handed, and on the left, if you’re left-handed.
- Draw along the edges of the sketch on the leather.
- Use a knife with a very thin blade to cut along the edges of this design.
- Remember the lines drawn at steps 4 – 6 and 7 in the section above? The space between these two is the welt, so start cutting on the innermost line, keeping 0.25 inches above the centerline.
- Now grab the welt and place this on the leather too, using masking tape to keep it in place.
- Draw alongside the welt design too, cutting the real welt when you’re done.
- Now make a hole about 5/8 inches above the bottom part of the sheath, but placing it on the centerline.
- Grab the utility knife and cut the leather between this hole and the bottom part of the sheath so the welt can have a tight fit.
The Belt Loop
This is a very important part of the knife sheath too since portability and safety are essential attributes of a well-designed sheath.
So follow these steps:
- Grab a pencil and a ruler to make the stitch lines.
- Draw a horizontal line starting at the top of the belt loop, which should be 1.75 inches.
- Draw two vertical lines, each one at 1.5 inches from the sides of this line, going upwards toward the top of the loop.
- Finish the rectangle by drawing another line between the lines drawn at step 3.
- Get a moist cleaning cloth and run it over the stitch lines drawn above.
- Now get your awl and mark the stitches.
- Get your overstitch wheel and place one of its spokes in the holes created with the awl, one hole at a time, rotating it to obtain various dots along these lines, placed at equal distances from one another.
- Place the sheath on a wooden board or table and puncture each of the stitch holes either with the awl or with a 1/16 inches drill bit.
Now it’s time to connect the belt loop to the softer side of the leather sheath, using glue and stitches, but roughen up the leather a bit so the glue holds.
- Grab the belt about 2 inches above the leather strap.
- Make a crease about 0.5 inches above the base of the belt loop, and fold it facing the soft leather side.
- Mark the 2 inches worth of leather at step 10 with a pencil, so you’ll know the exact attaching point of the belt loop.
- Use a utility knife to remove these 2 inches of leather, then use your wood rasp and sandpaper to smooth out the area.
- Put contact cement glue on the attachment points after you’ve sprayed some water on the leather.
- Fold down the belt loop and press firmly so the glue holds.
- Put the sheath on a wooden table or a wooden board, unfolded.
- Get your 1/16 inches drill or the awl so you can make some new punctures on the stitch holes you have on the belt loop until you actually puncture the wood below.
- Now it’s time to saw the belt loop, so grab the waxed thread and the needles.
- Measure the stitch line, multiply it 5 times and you have the total length of waxed thread you’ll use.
- Put one needle through each of its ends; let’s call them needle 1 and needle 2.
- Place needle 1 in the top left stitch hole, and pull it so the sheath ends up about halfway through the thread.
- Needle 2 is facing the other way.
- Move needle 1 to the right, in the next hole so it faces the same way as needle 2.
- Move needle 2 through the same hole, so now the needles are facing in different directions again.
- Pull the thread to make sure the stitch is tight.
- Repeat these steps until you’ve moved through all the holes and are back at the first one.
- Once you’re here, insert the needles through this hole from its two opposite sides to create a forward stitch.
- Do this step again, but inserting each needle from the other side to create a backward stitch.
- Both the needles should now be on the exterior end of the sheath, so make a third hole to insert them inside the sheath.
- Cut the ends of the thread, and maybe use a lighter to melt the thread ends.
The Finishing
If you want to have a durable knife sheath, you have to process the leather a bit.
This will also take some time, but it’s a worthwhile process.
- Spread newspapers on a wooden board, and place the sheath there, with its soft side up.
- Get some dye in a disposable cup and use a dauber to apply an even and thin layer of coating to the soft part of the layer.
- Let the dye dry.
- Polish the leather with a clean cloth to make sure there isn’t any extra-dye left.
- Turn the sheath on the other side.
- Using the dauber, apply another thin and even layer of coating everywhere, except on the area that’s 5/8 inches away from the edges; this is where the welt goes.
- Do the polishing thing again.
The Welt
After this is done, you should go ahead with inserting the welt inside the sheath. To do that, follow the steps below:
- Place the sheath on the wooden table, with its softer side up.
- Place the welt on its right side, and draw its inner line on the leather, using your pencil.
- Do this step again for the left side.
- Evenly spread contact cement glue in a thin layer on the side of the sheath drawn at steps 2 and 3.
- Do the same for both sides of the welt.
- Let the glue dry before moving to the next step.
- Start from the top part of the welt and gently press it on the top part of the sheath.
- With gentle movements, attach the welt and the sheath following this downward direction.
- Once you’re at the bottom, the welt should be inserted in the slot, even if you have to use a bit of force.
- Get your spray bottle and moisten the leather margins of the sheath so it’s easier to work with and so you can prevent any splits.
- Moisten the centerline too, but make sure it’s not downright wet; if that happens, use a soft cleaning cloth to remove any mini-puddles of water.
- Make sure the sheath’s top corners are aligned, clamp them down and press them together.
- Repeat this step until you get to the bottom of the sheath.
- Get your utility knife or scissors and trim the welt so fits snuggly inside the sheath.
The Sewing
Since all that’s done, it’s time to sew the sheath. The leather needs some forming too before moving on to the finishing part to make sure you have a good fit for your knife.
You might want to do this section later, so you’re rested enough, as this requires quite a bit of careful work.
- Grab a compass and set it at 0.25 inches, placing it at the top part of the sheath, with the pencil on the leather.
- Make various markings starting from the top part and moving towards the bottom until you get to the centerline.
- Moisten the stitch line with a damp cleaning cloth so the leather is easy to work with.
- Grab your awl and mark the stitch that’s nearest to the top.
- Put a spoke of the overstitch wheel in this hole and rotate it on the stitch line.
- Now you have to use an awl to make each of these marks bigger and deeper, so start with the sheath placed on the wooden board. You can also use the 1/16 inches drill bit for the job, ensuring the punctures reach the actual wood.
- Proceed by cutting a piece of waxed thread that’s about 7 times bigger than the stitch line, and place its ends through two needles. Let’s call them needle 1 and needle 2 again.
- Get needle 1 through the topmost stitch hole and pull it until the sheath is halfway through the thread. Obviously, needle 2 is facing the other side.
- Now get needle 1 to go through the nearest stitch hole in the right, so it faces the same way as needle 2.
- Get needle 2 to get through the same hole now and pull it tight so the stitch is secure.
- Repeat steps 8 – 10 for the other holes until you get to the last one.
- Now, you should make the same stitches in reverse, inserting the needles through the holes from the opposite direction.
- You should end up with both needles on the same side.
- Cut the thread ends near the leather, and melt them with a lighter.
- Now, let’s move on to forming the leather, so start by spraying a bit of water on the sheath, letting it soak.
- Repeat this step until the leather feels soft enough to work, but never let it get completely wet.
- Place the knife inside this moistened sheath, getting its tip all the way through to the bottom of the sheath.
- Press the leather down on the knife, using your fingers.
- Repeat steps 17 and 18 about five more times.
- Leave the leather out to dry.
The Sanding
This part is optional too, but it adds extra resistance and a better look.
- Get your spray bottle again and spray water on the sheath. If you’ve sprayed too much, remove the extra water with a cleaning rag.
- Grab your wood rasp to give the desired shape to the sheath.
- Move on to a belt sander to even out the edges, starting with a coarser one that’s 80 grit.
- Now use a finer, 220 grit belt to make the whole thing smoother.
- You can even use some fine sandpaper here if there are still some tiny indents or notches you want to get rid of.
- Cover your wooden table with newspapers.
- Place some dye in a disposable cup and use a dauber to spread a thin and even layer of coating on the leather.
- Use a dry cleaning cloth to polish the dye and remove some of it if you’ve coated the sheath with a layer that’s a bit thick.
- You can also make your sheath waterproof if you soak the sheath in a basin of neatsfoot oil, after which you let it dry.
The No-stitching Version
We’ve taken you through the entire process of manufacturing a knife sheath out of leather. But the stitching part is quite a painstaking process, so it’s no wonder that you might want to skip it.
If that’s the case, we have another option for you: the no-stitch knife sheath.
- Measure the blade length and add one inch.
- Do the same for the handle, but only add 0.5 inches for the belt loop.
- Draw the shape of the blade on cardboard, making sure you leave a bit of extra space.
- Turn the knife on the other side and repeat.
- Once you’ve drawn the sheath, it’s time to cut around it.
- Place this sketch on a piece of thin leather and cut it too.
- Make a crease in the middle of the bigger section and fold it.
- Place your knife on top of it and measure it, maybe cutting the excess leather if that’s the case.
- Since now you have the folded half, get the other piece of the leather beneath it to make an idea of the number of needed slits.
- Start making the slits in the bigger, untrimmed side, sticking your knife through them to make sure you get the right number.
- Cut the half you have already folded, and insert it through these slits. This takes a bit of experimenting though, so don’t rush it.
- Grab some rawhide and tie it around the knife handle to secure it.
This sounds easy-breezy, right? You’re using fewer materials and takes less time, so it’s a great solution when the time is of the essence.
Final Thoughts
After reading this article, you should have a pretty good idea of how a knife sheath is made, as well as what model you want to choose. The first version we’ve talked about is more complicated, it takes longer to make, but it’s obviously more sturdy. On the other hand, the second version is simpler, though it’s not as resistant to punctures or the weather.
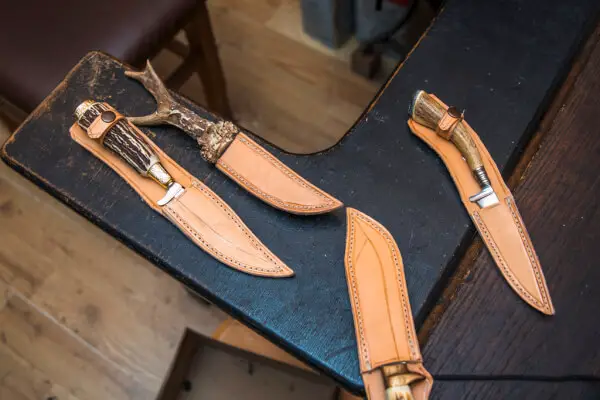
Featured Image Source: https://www.flickr.com/photos/26344495@N05/49521894906