Learning how to use a compass is a basic skill, something everyone should know. In this era of technological gadgets, when everyone has a GPS or a smartphone with navigation apps on it, you might think that an old-school, basic compass is no longer needed.
See also: Hiking Compass: Backcountry Navigation 101
However, if you are preparing for a camping trip, a compass is an absolute necessity, one of the most important pieces of camping gear you should bring with you.
A GPS could lose power, your smartphone might not have coverage in remote areas, and both are big and impractical to rely on for orientation when hiking, and break rather easy. A compass, on the other hand, doesn’t need charging or Wi-Fi coverage, works on its own, is small, compact, easy to carry and always reliable.
What Is a Compass?
First of all, in order to understand how a compass works and learn to use it, you must find out what a compass is. The compass is an instrument that people have used for navigation and orientation for centuries, which shows direction relative to the geographic cardinal points: North, South, East, and West.
The most popular type of compass is the magnetic compass, relying on a magnetized needle that aligns itself with Earth’s magnetic field. This means that the tip of the needle will always point to the North, while its opposite side will be oriented toward South. The compass also has a diagram on it, called a compass rose, where the cardinal points are marked with initials: N, S, E and W.
The intermediary directions are also marked: NE (north-east), SE (south-east), SW (south-west), NW (north-west). Some compasses, beside the cardinal points, also have degrees marked on them. North corresponds to zero degrees and the angles go clockwise, which means East is 90 degrees, South is 180 degrees and West is 270 degrees.
Parts of a Compass
- The baseplate is made usually of plastic and it’s the small plate the actual compass actually sits on. Depending on the type of compass, it has rulers and scales to help you measure distance on a map. Before buying a compass, check the common scales of maps in your area and make sure the scales of the maps and the compass match;
- Travel direction – is an arrow marked on the baseplate, pointing away from the compass, that guides the direction;
- The compass housing is a clear circle that contains the magnetized needle;
- The degree dial is a rotating ring that surrounds the compass housing and has degrees markings on it;
- The magnetic needle floats on a pivot in the centre of the compass and is made of magnetized metal. The end that points toward North is usually painted red, and the other end, pointing South, is often white or black;
- The orienting arrow is located within the compass housing. This arrow allows the base plate to be aligned with the magnetic needle;
- The orienting lines inside the compass housing are running parallel to the orienting arrow;
Things to Know Before Starting to Use a Compass
There are a few basic things you should know about compasses and cardinal points before starting to use a compass. First of all, you need to learn your … North’s. It might sound confusing, but there is the magnetic North and the true North. True North, the one that is marked on the map, refers to the North Pole, where all the longitudinal lines on the map meet.
All maps are laid out the same, with the North Pole on top. But, because there are variations on the magnetic field on the Earth, your compass will point to the Magnetic North, located about eleven degrees from the tilt of the Earth’s axis.
The difference between the True North and the Magnetic North is up to 20 degrees, depending on where you are on the surface of Earth. You will have to account for this Magnetic shift for an accurate reading.
For example, in the United States, the line of zero declination, where the North Pole and the Magnetic Pole are completely aligned, crosses through Alabama, Illinois and Wisconsin. East of that line, Magnetic North is several degrees west to the True North; while west of the line the opposite is true.
So, before hiking anywhere, find out how that place is situated relative to the line of zero declination. If it’s East, add the number of degrees necessary to find out True North, and if that place is West of the line of zero declination, subtract the corresponding number of degrees.
Types of Compasses
Compasses can vary a lot in quality, from plastic trinkets you find in gift shops to high-quality, high-precision military compasses.
Backpackers usually use a so-called “base-plate” or “orienting compass” that is suitable for determining one’s position and direction. More sophisticated compasses have extra accessories:
- Magnifying lens, mounted into the base plate of the compass, for reading very small symbols on maps;
- A fold-out sighting mirror that allows users to simultaneously see the landmark and its bearing;
- Luminescent indicators for night readings; However, bear in mind it’s not recommendable to hike at night through unknown terrain;
- Clinometer: is a compass feature that allows you to estimate the height of a landmark or the steepness of a slope;
- The global needle: if you’re planning to hike in the Southern Hemisphere, you’ll need a compass with a global needle. This type of needle compensates for the variances of the Earth’s magnetic field and work accurately worldwide;
- Declination adjustment: is a different, more accurate orienting arrow, which compensates for the magnetic declination in your area of travel.
In this type of compass, the orienting arrow is not fixed, but can be adjusted with a tiny tool that’s also attached to the compass. You can offset the orienting arrow for the declination of the magnetic field. New adjustments can be made for each trip, taking into account the variation of the magnetic field in your area of travel.
As a general rule, keep in mind that it’s not necessary to break the bank for the most sophisticated, military-grade type of compass, especially if you’re a beginner in using compasses. However, don’t bet on the cheapest, gift shop type of compass either.
After all, you’ll be relying on it to find your way in the wilderness. A mid-range product is a good choice. Once you get the hang of it and you learn how to use it in all terrains, you can upgrade to a more sophisticated product.
How to Read a Compass
- First of all, make sure that you are away from structures that could affect the compass reading. Large metal structures or high-voltage power lines can affect the results of the reading.
- Put the compass on your palm, keeping the elbow at 90 degrees at the chest level. The magnetic needle shouldn’t touch the top or the bottom of the compass housing. Keep your hand as steady as possible and watch the magnetic needle: the North is where its red tip is pointing.
- Now, you can find the direction you were moving toward, or the heading, as it is usually referred to. In order to find it, turn the degree dial surrounding the compass housing until the orienting arrow is completely lined up with the magnetic needle. In this position, the direction arrow on the baseplate of the compass will indicate your heading.
- The next step is to determine the direction (a.k.a. bearing) of a distant landmark: hill, lake, mountain. To determine the direction, or the bearing, of that specific landmark, you have to turn toward it and repeat the process used to determine your heading. Once you have the bearing, you can start walking toward it, even if the surrounding terrain sometimes obscures the landmark. Just take new readings from time to time, to make sure you are staying on track.
Check the above YouTube video below to learn more about using a compass.
How to Use a Compass and a Map
When hiking in remote areas, finding and keeping the right direction is essential. A good compass and a map of the region are all you need for orientation and will you help navigate in terrains you’ve never been before.
Here is how to use the map and the compass together.
- First, check where you’re currently facing or traveling. Put the compass on your palm and watch the magnetic needle. The needle should swing off to sides, unless you are facing North. Turn the degree dial until the orienting arrow aligns itself with the magnetic needle. Then, look at the travel direction arrow – it will show you where you’re facing. If the travel direction arrow points between the S and the E, it means you’re facing South-East.
- Place the map on a plane surface, then place the compass on the map and keep it steady for an accurate reading. Now, you must align the orienting lines and arrow on your compass with the meridian lines on the map. It is very important to know where North is on the map and make sure that the orienting arrow is pointing toward North. On most maps, North is on top.
- Identify your point of destination on the map. Line up the point where you currently are with your point of destination, with one of the sides of the compass. Make sure that the orienting lines on the compass line up with the route toward your destination, as shown on the map. The orienting (travel) arrow has to point in the direction you want to go.
- Slowly rotate the degree dial surrounding the compass housing until the North “N” marking on the dial and the orienting arrow are pointing to grid north (on the top of the map).
- Now, you can lift the compass from the map and stand up, holding it horizontally in front of you. Move your body until the north end of the magnetic arrow is in line with the orienting arrow on your compass. You are now properly oriented toward your point of destination. The travel direction arrow should be pointing away from you. Follow the arrow to guide you toward your destination.
- To make sure you are on track and following the right direction, take new readings from time to time. This is important especially when on rough terrains, with differences of altitude or obstacles, such as forests, that might affect your sense of orientation.
Tips and tricks for the beginner:
- Before embarking for a camping trip in a remote area or places you’ve never been before, test your compass and map skills in a place where you hike frequently.
- Always make sure that the direction you want to walk coincides with the direction of travel arrow.
- When taking a map reading, the orienting arrow should be pointing to grid north (top of the map), even if you are walking south.
Check the above YouTube video that shows you how to find your direction with a map and a compass. Also, see our piece on the best compass watch to help you with more options.
Find Your Way by Facing North
Assuming that you are in the wilderness and you lost your way, but you didn’t bring a map with you (or you lost your map), a compass can still help you find your way out. According to several psychological studies, our brain is wired in a way that allows us to reorient ourselves when facing North. Because the maps are always oriented toward North, so is our visual memory.
So, if you find yourself lost in the woods, take your compass and determine where the North is. While facing North, try to visualize the map of the area where you are and start navigating based on memory. According to some studies, when facing north, most people are capable of visualizing an approximate map of the area where they are, even if they only glanced at the actual map before.
As you well can see, a compass is an indispensable when hiking. It doesn’t take a lot to get lost and it can actually happen to anyone, anywhere. There are many instances where people got lost in forests located near to populated areas and it still took them days to find the way back. You can even pair your compass with our top pick of the best outdoor watches to help you.
When hiking, the surrounding terrain can be pretty confusing without a compass and a map, especially when you are climbing hills or going through forests.
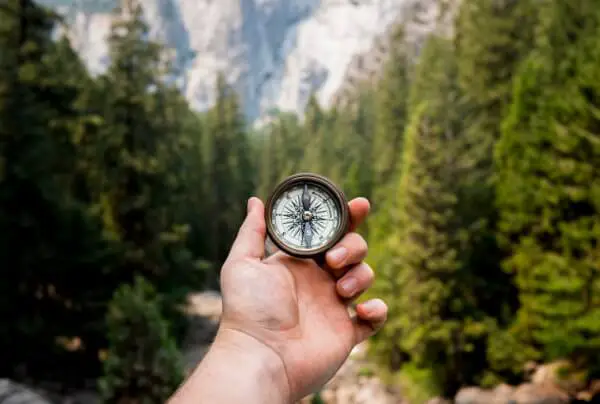
Featured Image Source: https://unsplash.com/photos/ 94HLr QXo8